Tropical Photo Rally Locations For Like A Dragon Infinite Wealth

Tropical Photo Rally, or Substory 32, is a Substory in Infinite Wealth that offers fantastic rewards. This guide on Tropical Photo Rally Locations For Like A Dragon Infinite Wealth lists all of the locations in all areas where you need to locate and take a picture of a unique part of the scenery.
Little Japan, Waikiki, Downtown & Chinatown & District Five, and the Cultural District & Harbor Park, all offer incredibly strong weapons as completion rewards. As such, while it may be a little time consuming, completing this Substory as soon as it’s available offers a huge boost in damage for certain characters and jobs.
Hawaii Tropical Photo Rally Locations
[line style=’solid’ top=’10’ bottom=’10’ width=’100%’ height=’1′ color=’blue’] [accordion initial=’1′] [accordion_item title=’Little Japan’]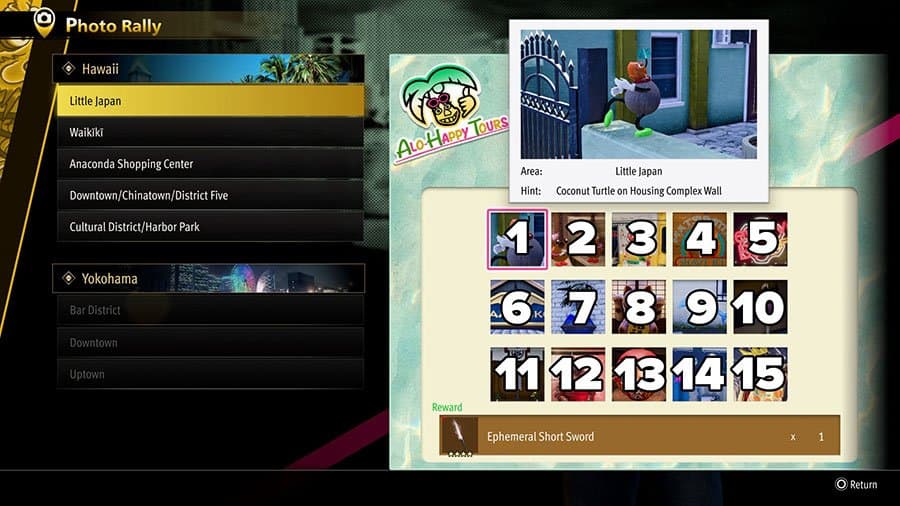
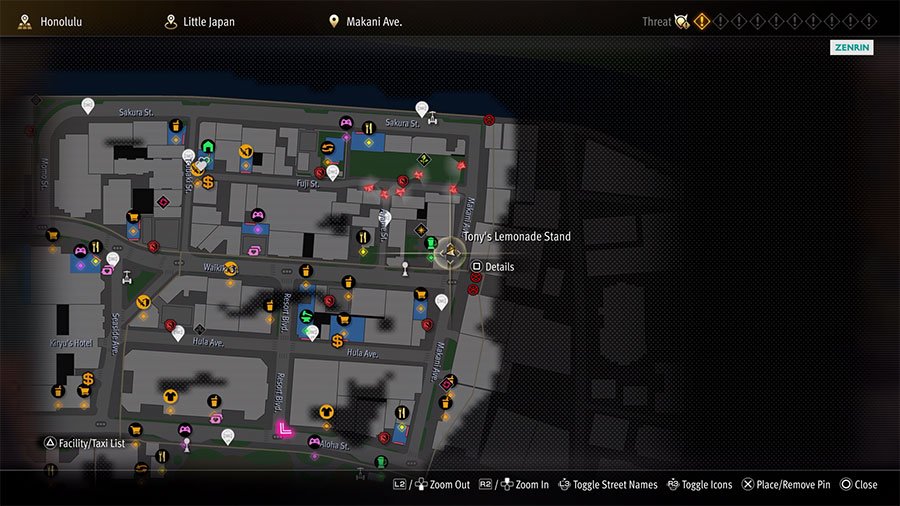
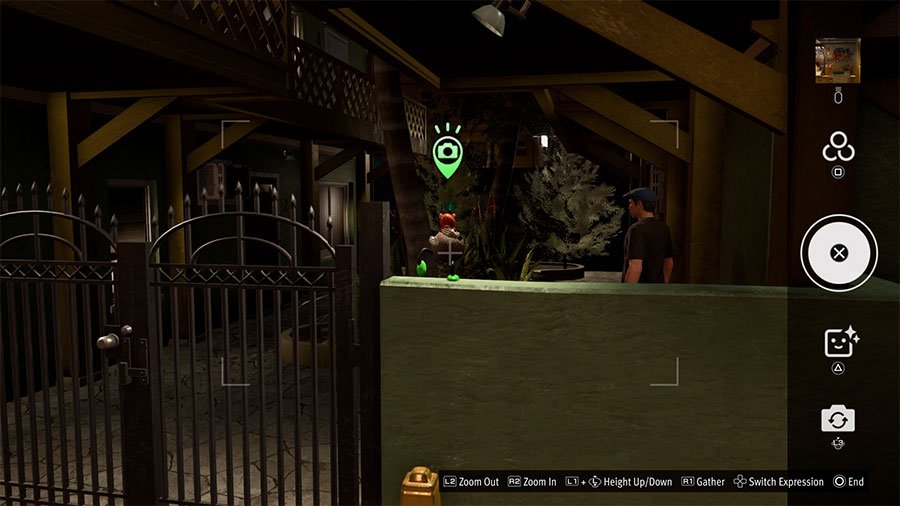
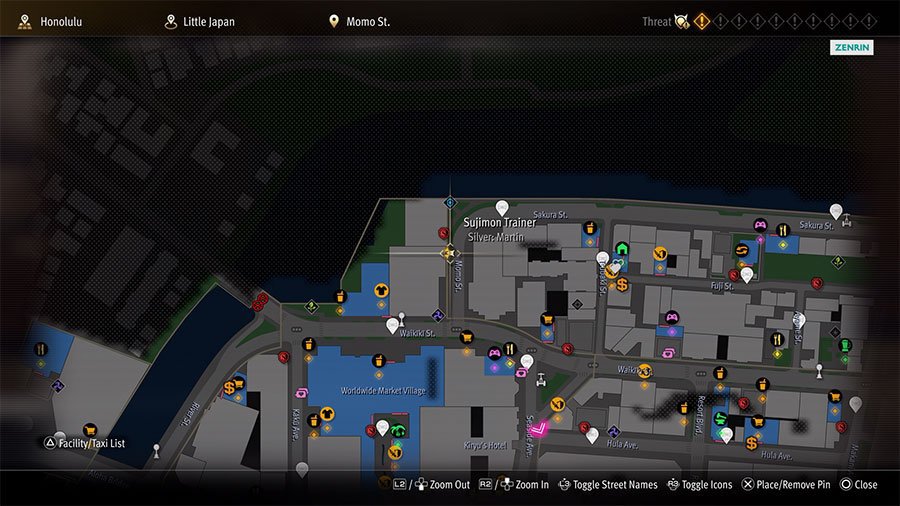
1: Coconut Turtle on Housing Complex Wall (Little Japan)
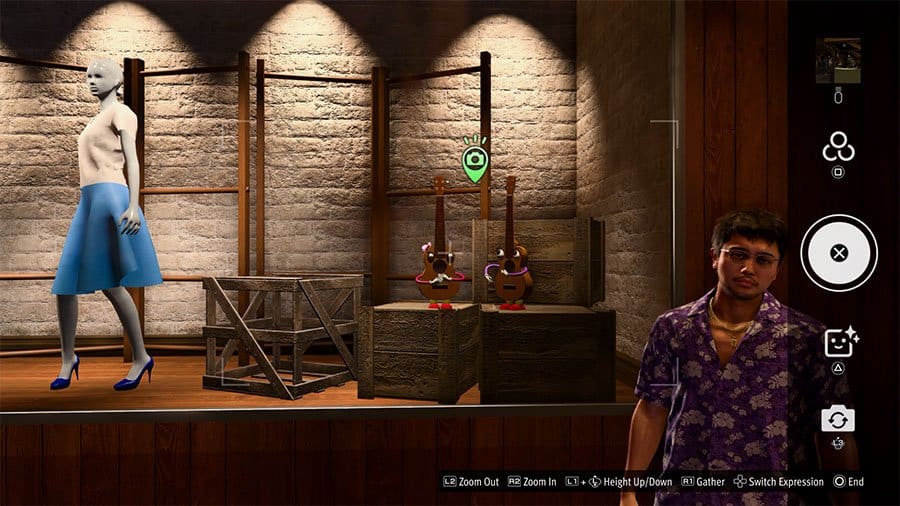
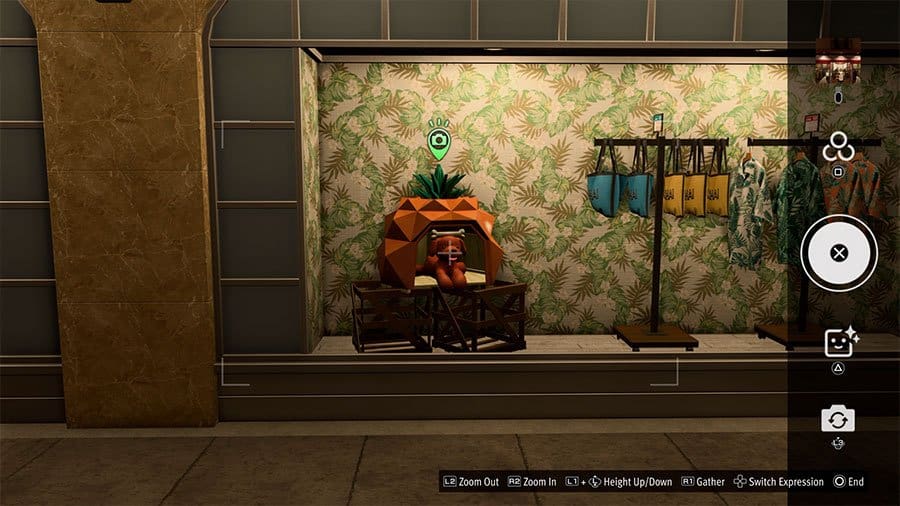
2: Streetside Window Display (Little Japan)
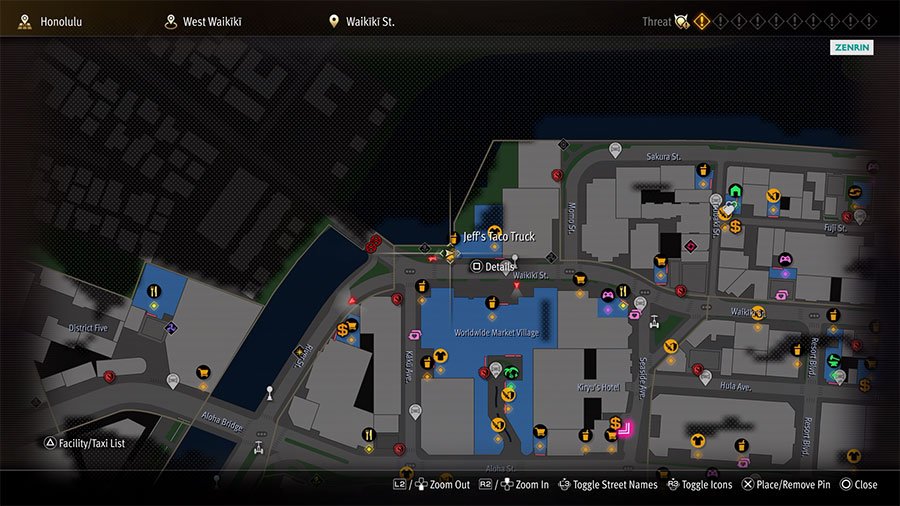
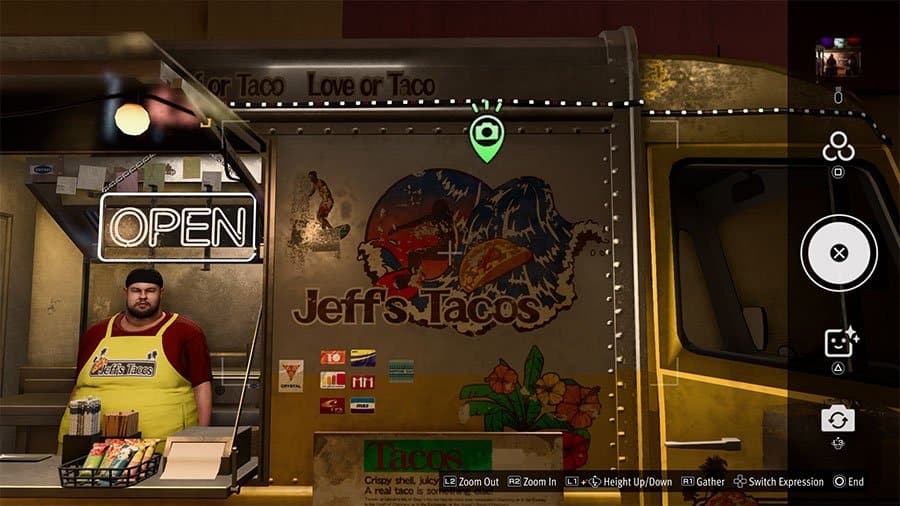
3: Golden Food Truck (West Waikiki)
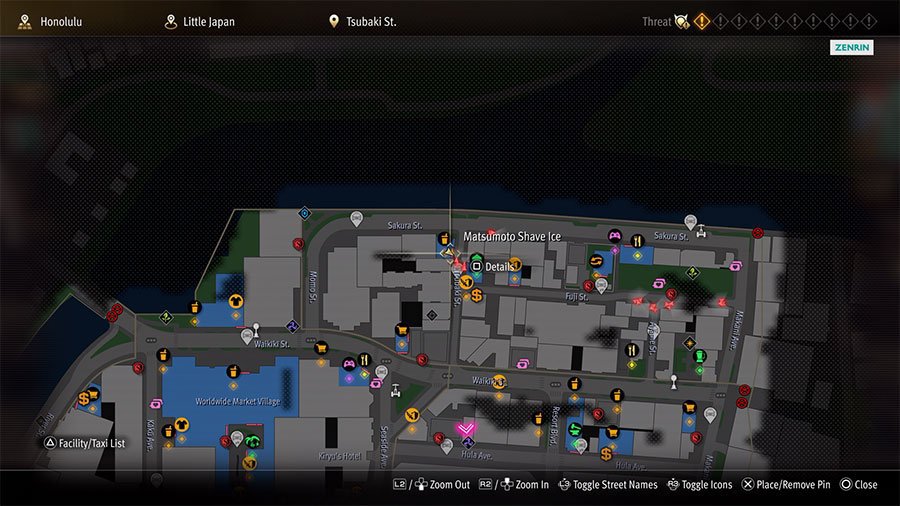
4: Shave Ice Shop Painting (Little Japan)

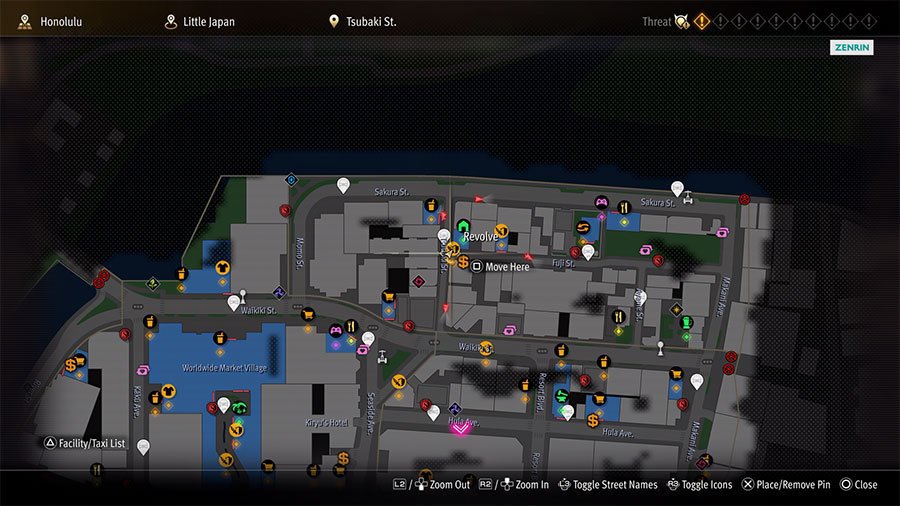
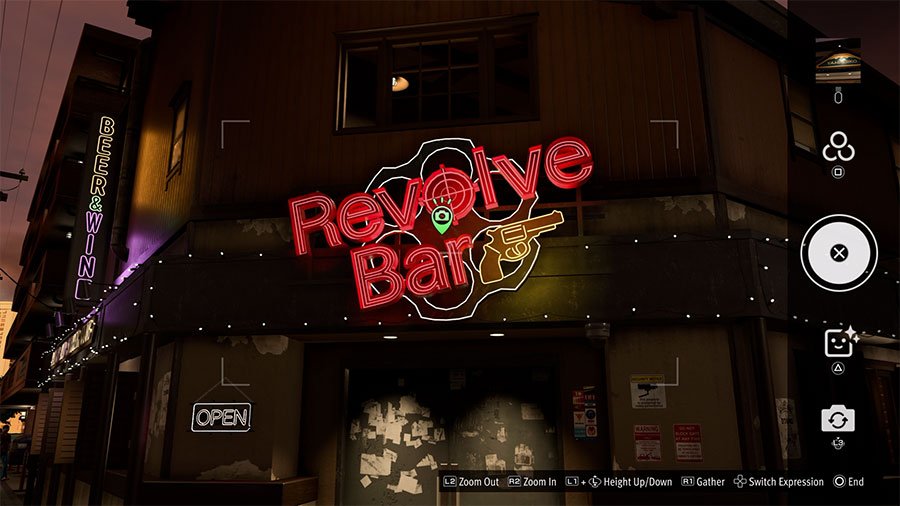
5: Popular Bar And Hangout Spot (Little Japan)
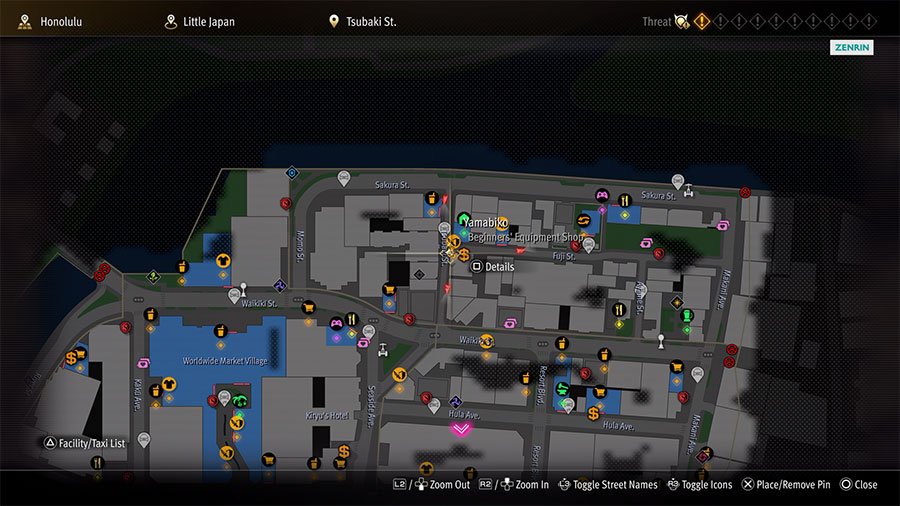
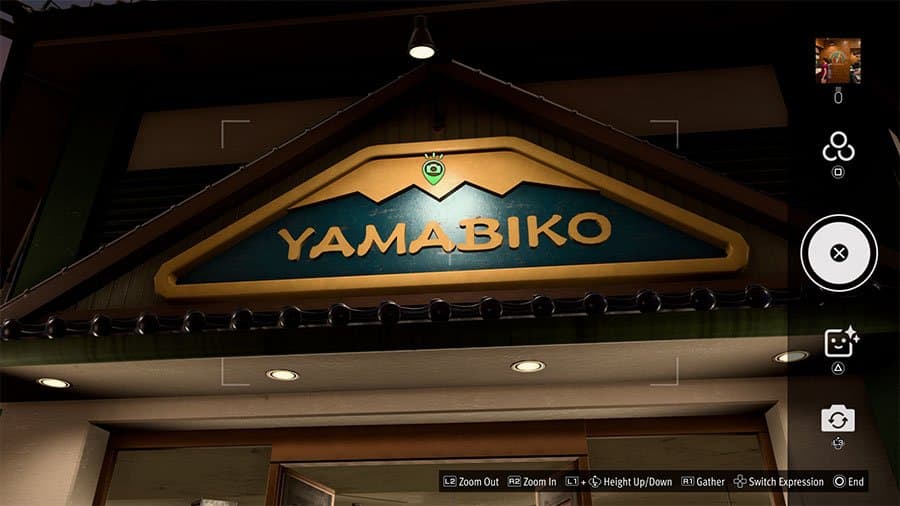
6: Equipment Store Near Revolve (Little Japan)
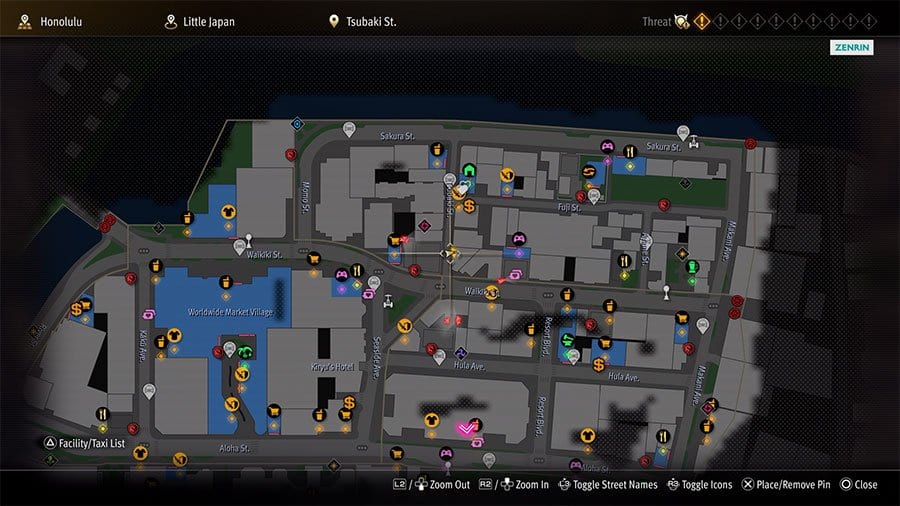
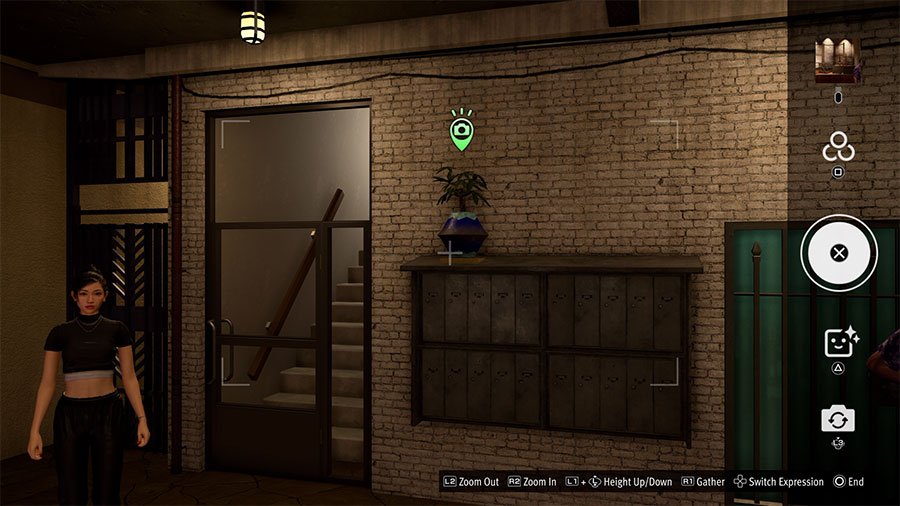
7: On A Residential Mailbox (Little Japan)
8: This One Takes Confidence (Little Japan)

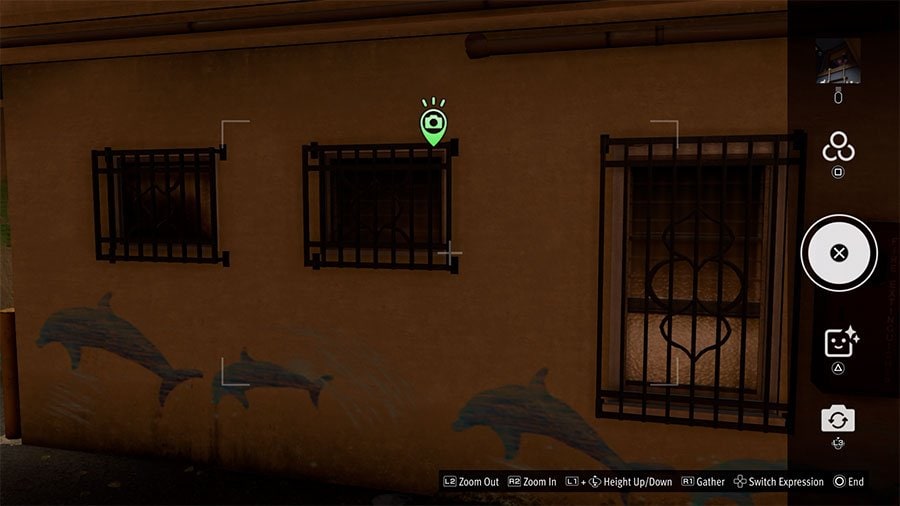
9: On A Housing Wall (Little Japan)
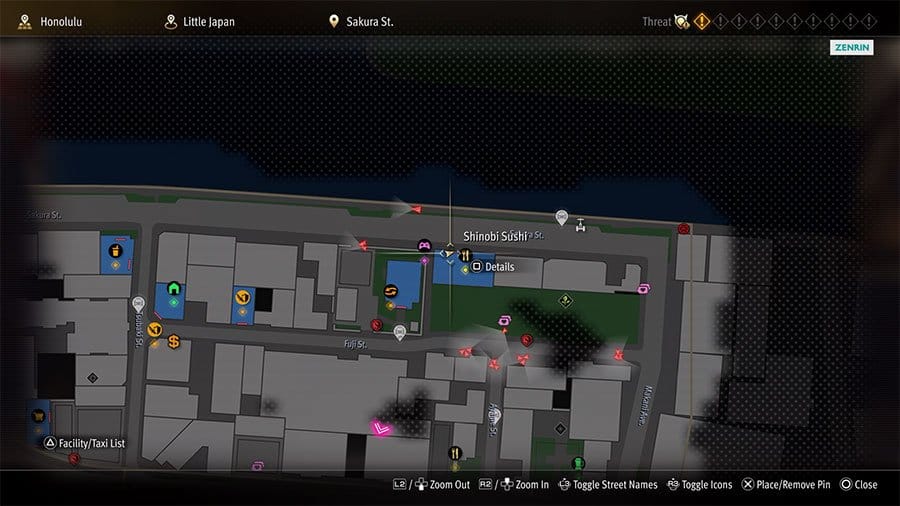
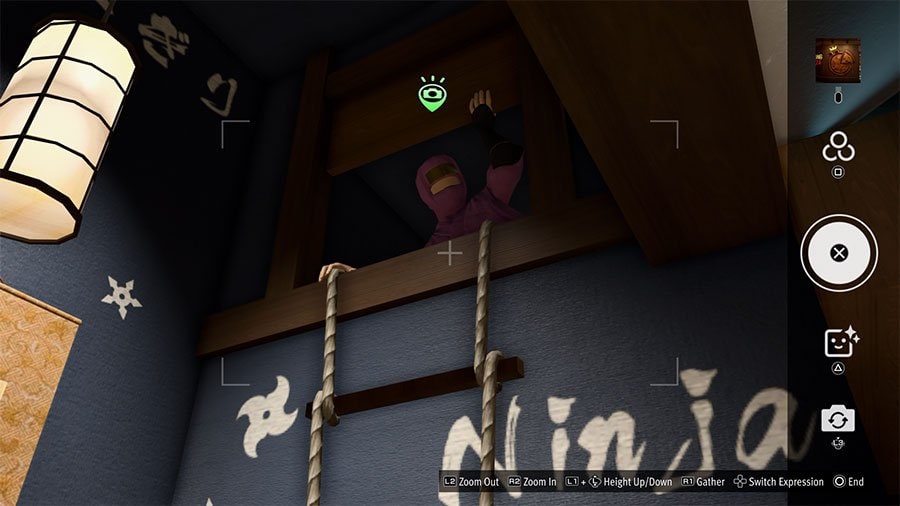
10: The Ninja Up Where Ninja Sup (Little Japan)
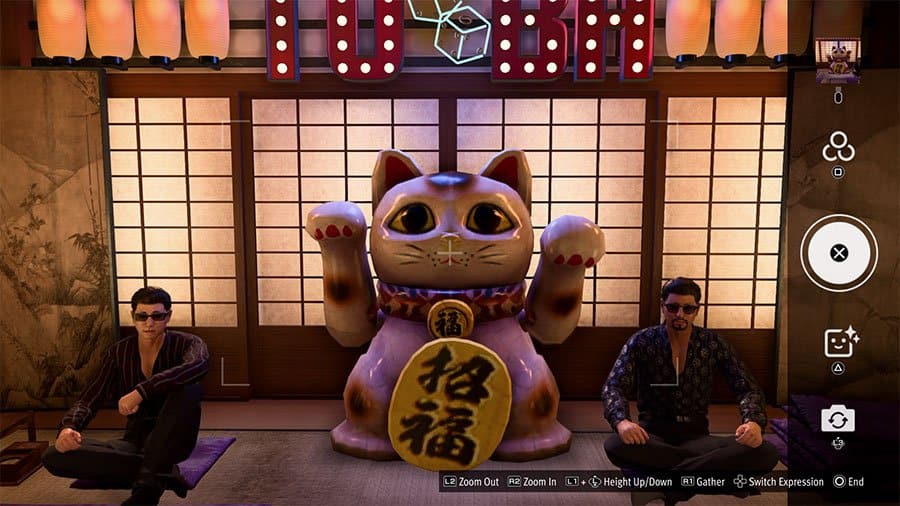
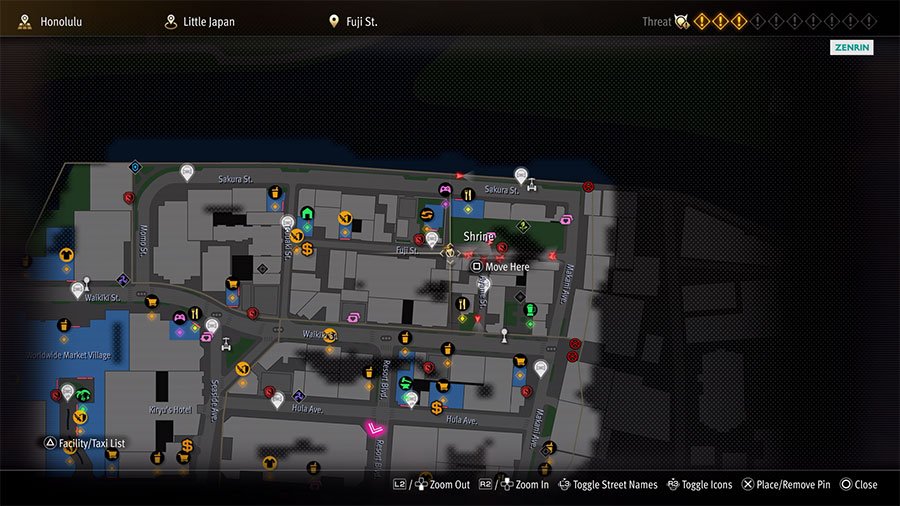
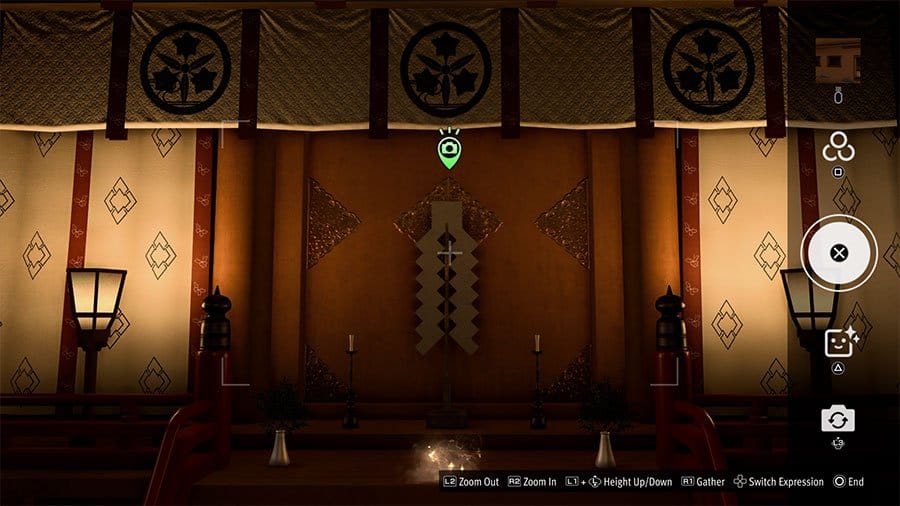
11: Inside The Shrine Building (Little Japan)

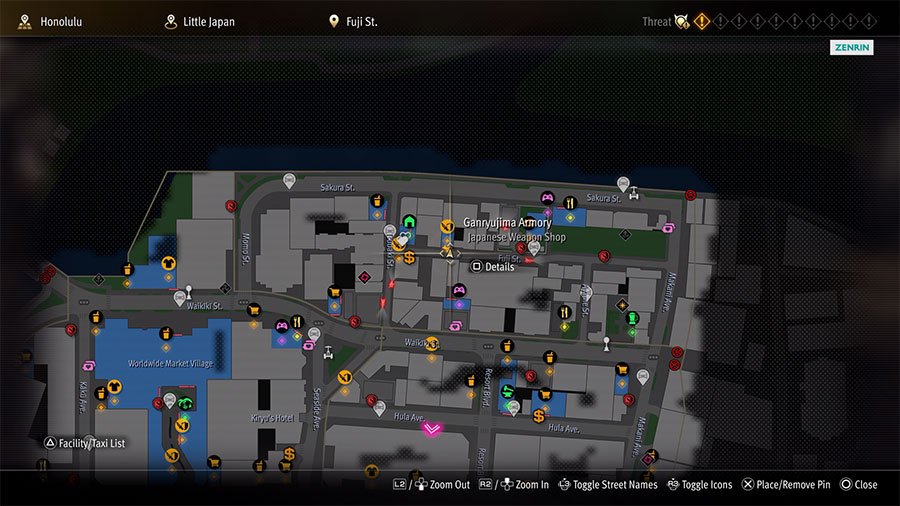
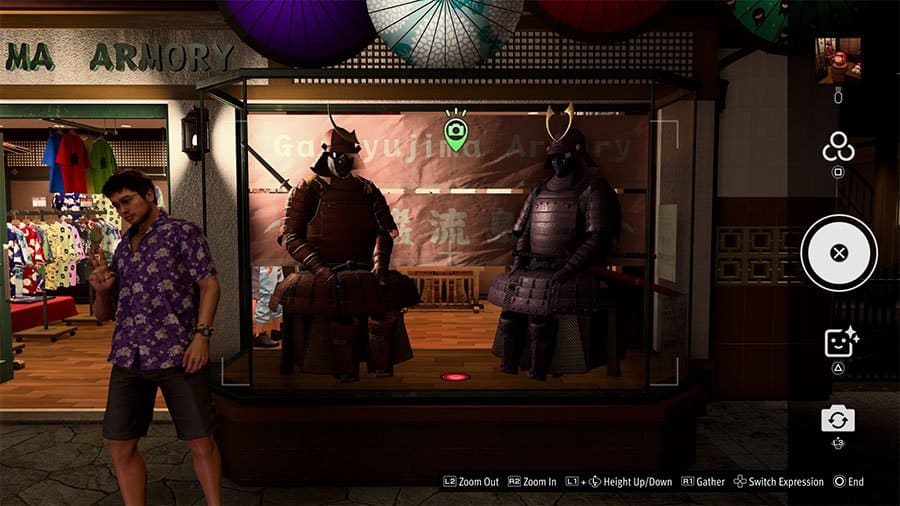
12: Samurai Window Display (Little Japan)
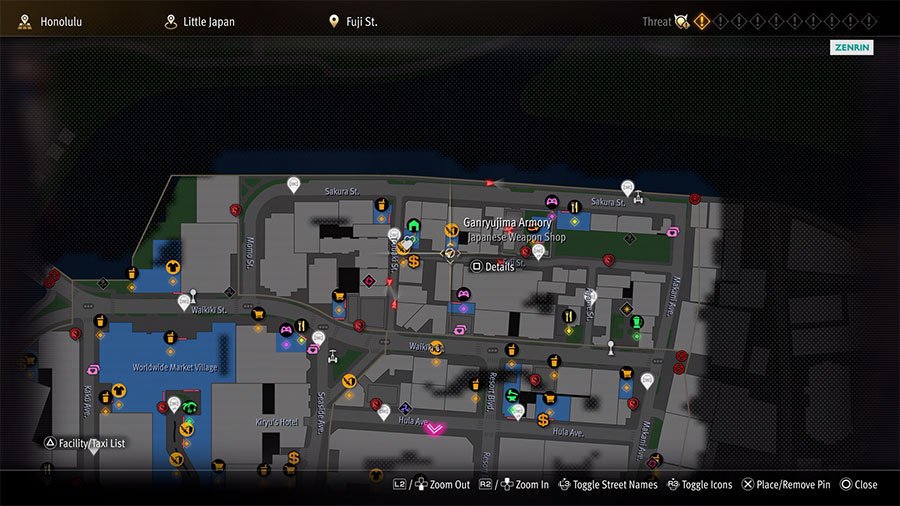
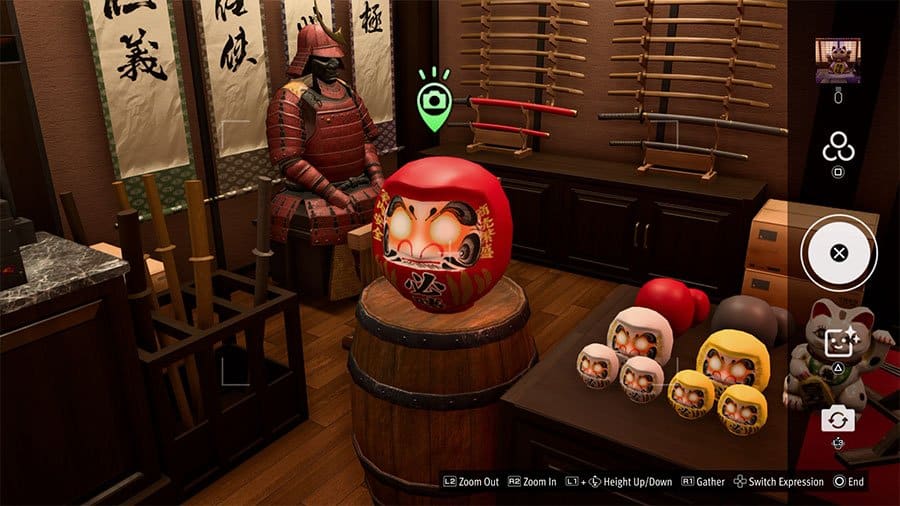
13: Inside The Weapons Shop (Little Japan)
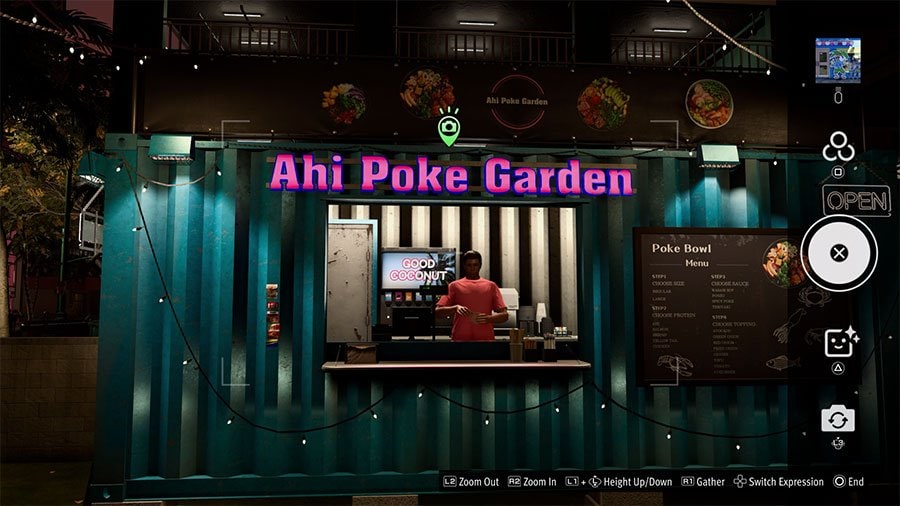
14: Garden In A Shipping Container (Little Japan)
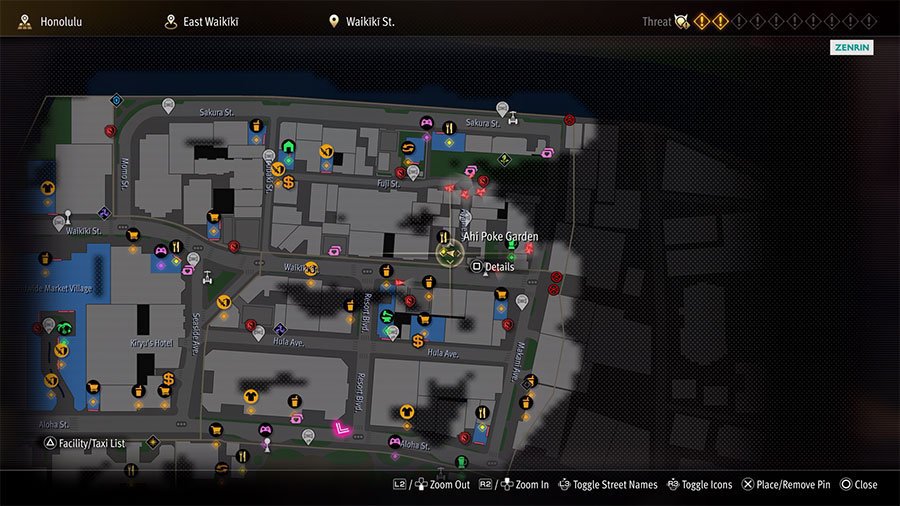
15: Street Corner Restaurant Sign (Little Japan)
[/accordion_item]
[accordion_item title=’Waikiki’]
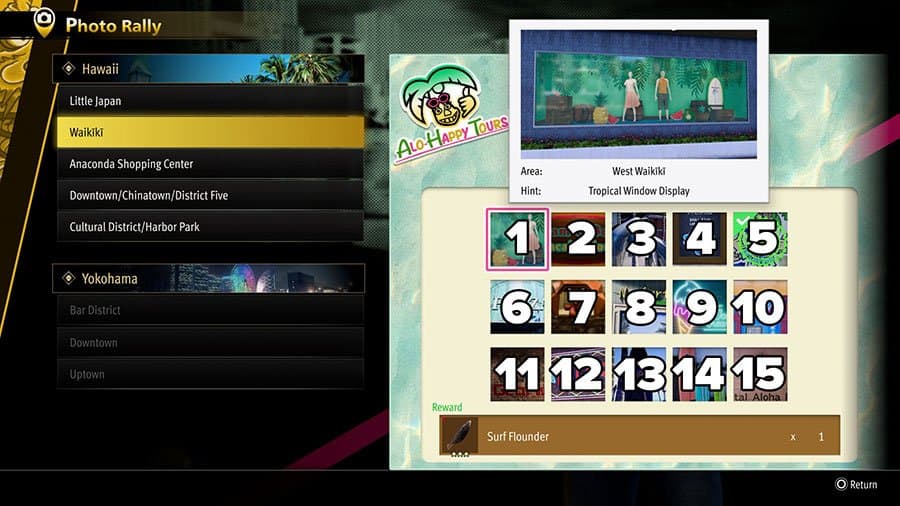
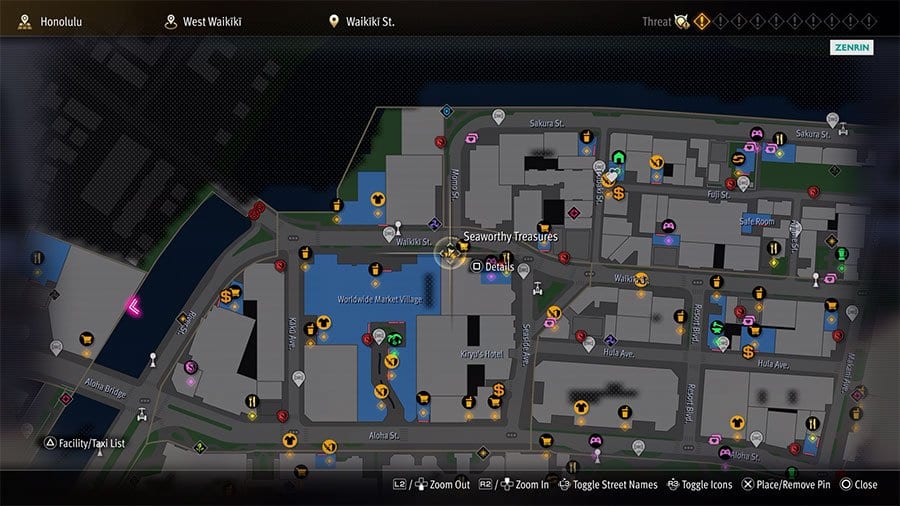
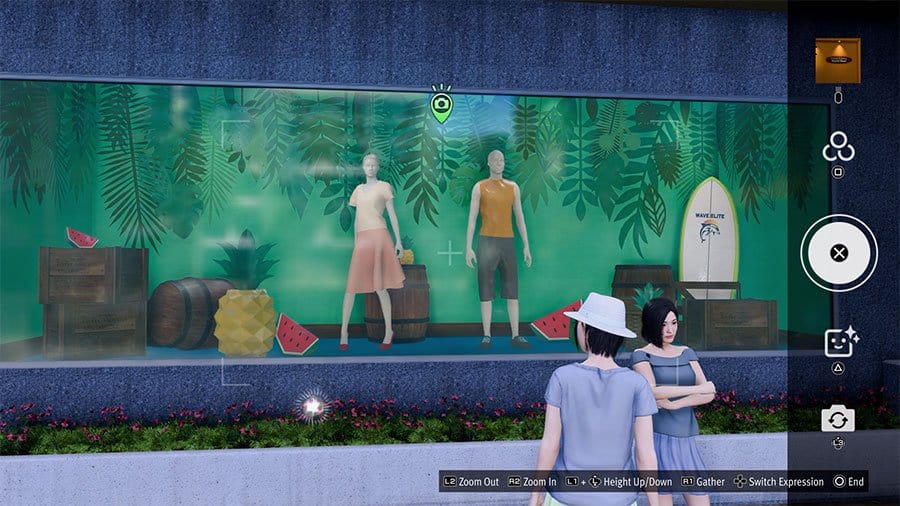
1: Tropical Window Display (West Waikiki)
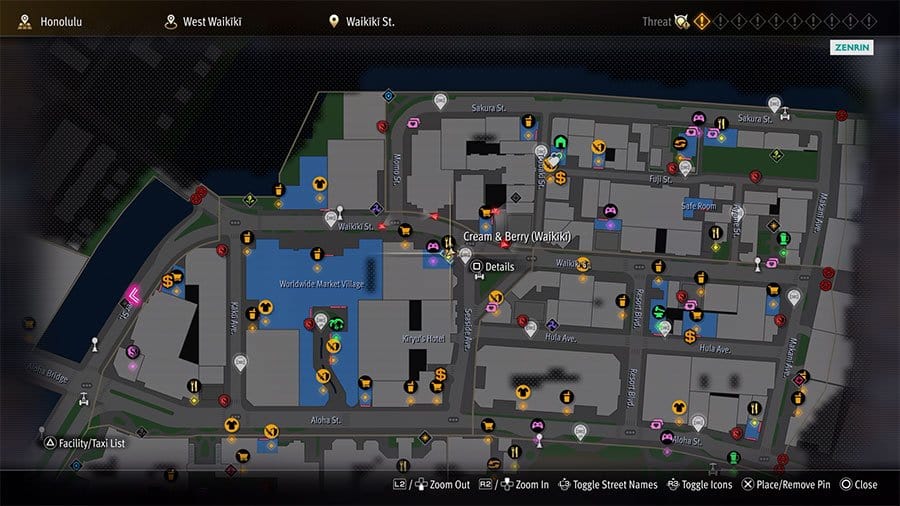
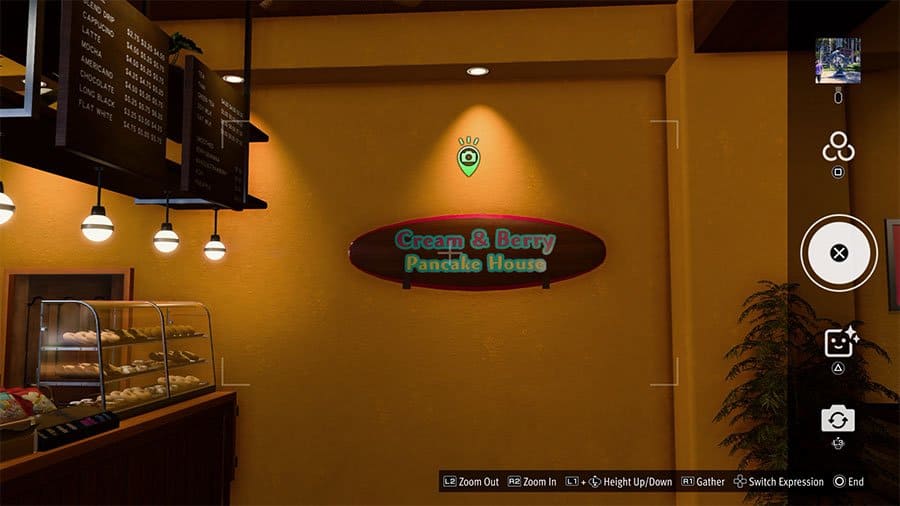
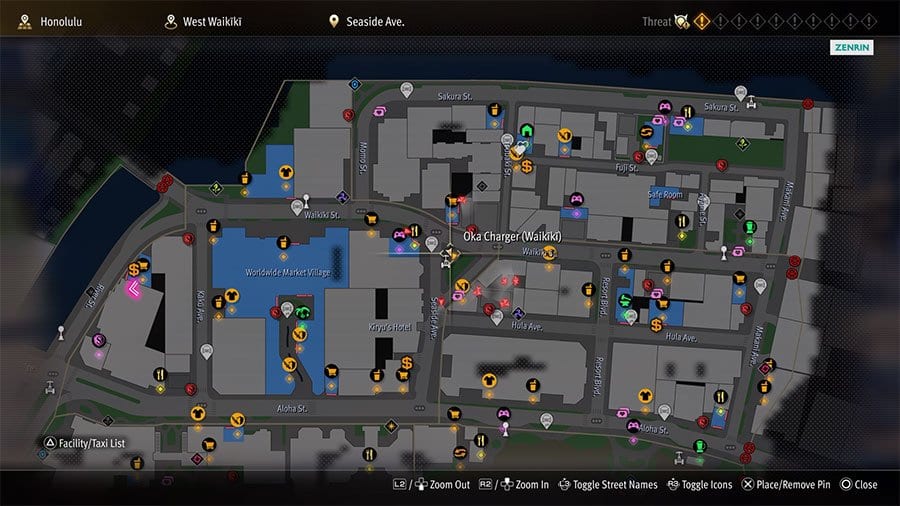
2: Surfboard Sweets Shop Sign (West Waikiki)
3: Middle Of A Park Square (West Waikiki)
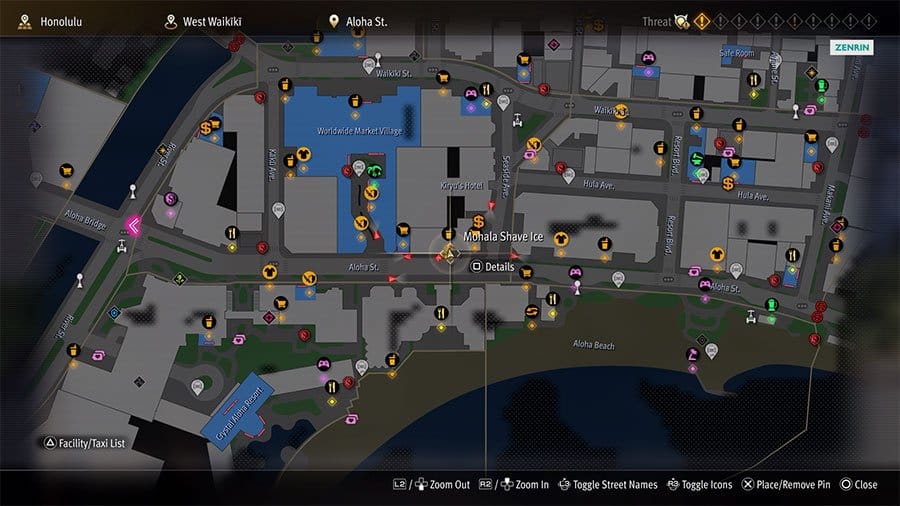
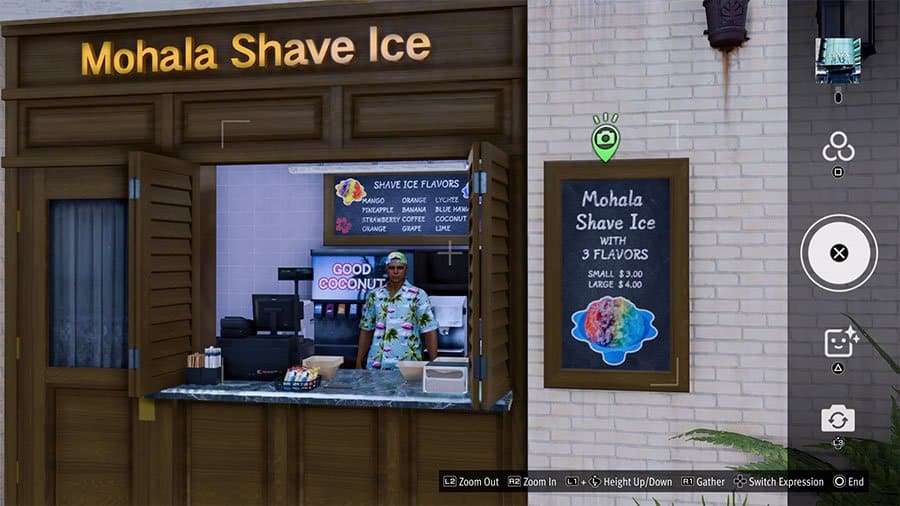
4: Shave Ice Menu Board (West Waikiki)
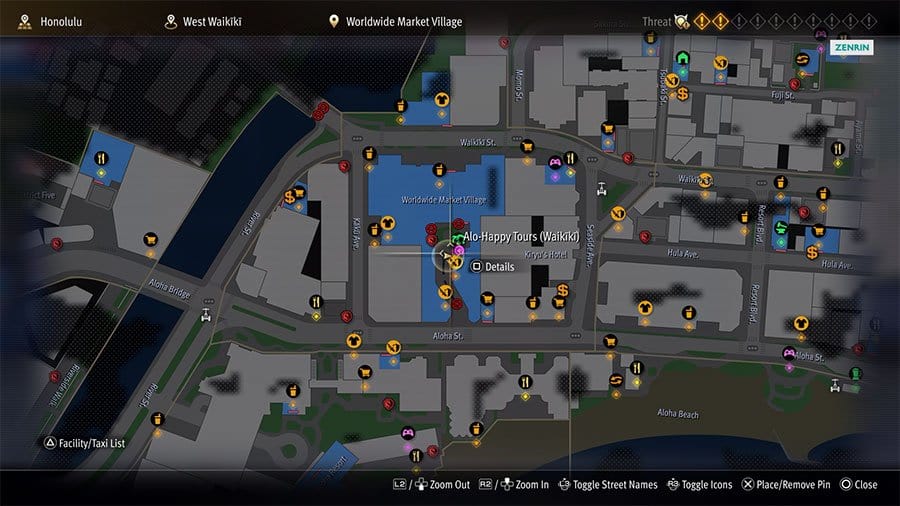
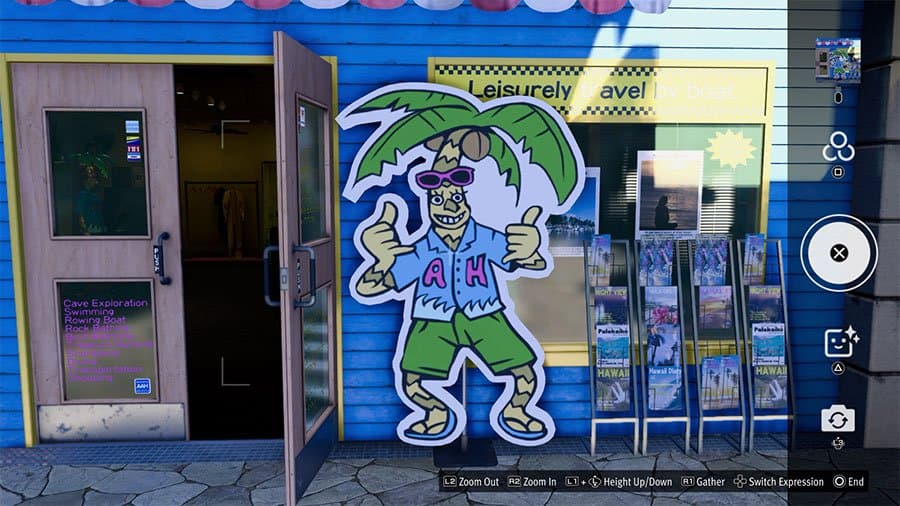
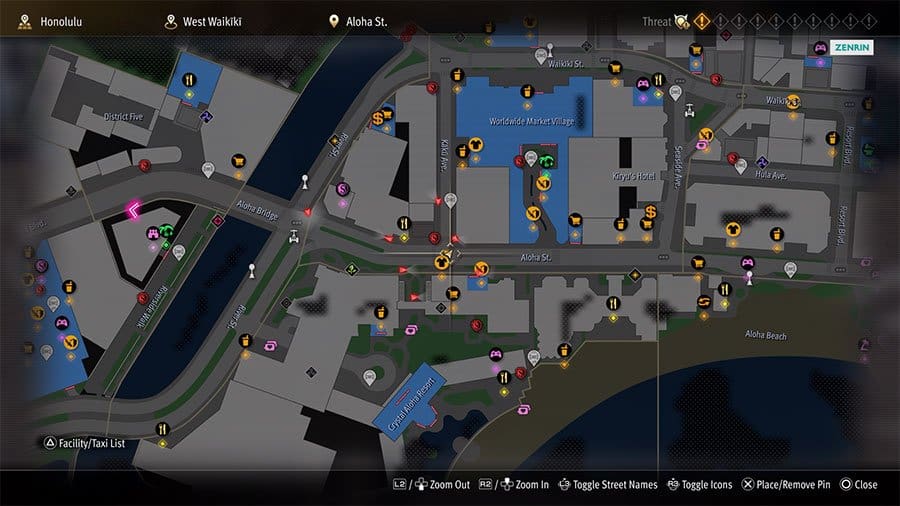
5: Alo-Happy Tours (West Waikiki)
6: Shopping Center Entrance (West Waikiki)
7: Streetside Window Display (West Waikiki)

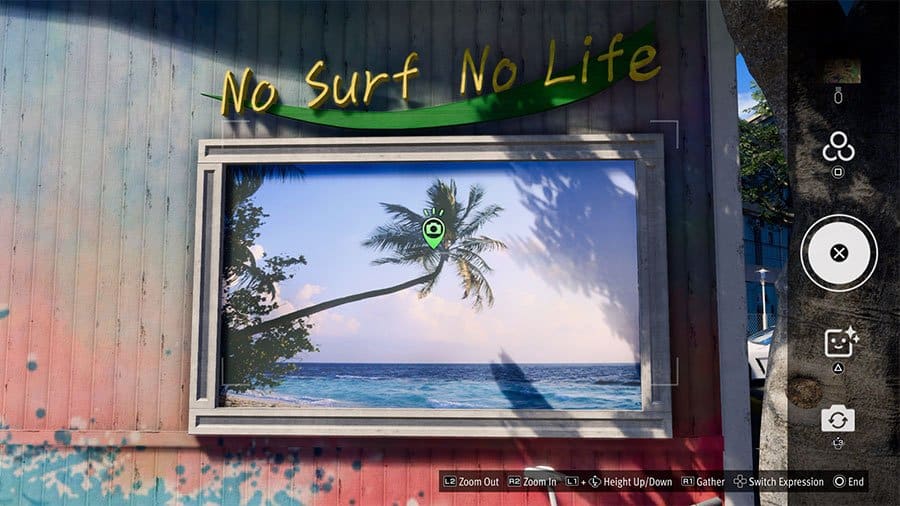
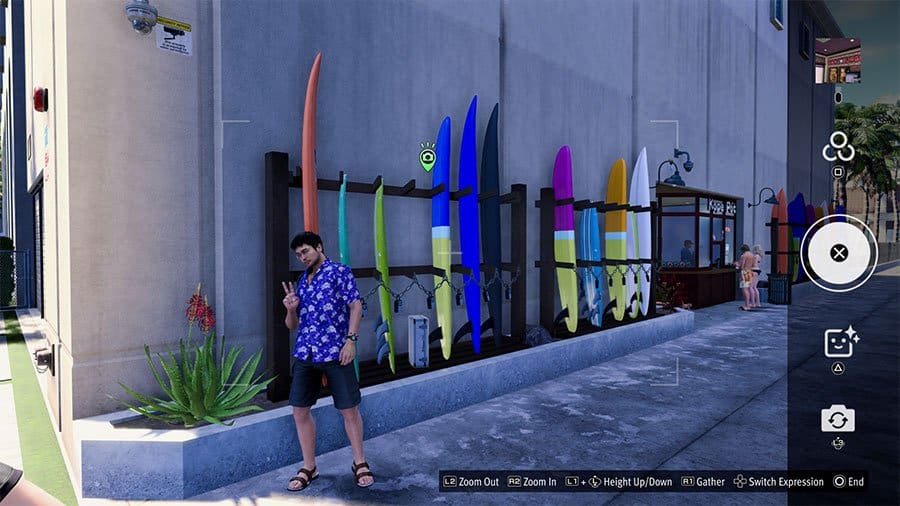
8: Behind The Surf Shop (East Waikiki)
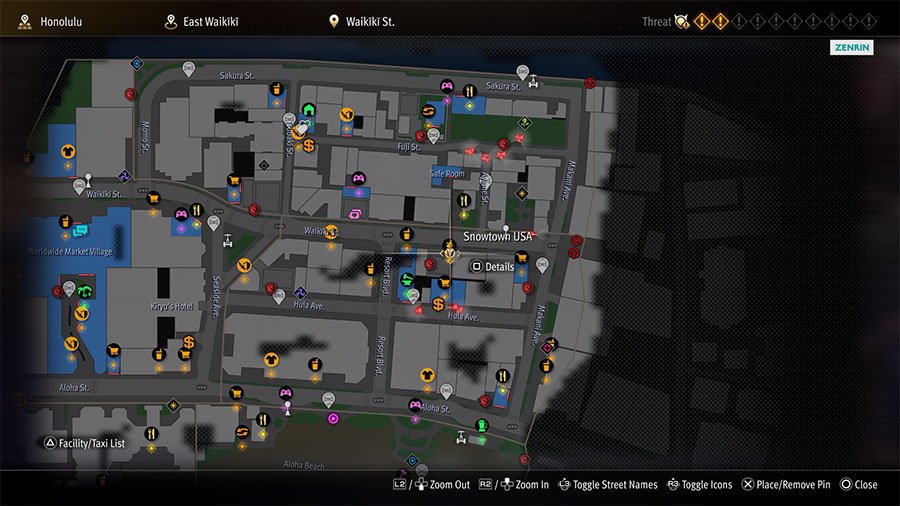
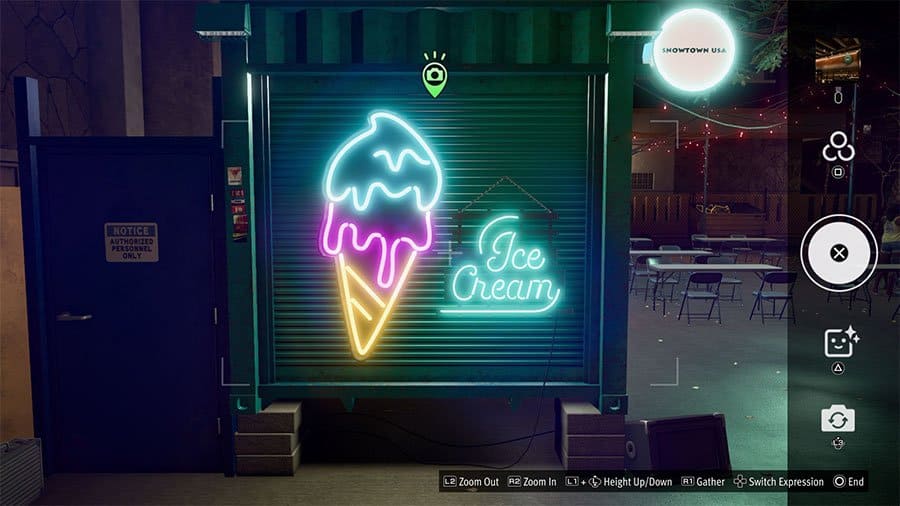
9: Ice Cream Stand Neon Sign (East Waikiki)
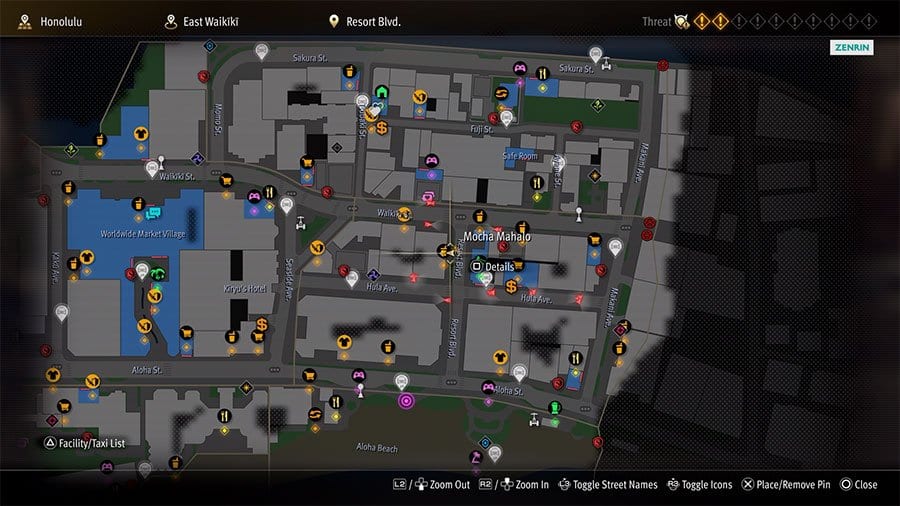
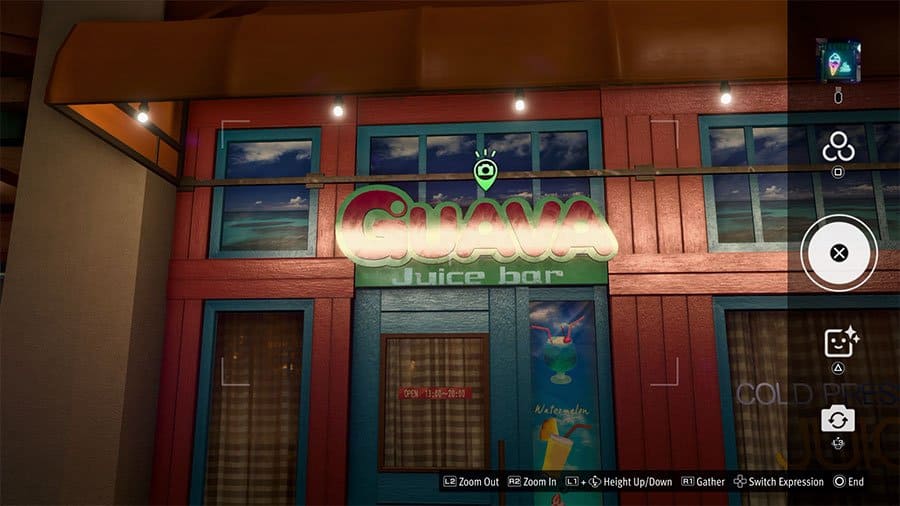
10: Beside Mocha Mahalo (East Waikiki)
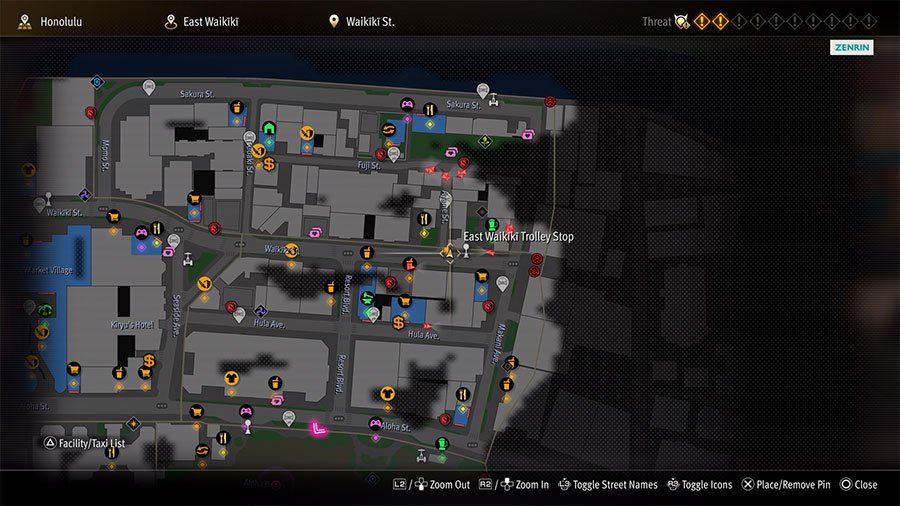
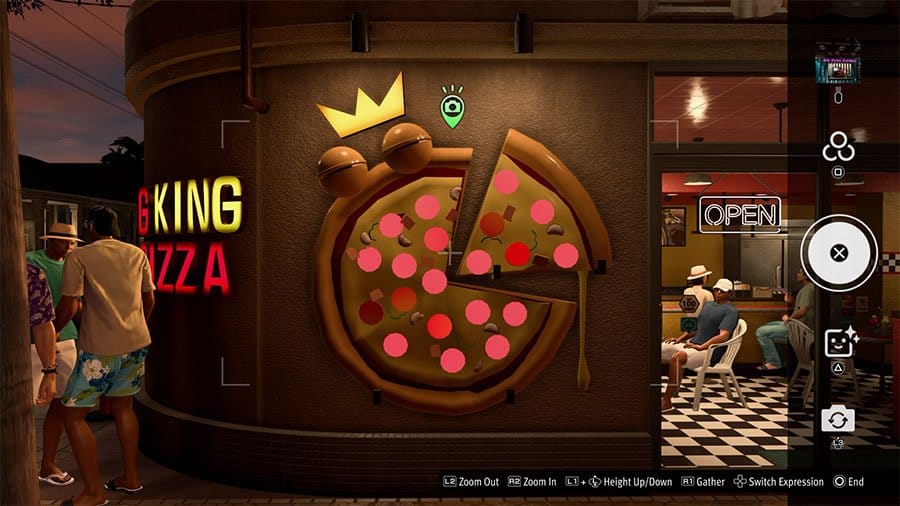
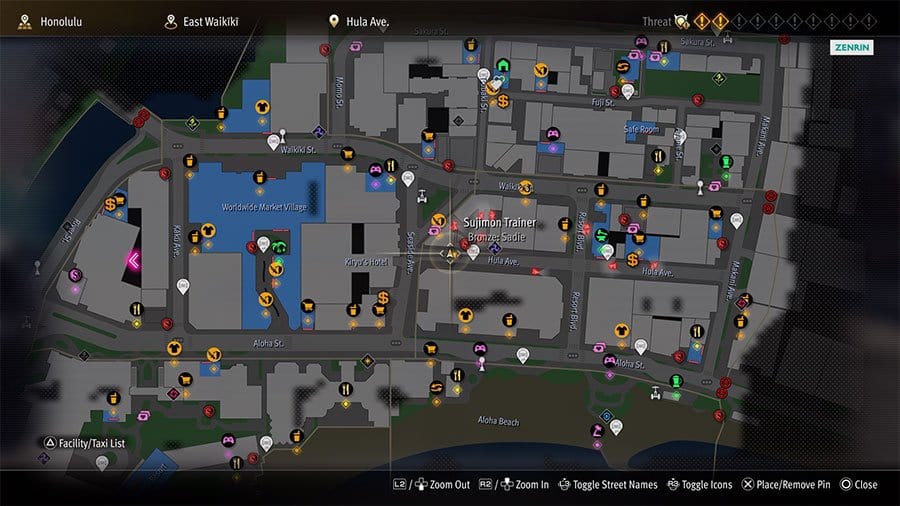
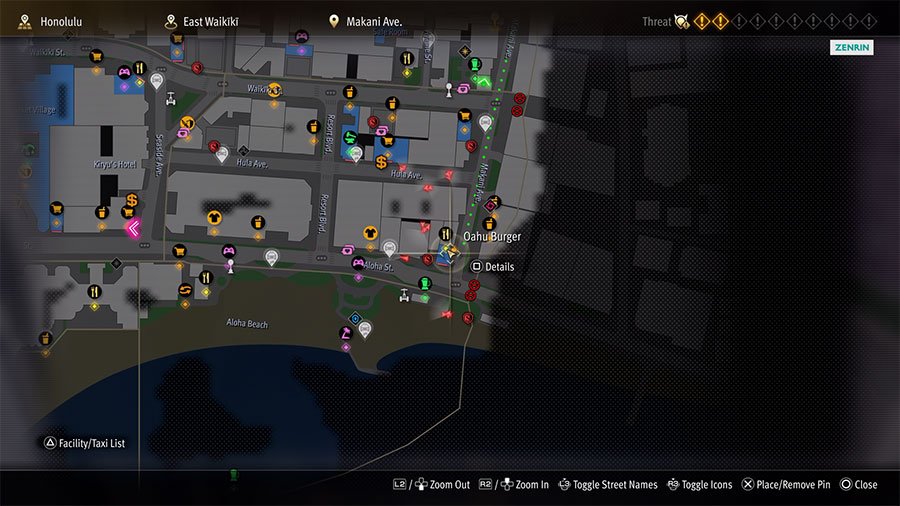
11: Garage Logo (East Waikiki)
![]()
![]()
12: Inside The Restaurant (East Waikiki)

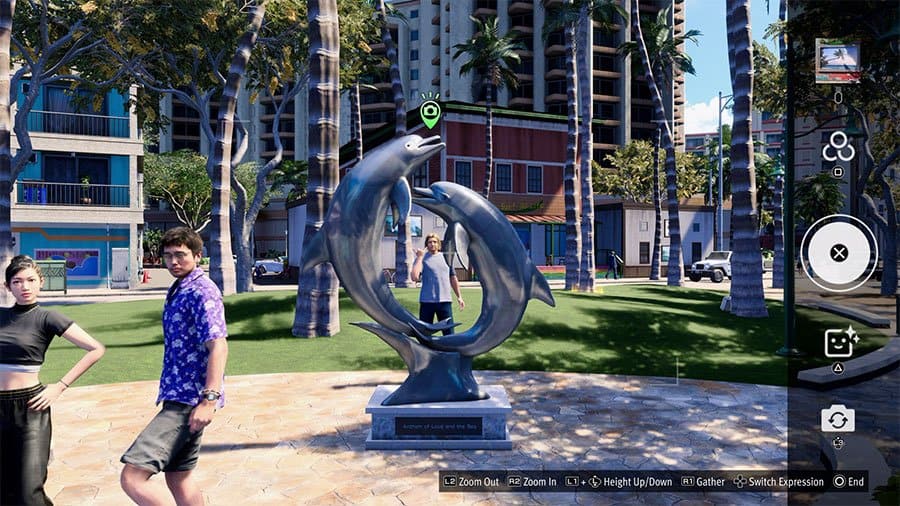
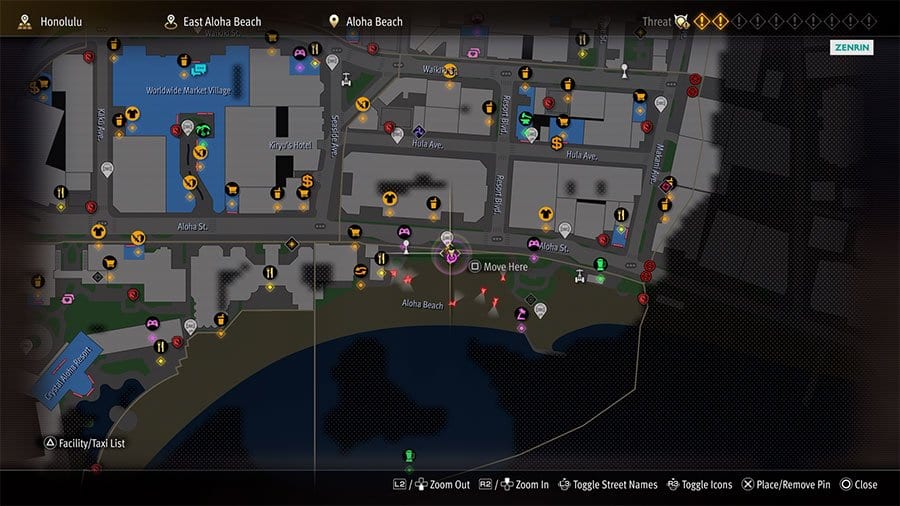
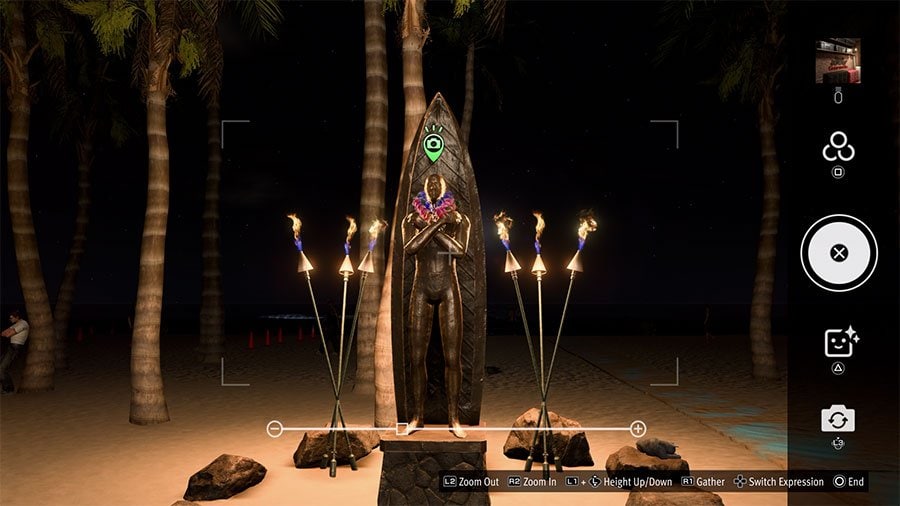
13: Surfboard Statue On The Sands (East Aloha Beach)
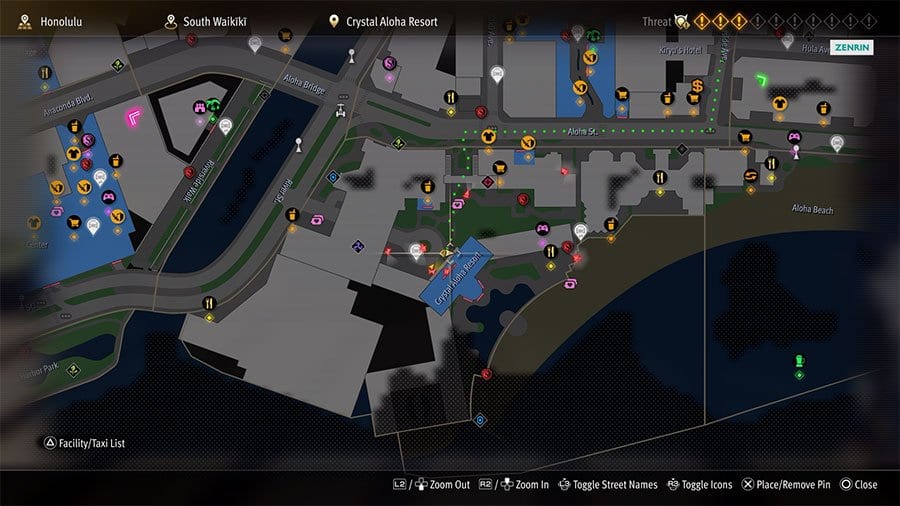
14: Alleyway By The Beach (South Waikiki)
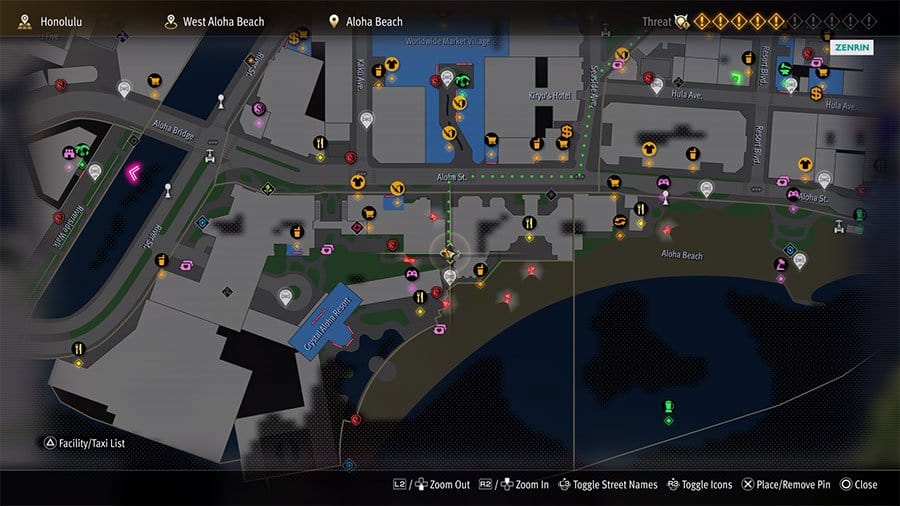
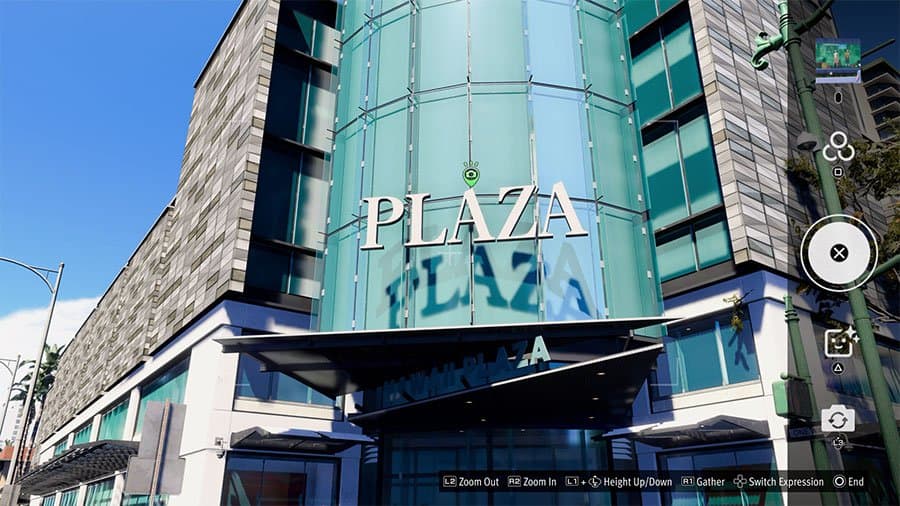
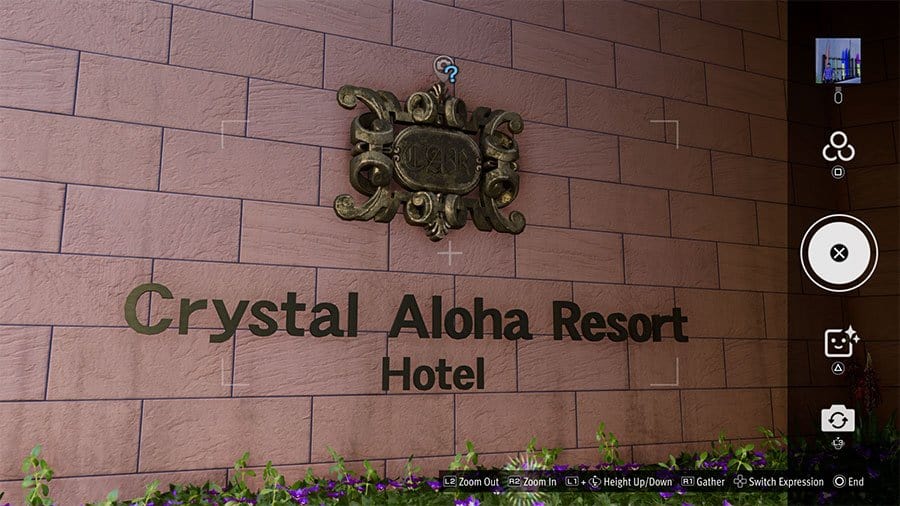
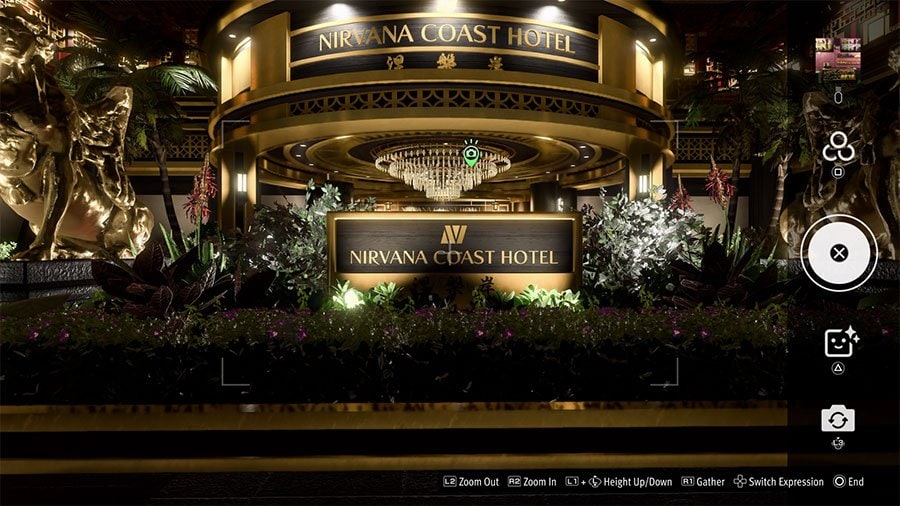
15: Famed Hotel Insignia (South Waikiki)
[/accordion_item]
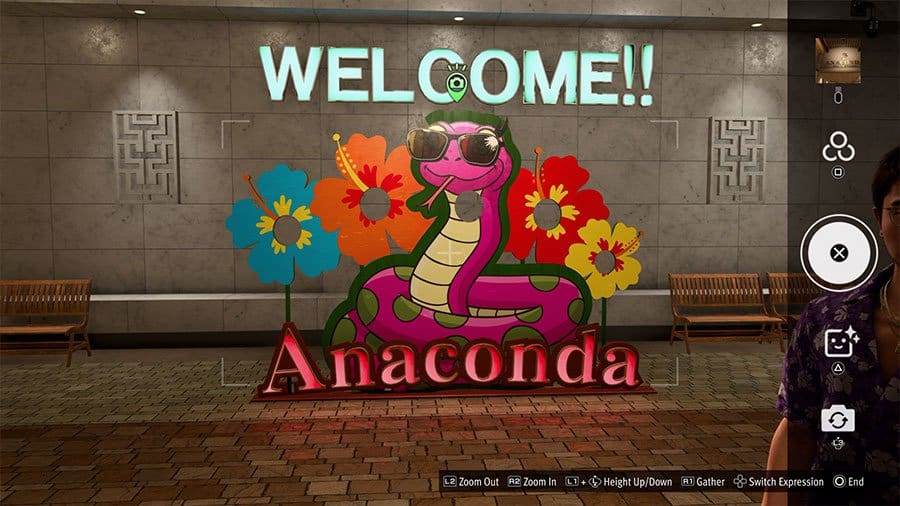
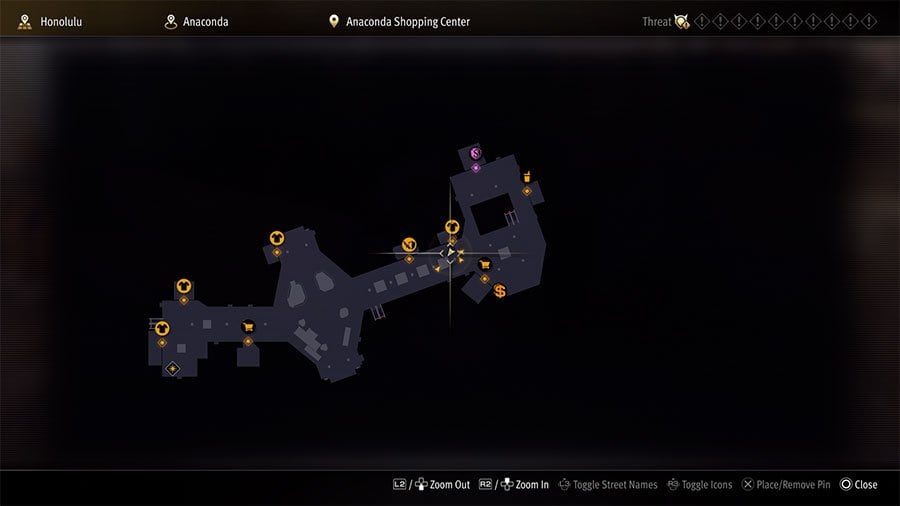
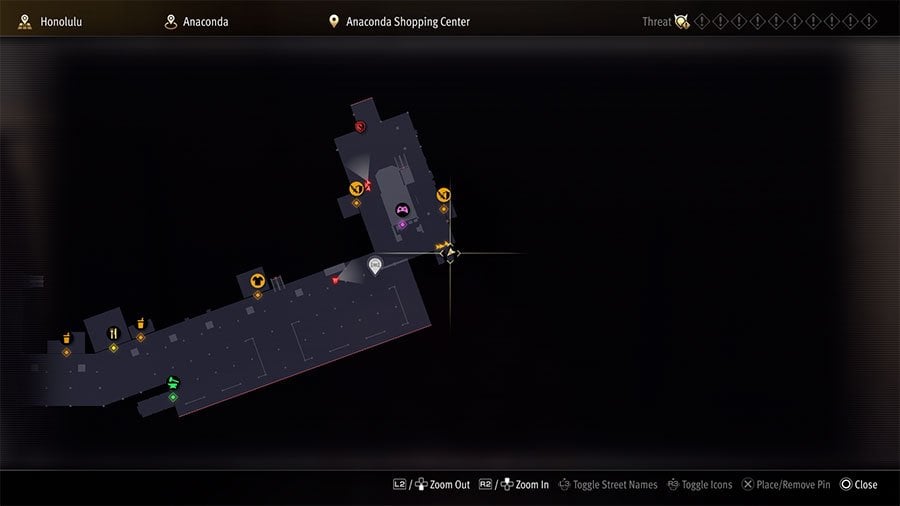
[accordion_item title=’Anaconda Shopping Center’]
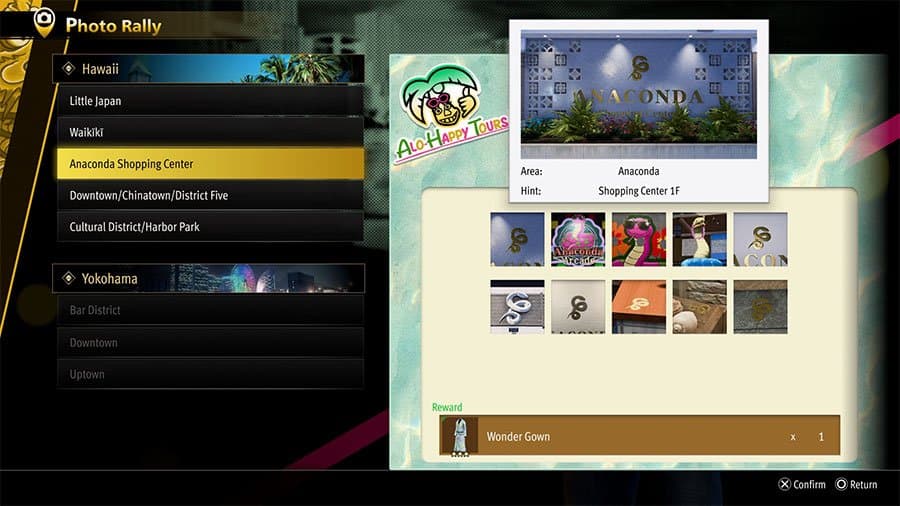
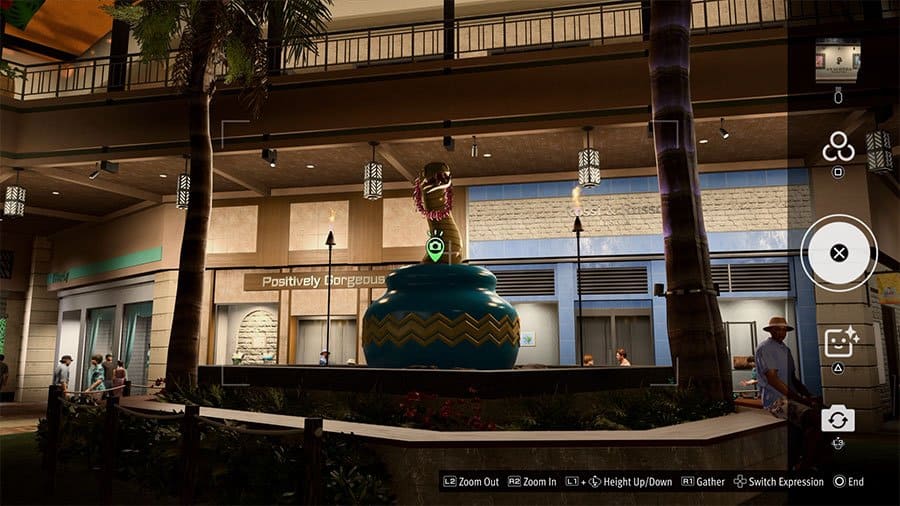
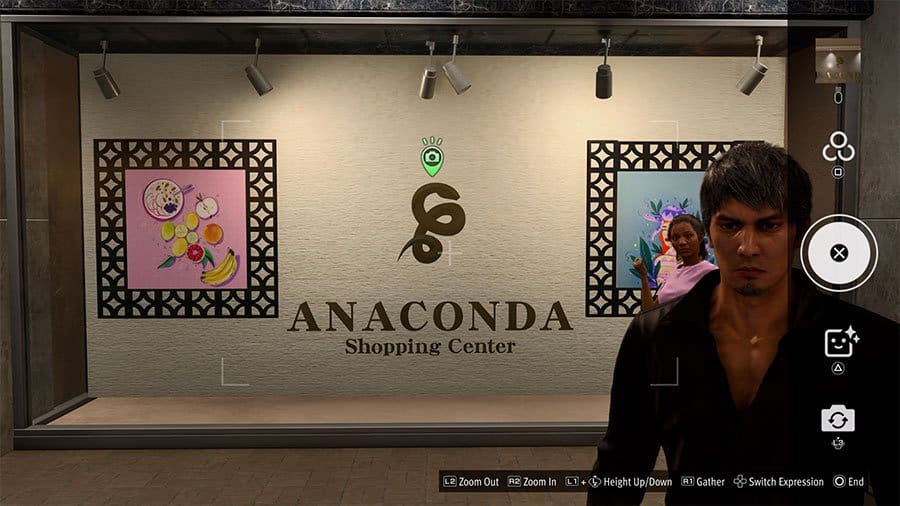
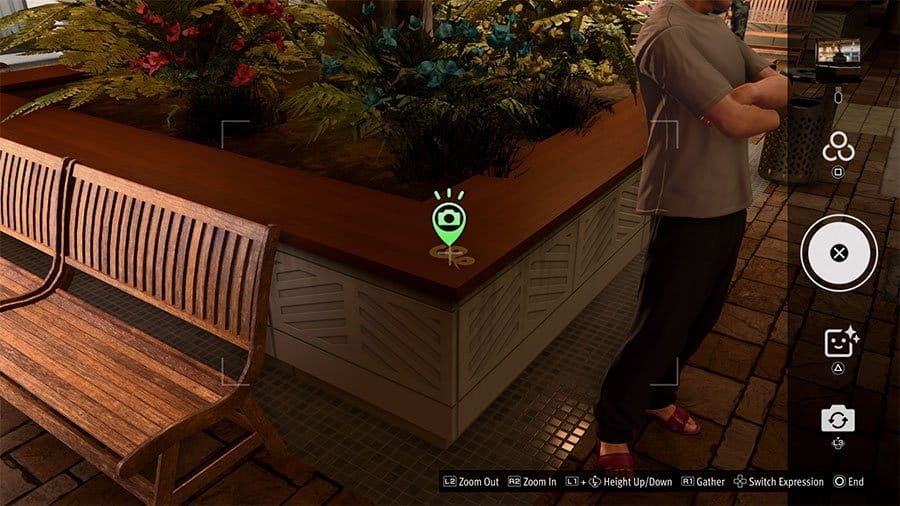
1: Shopping Center 1F (Anaconda)
2: Shopping Center 1F (Anaconda)
3: Shopping Center 1F (Anaconda)

4: Shopping Center 2F (Anaconda)
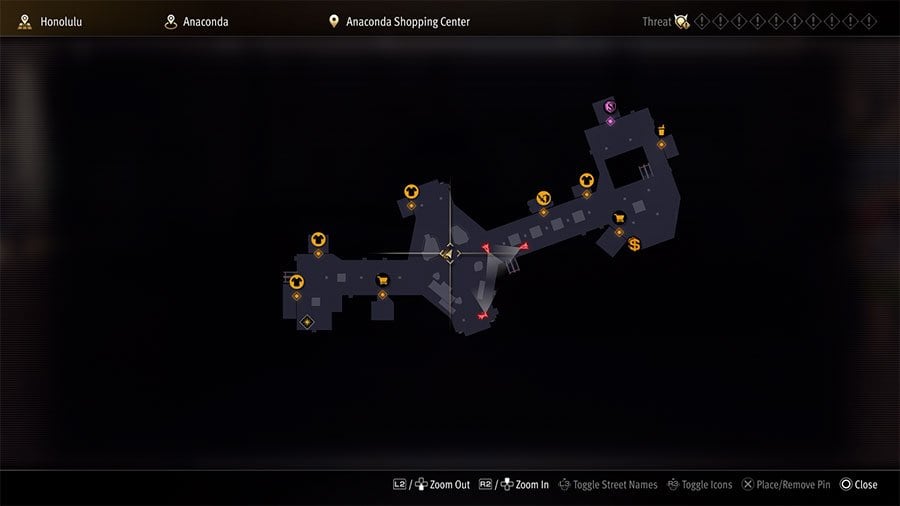
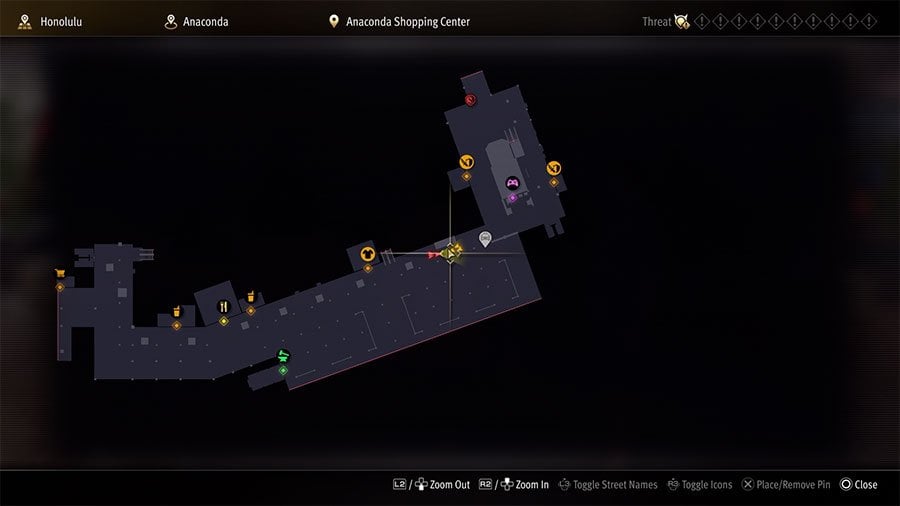
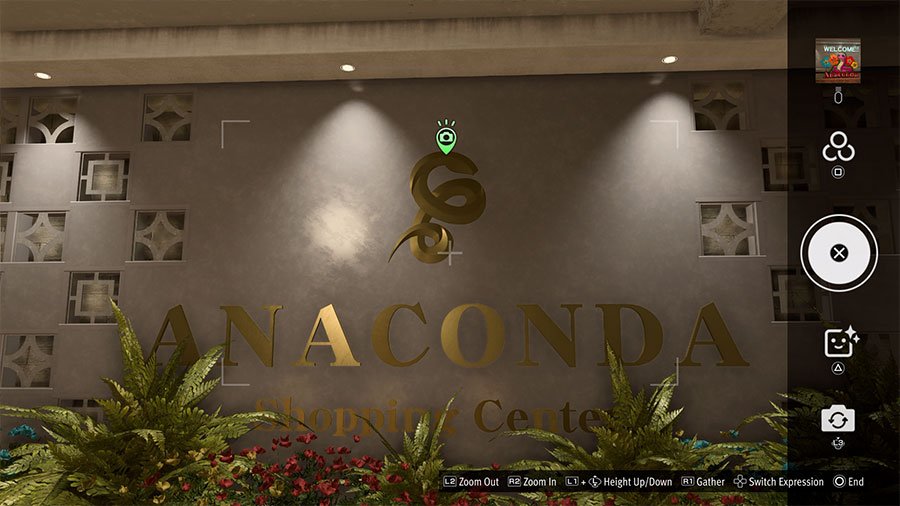
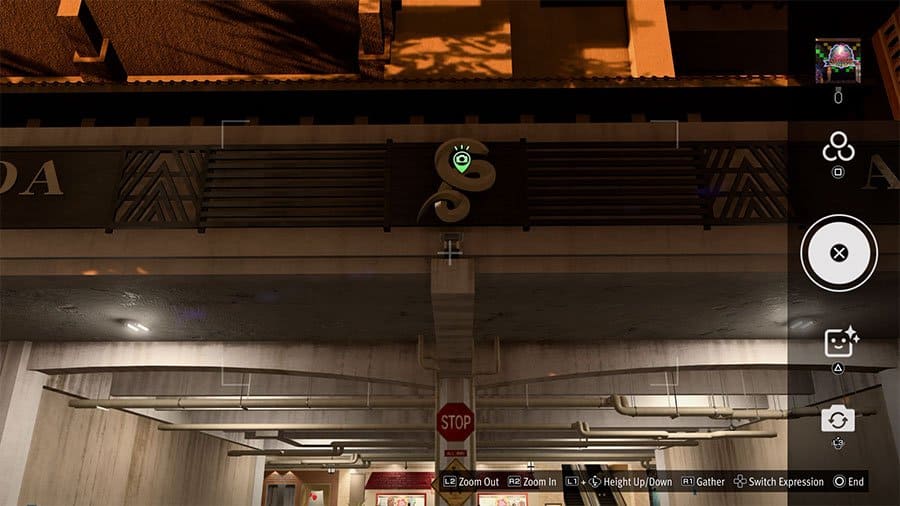
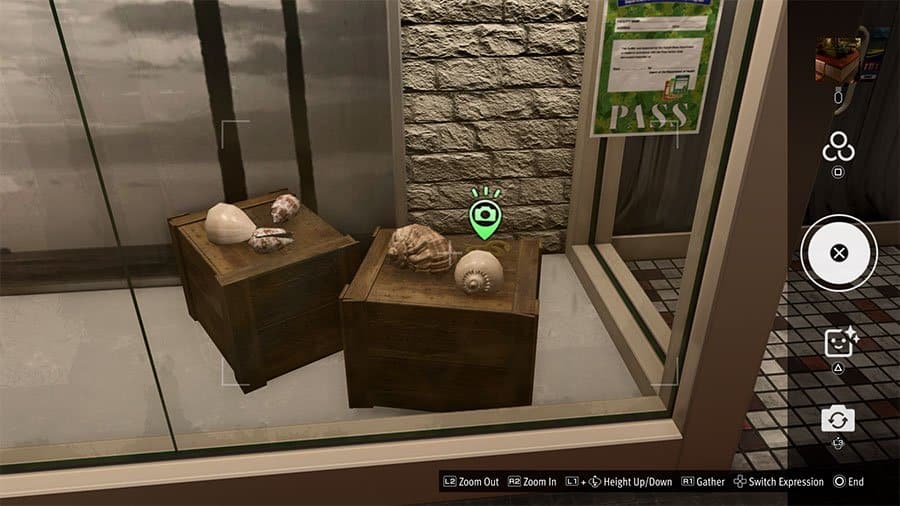
5: Shopping Center North Entrance (Anaconda)

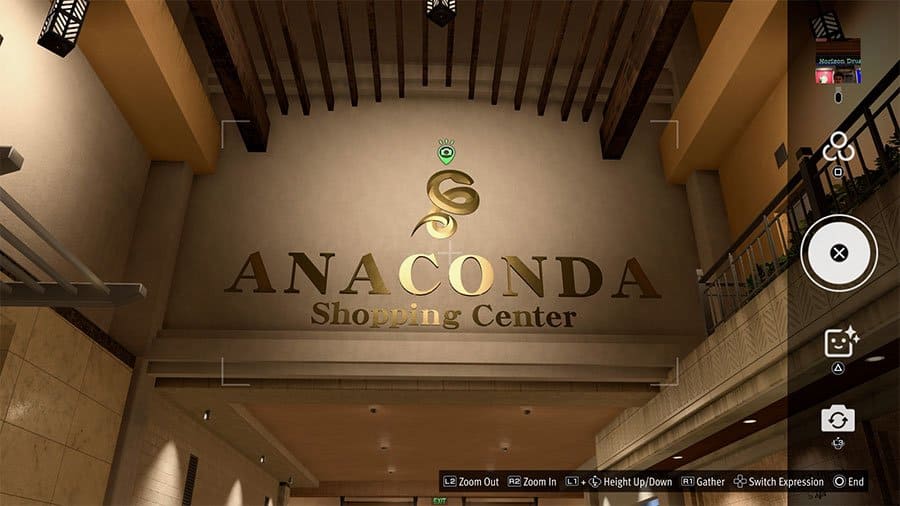
6: Shopping Center South Entrance (Anaconda)
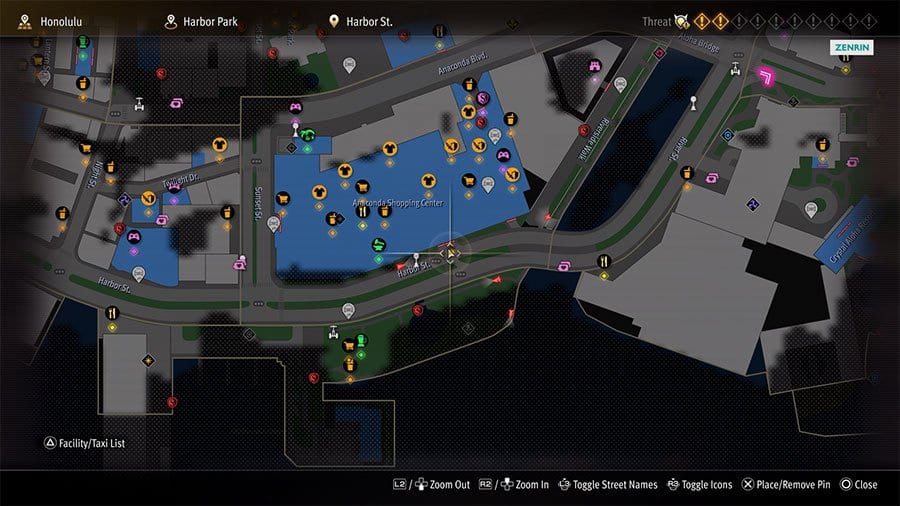
7: Shopping Center West Entrance (Anaconda)
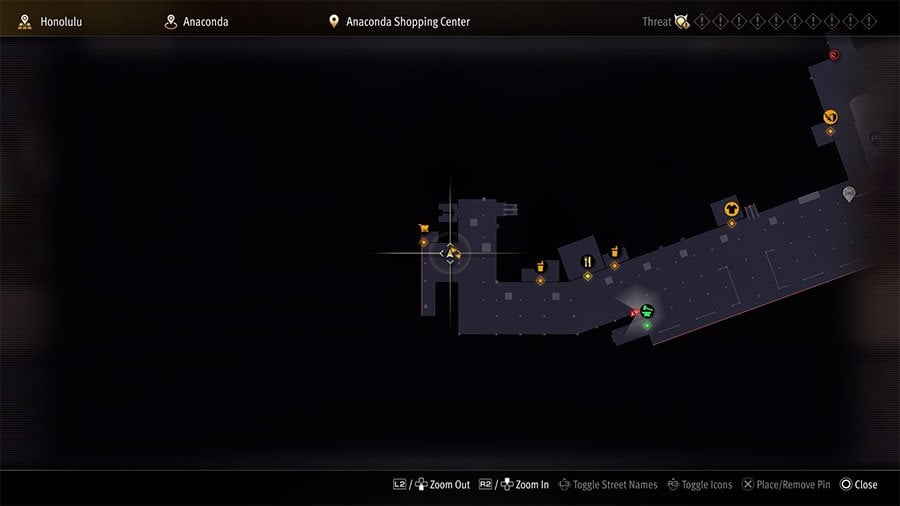
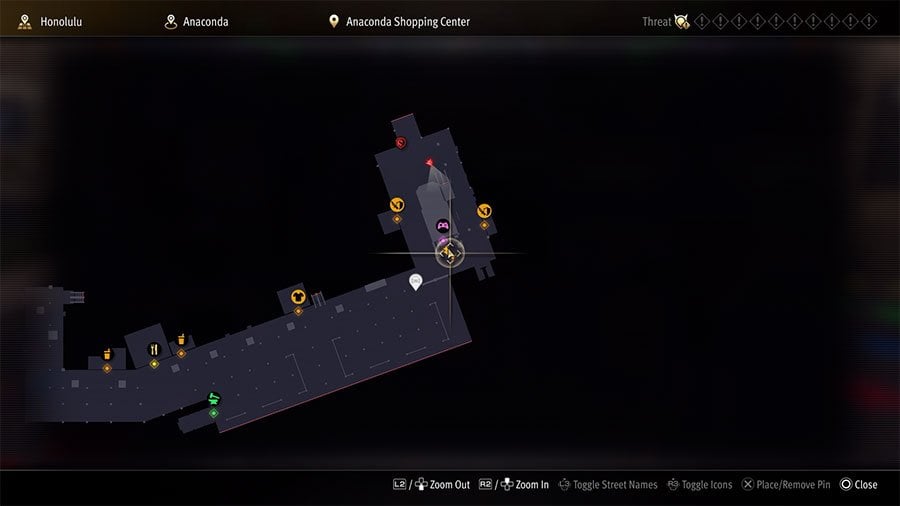
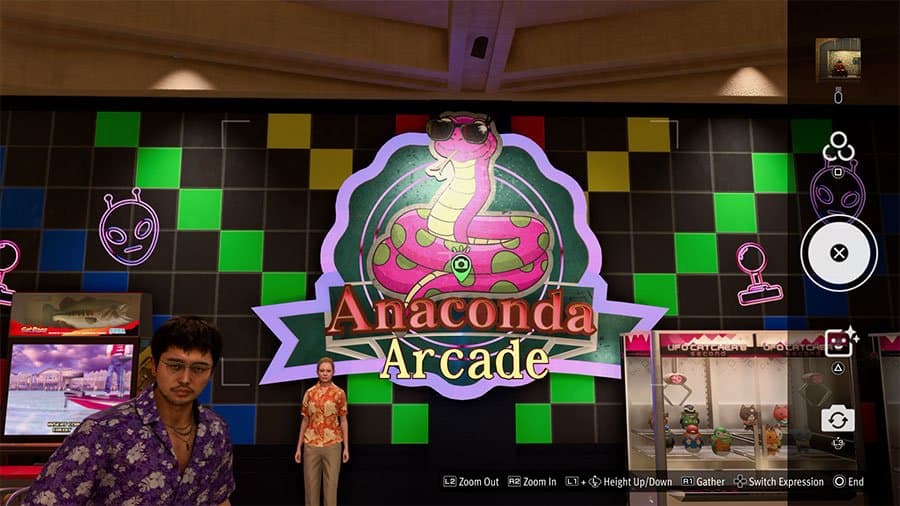
8: Shopping Center 2F (Anaconda)
9: Shopping Center 2F (Anaconda)
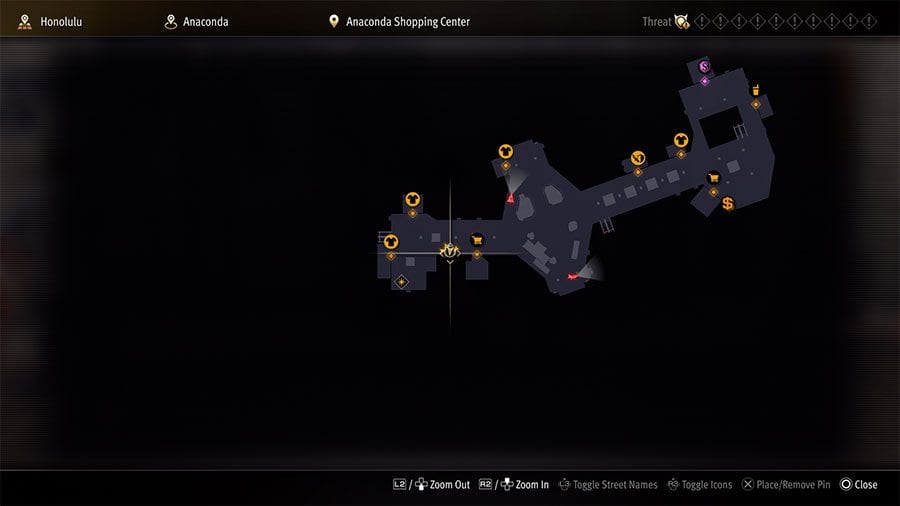
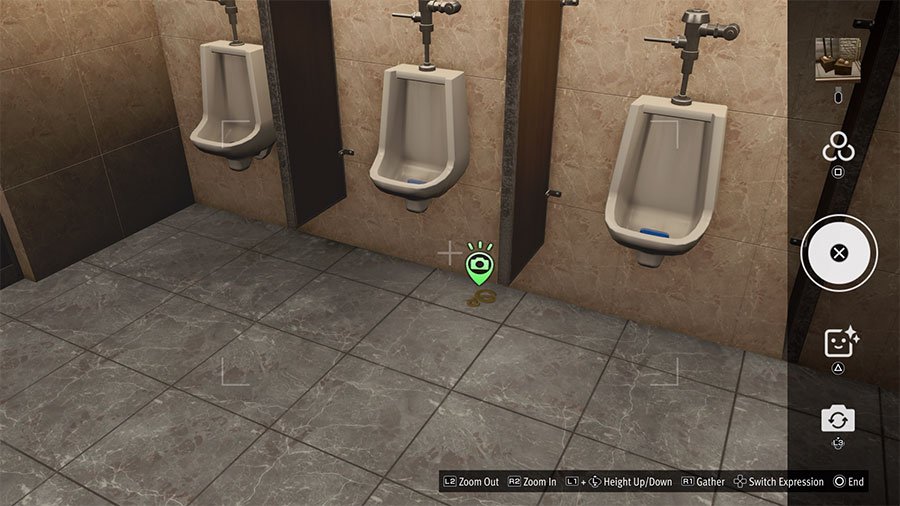
10: Shopping Center Restroom (Anaconda)
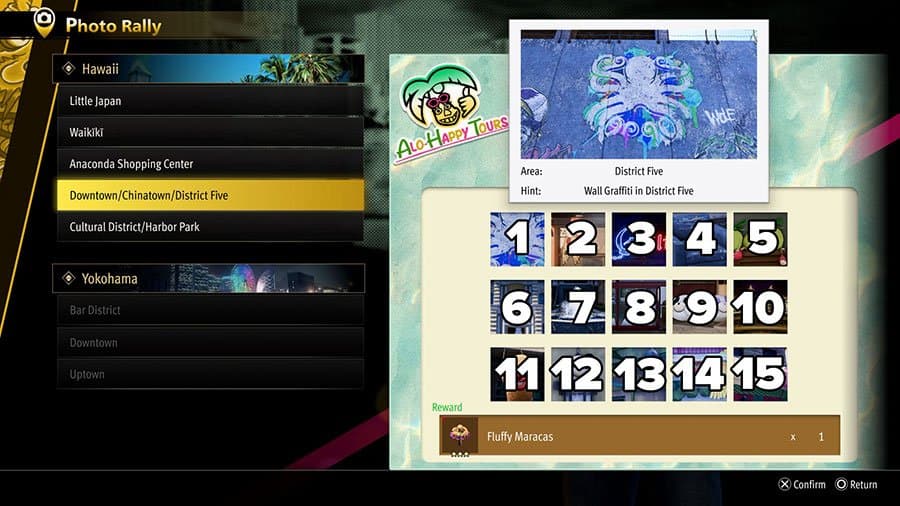
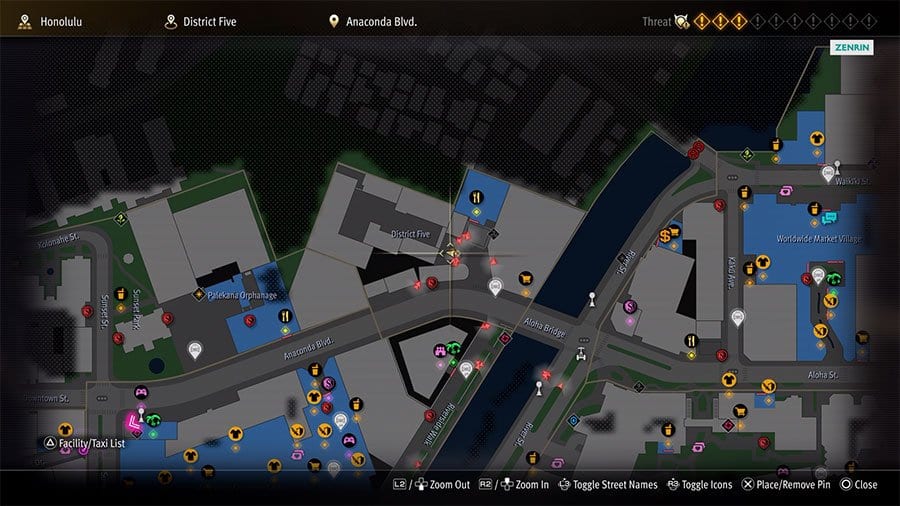
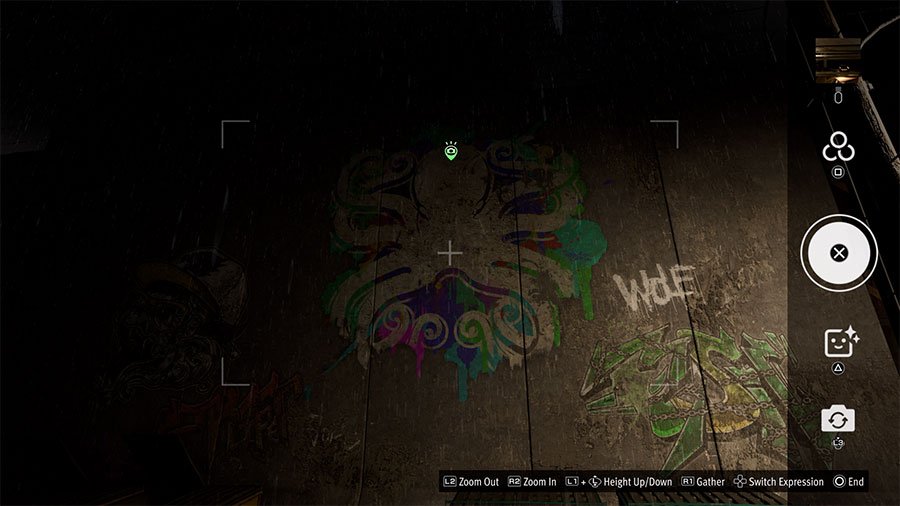
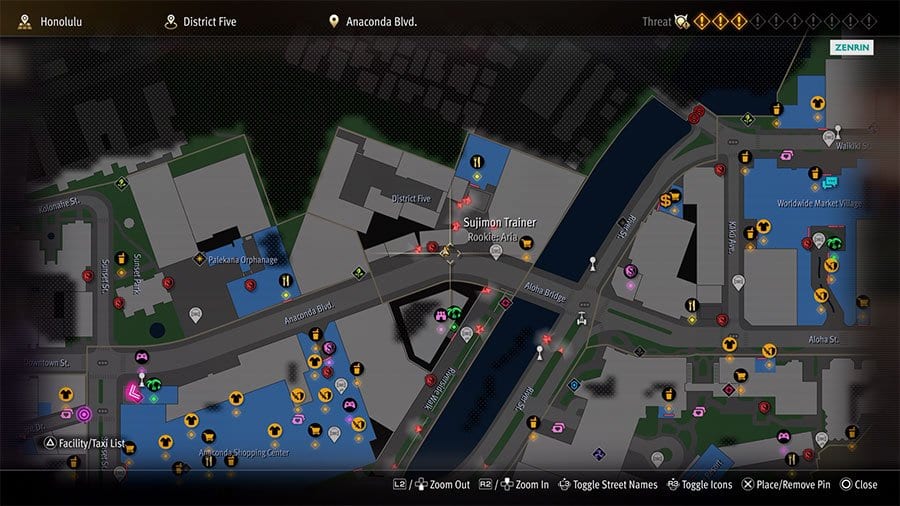
1: Wall Graffiti In District Five (District Five)
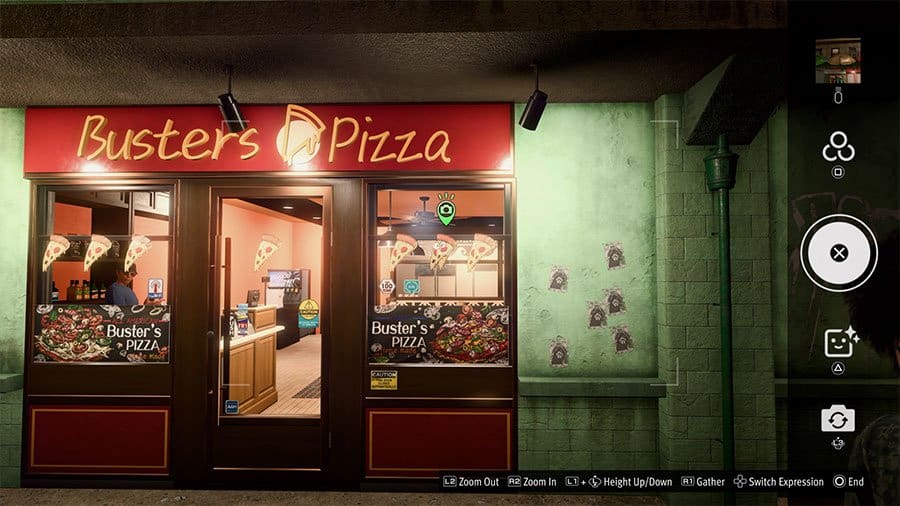
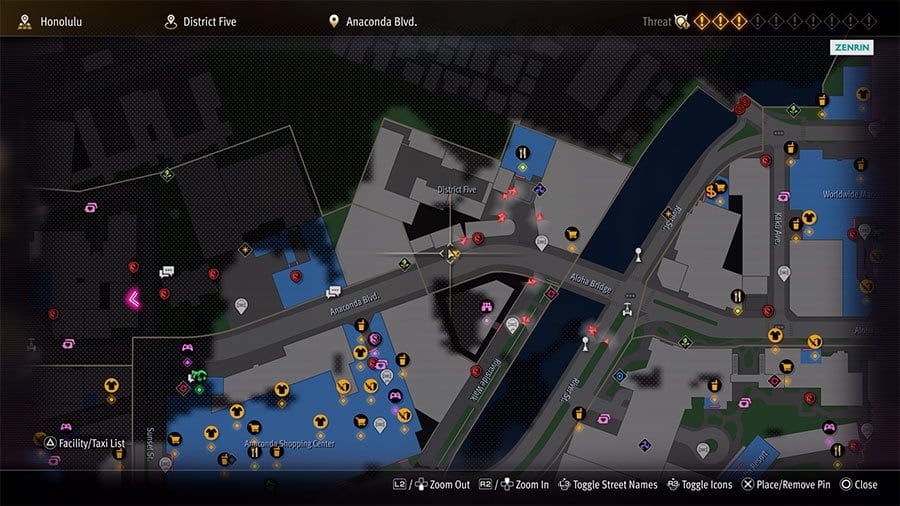
2: One Mismatched Slice (District Five)
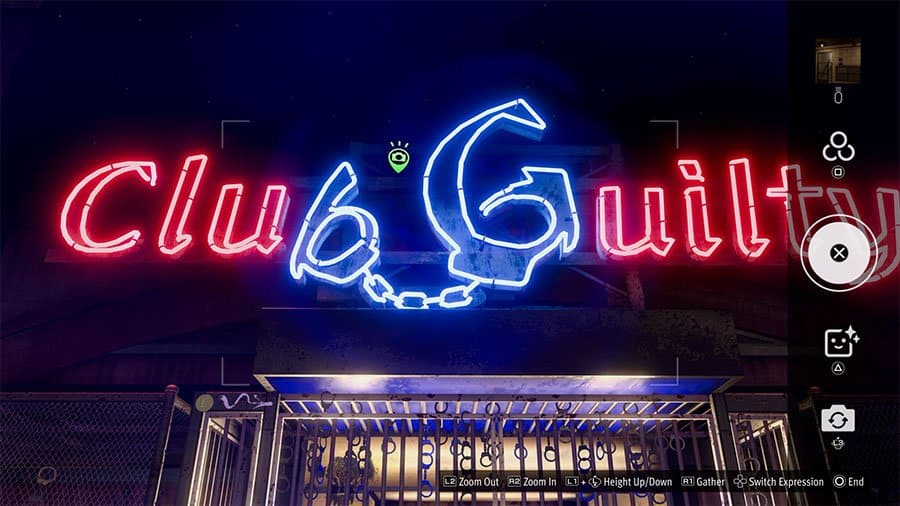
3: Cuffed Nightspot (District 5)
4: Inside Ruins (District 5)

5: Store Shelf Mascot (Downtown)
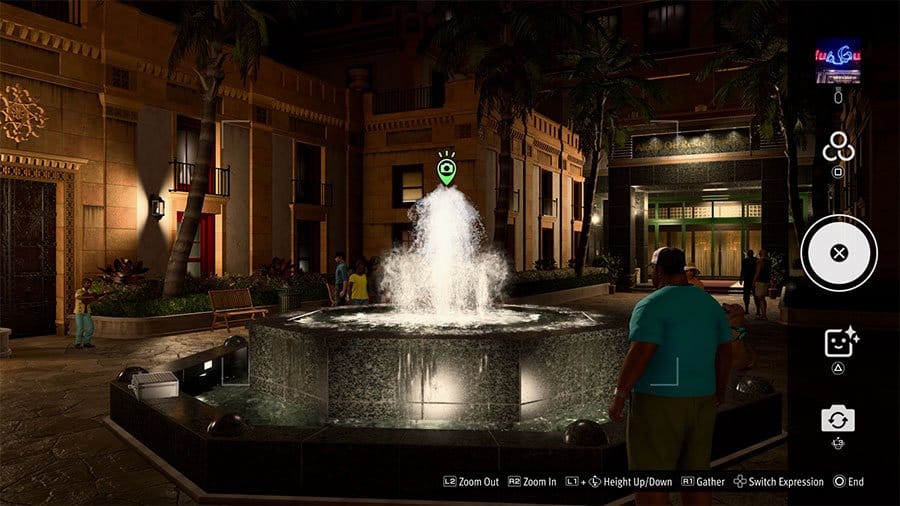
6: Streetside Water Installation (Downtown)
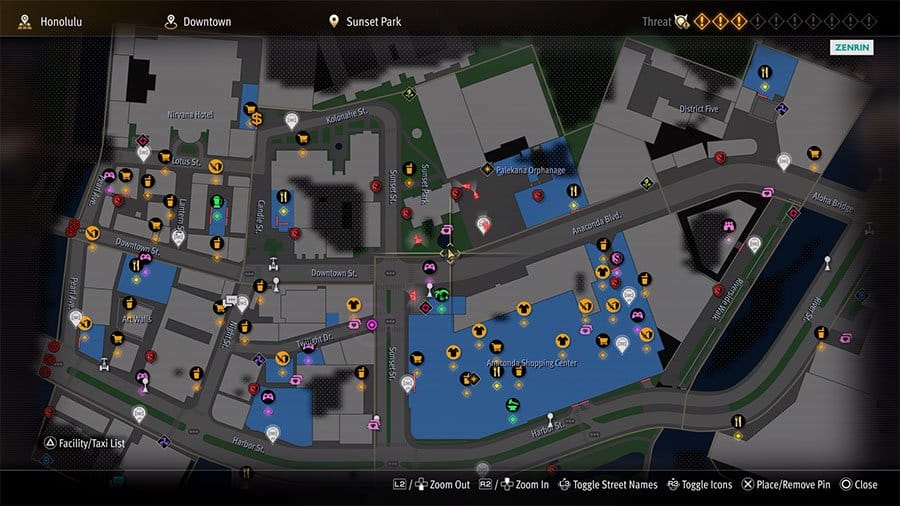
7: Streetside Water Installation (Downtown)

8: Serrated Storefront (Downtown)
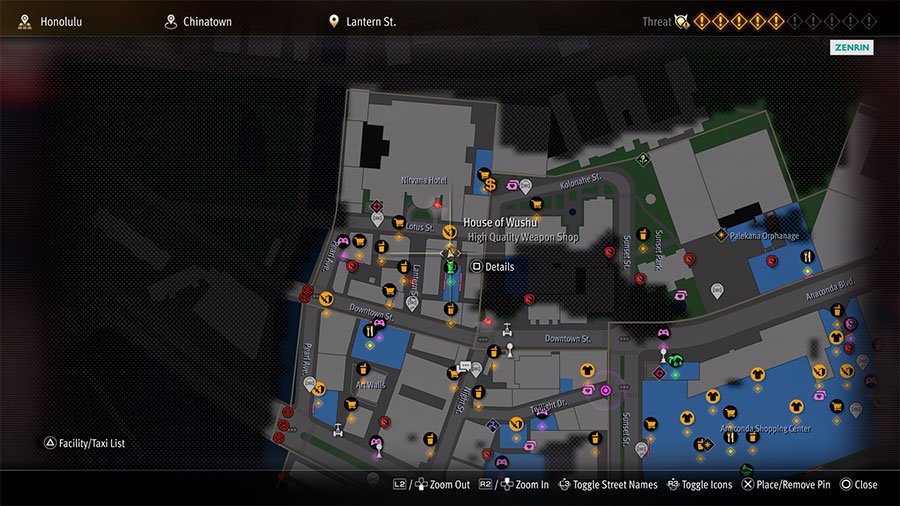
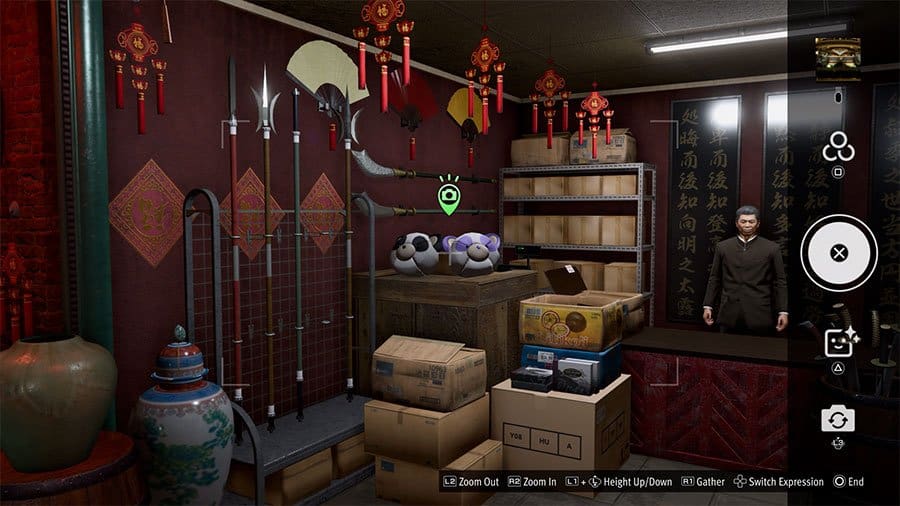
9: Chinese Weapons Dealer (Chinatown)
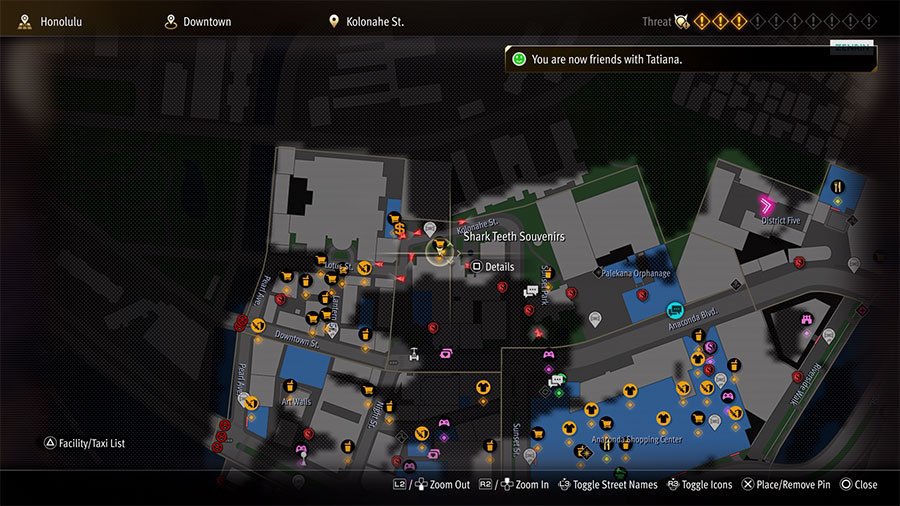
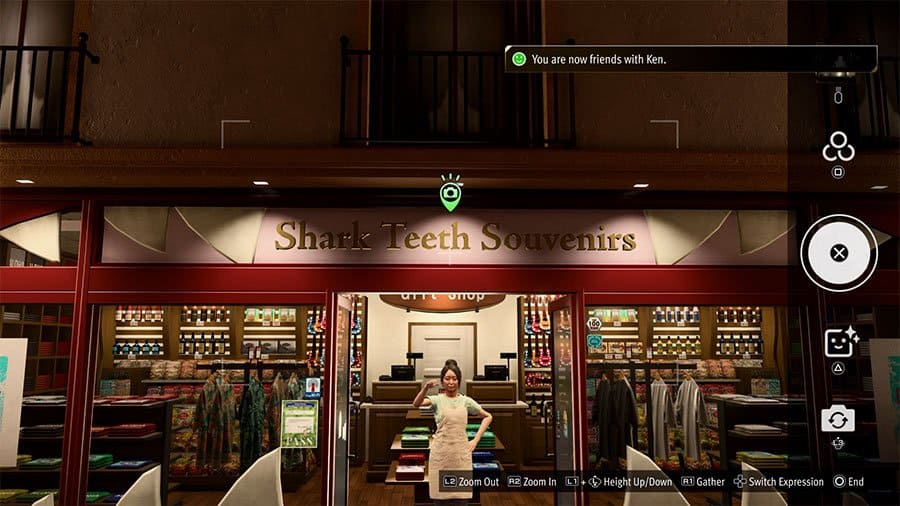
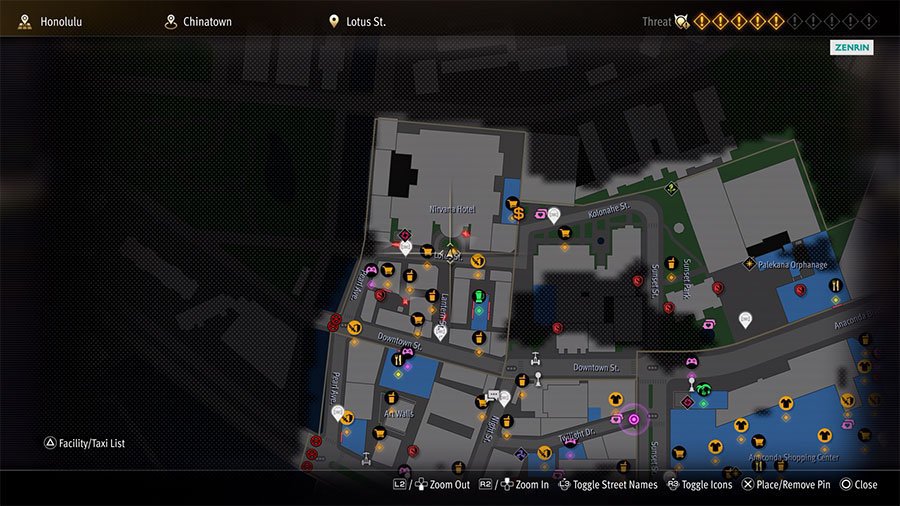
10: Sign of Bliss (Chinatown)
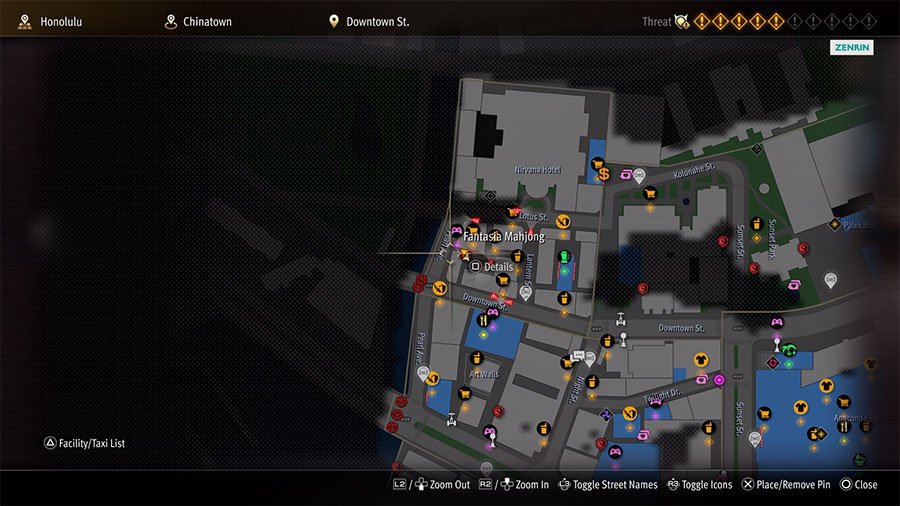
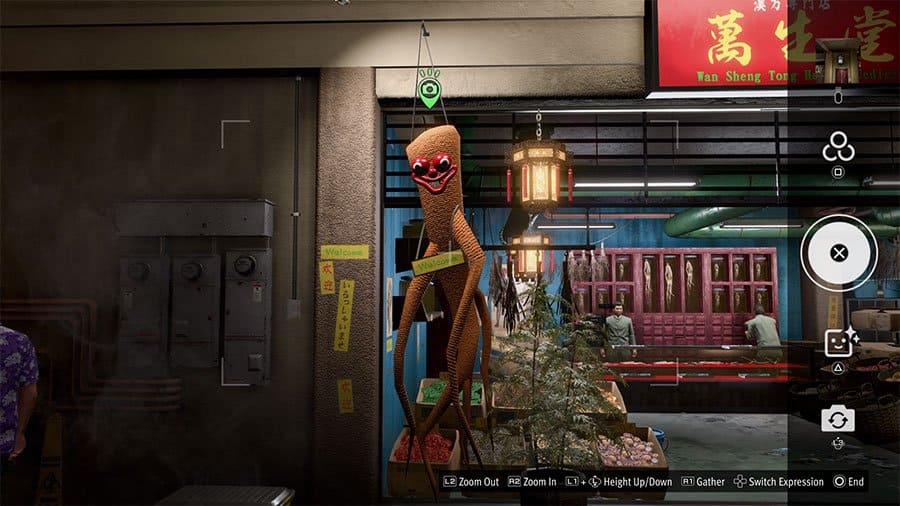
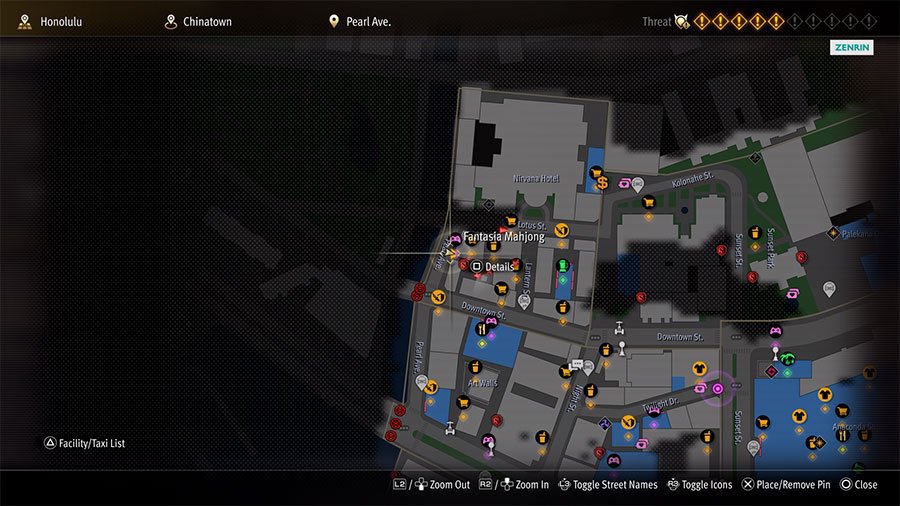
11: Herbal Store Mascot (Chinatown)
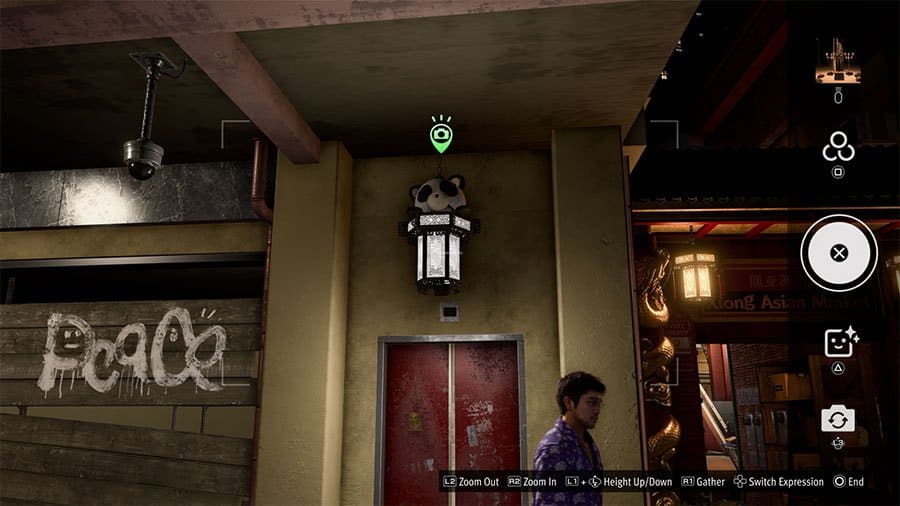
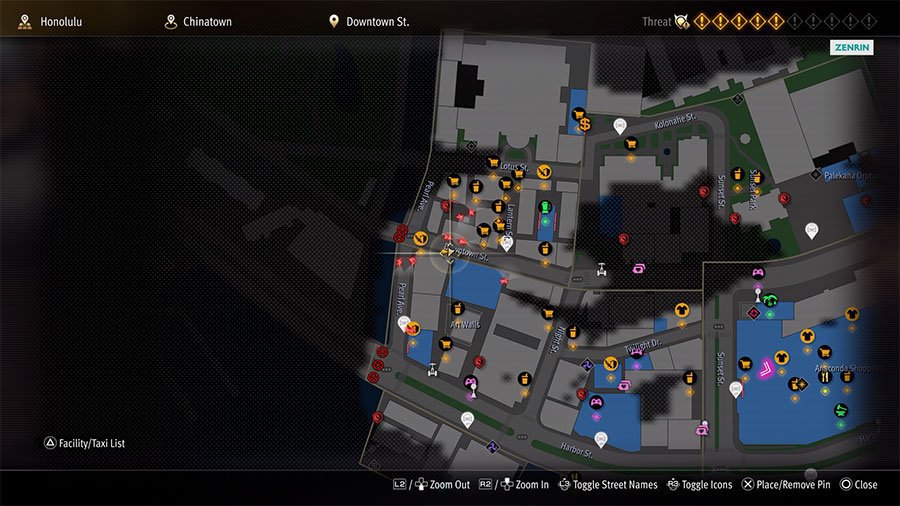
12: Elevator Panda (Chinatown)
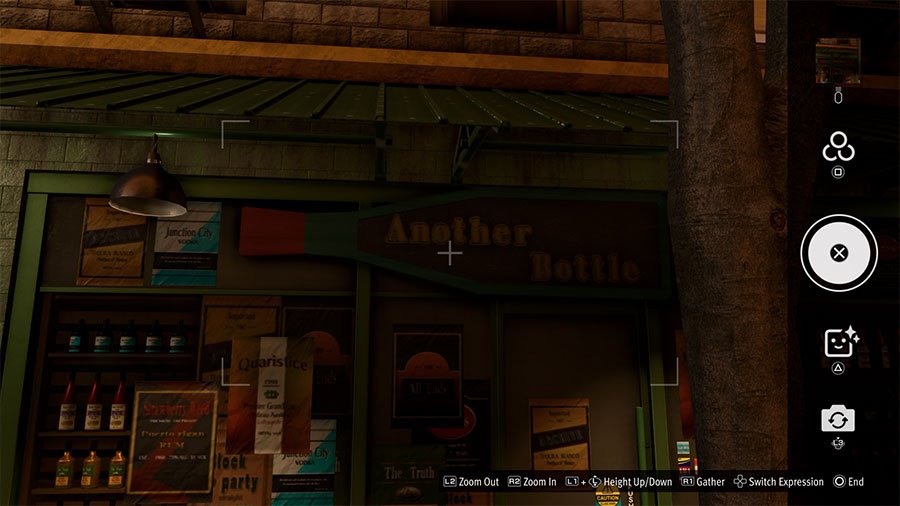
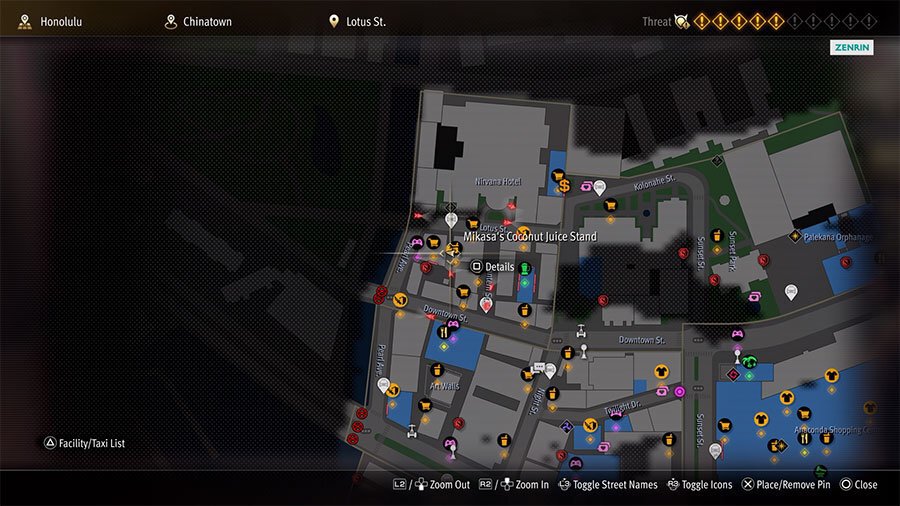
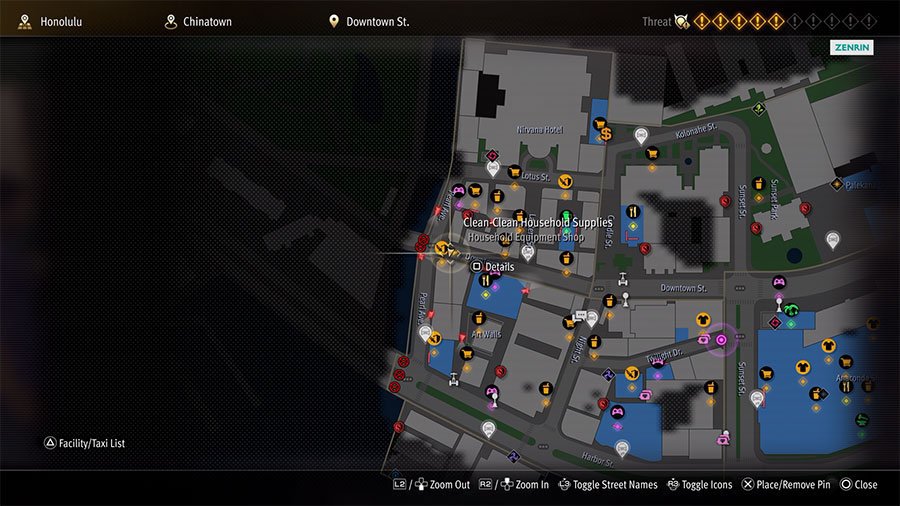
13: Local Liquor Market (Chinatown)
14: Hole-in-the-wall Smoothie Shop (Chinatown)
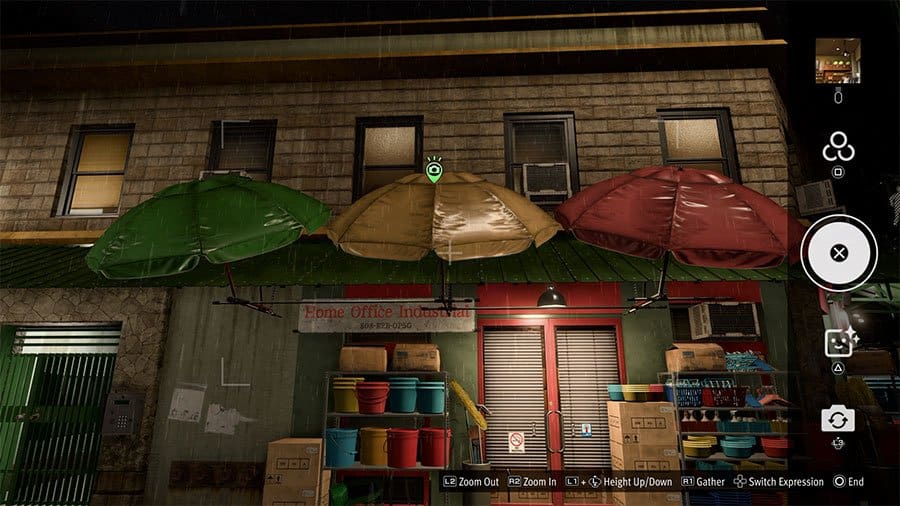
15: Umbrellas On A Corner Store (Chinatown)
[/accordion_item]
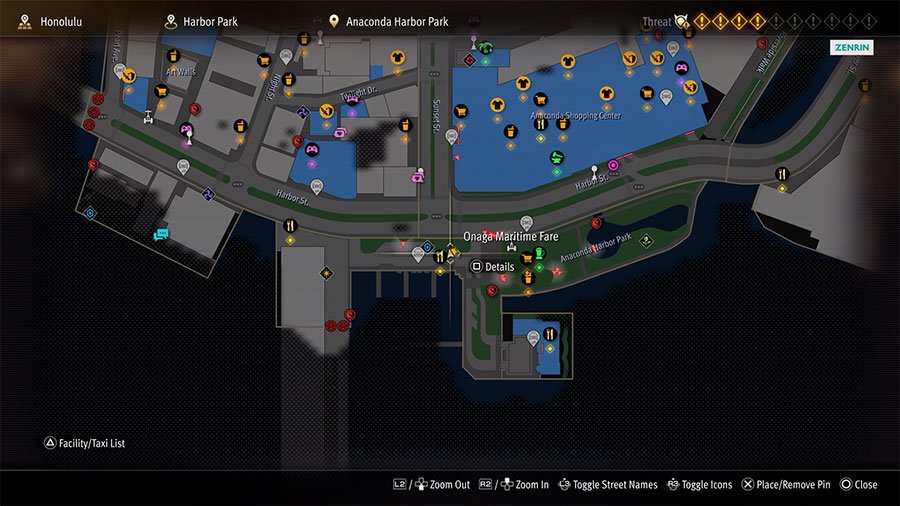
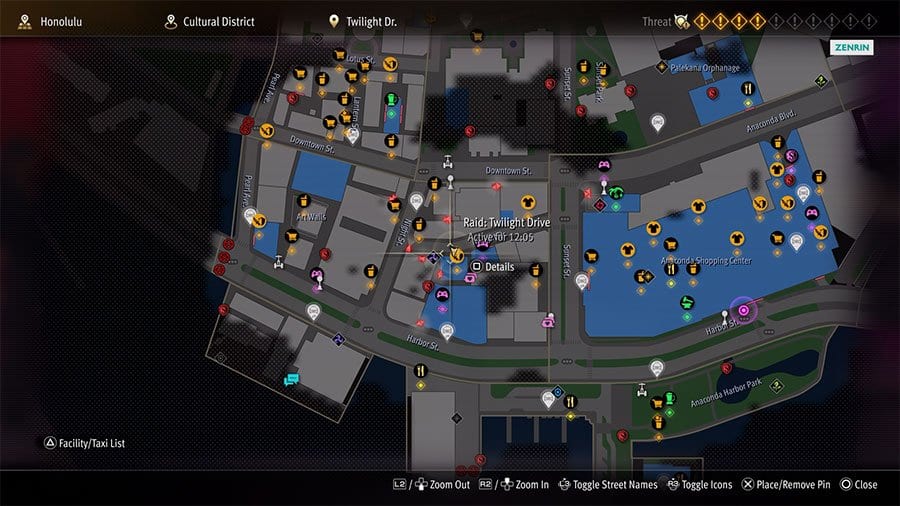
[accordion_item title=’Cultural District & Harbor Park’]
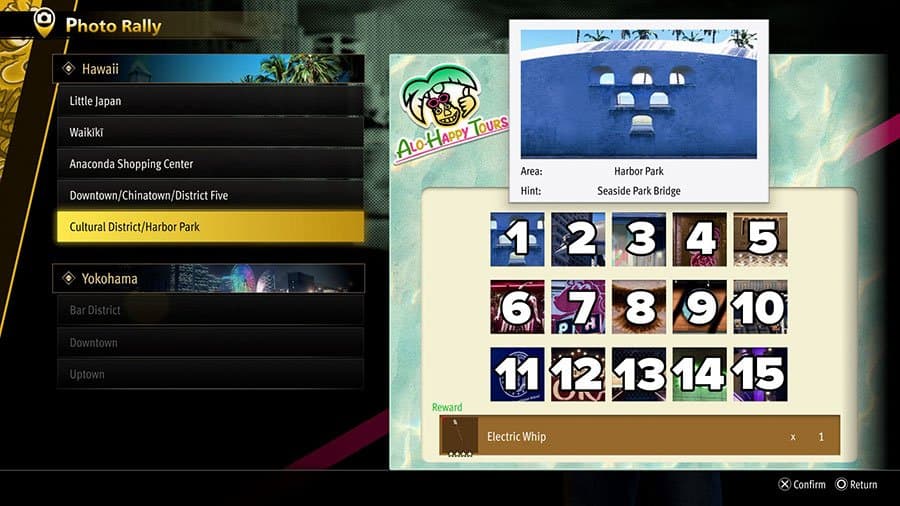
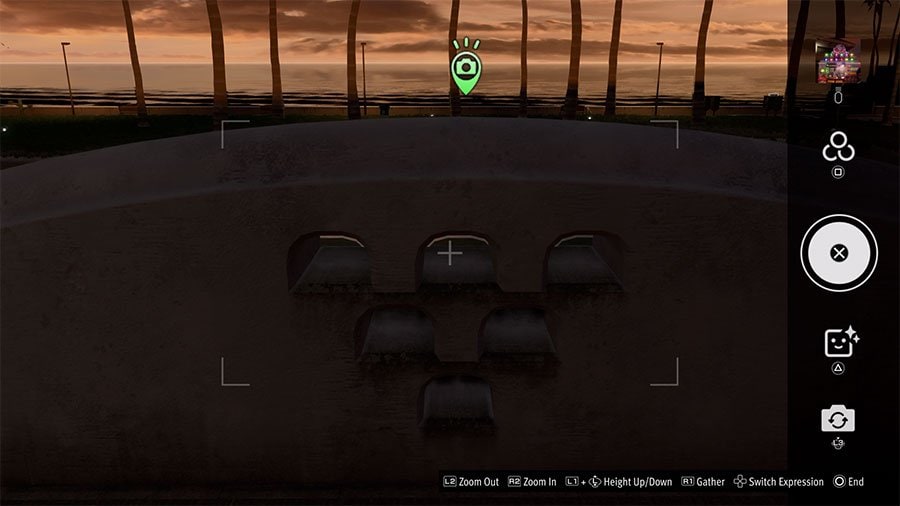
1: Seaside Park Bridge (Harbor Park)
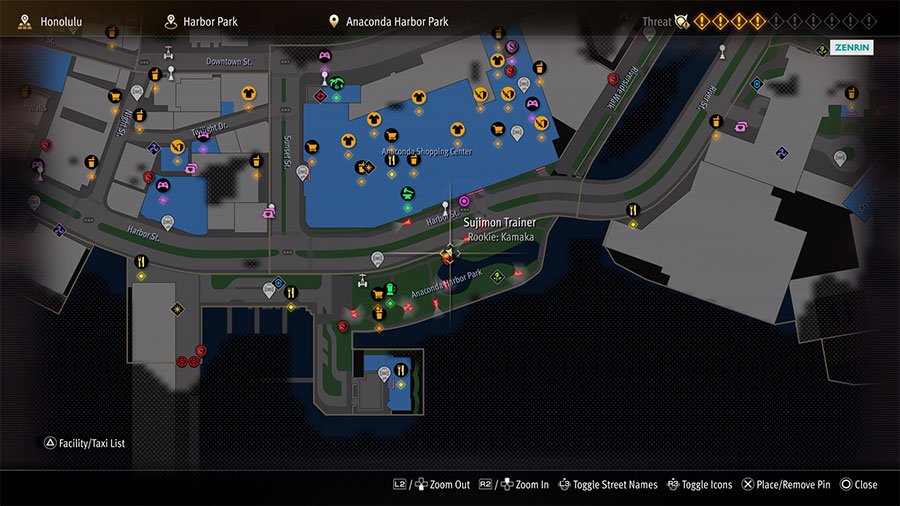
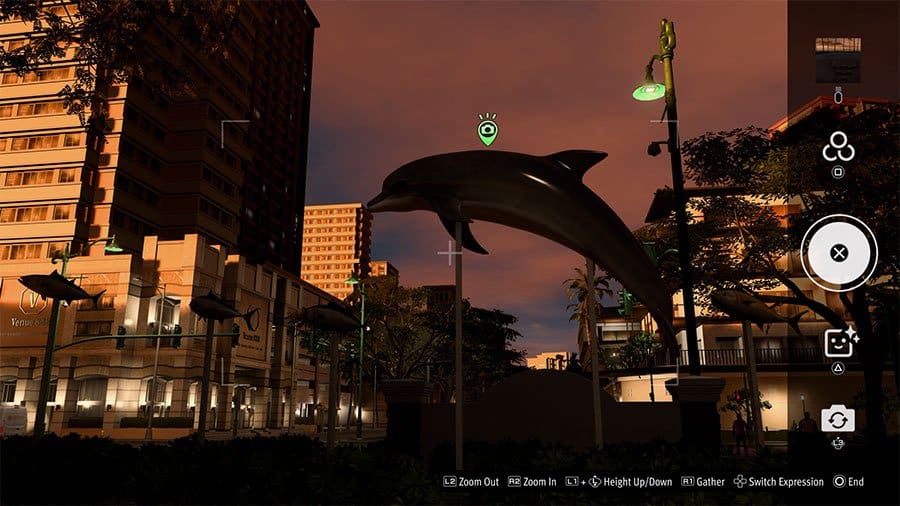
2: Dolphins At Play (Harbor Park)
3: Street Corner Near The Parking Lot (Anaconda)
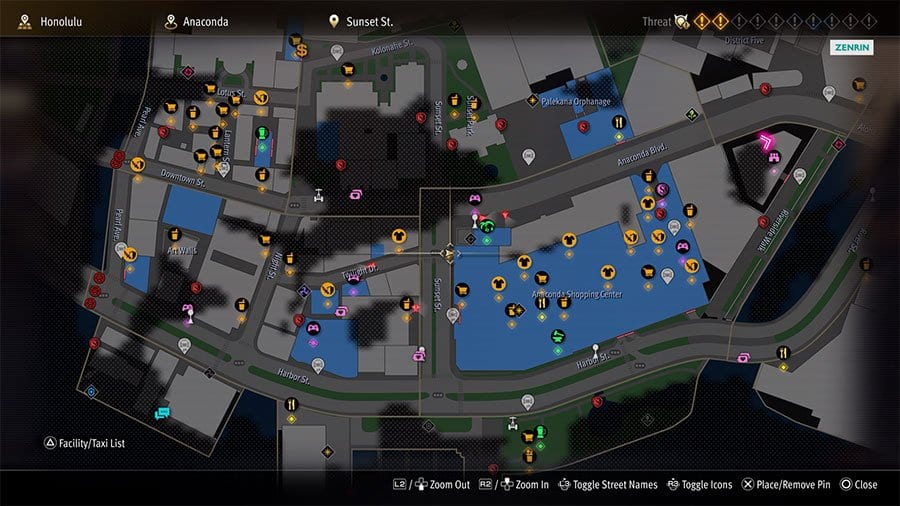
4: Window Near Klotzman Entrance (Cultural District)
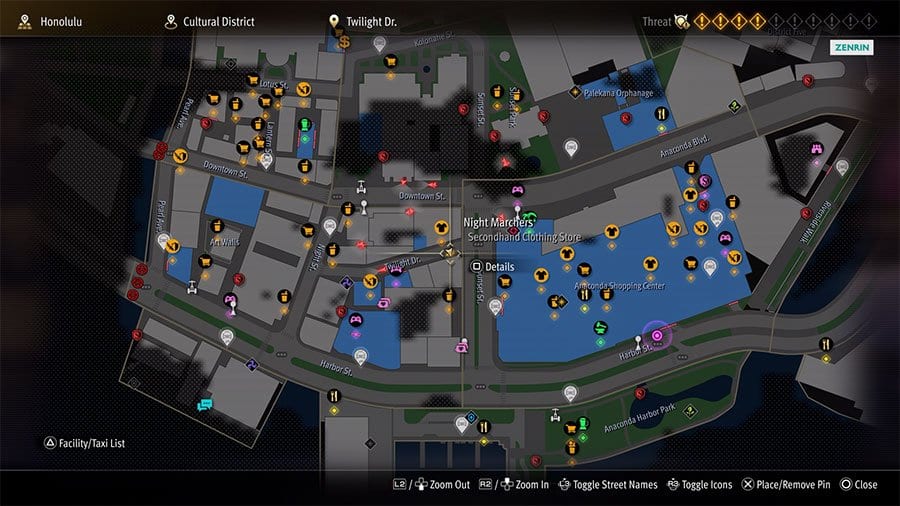
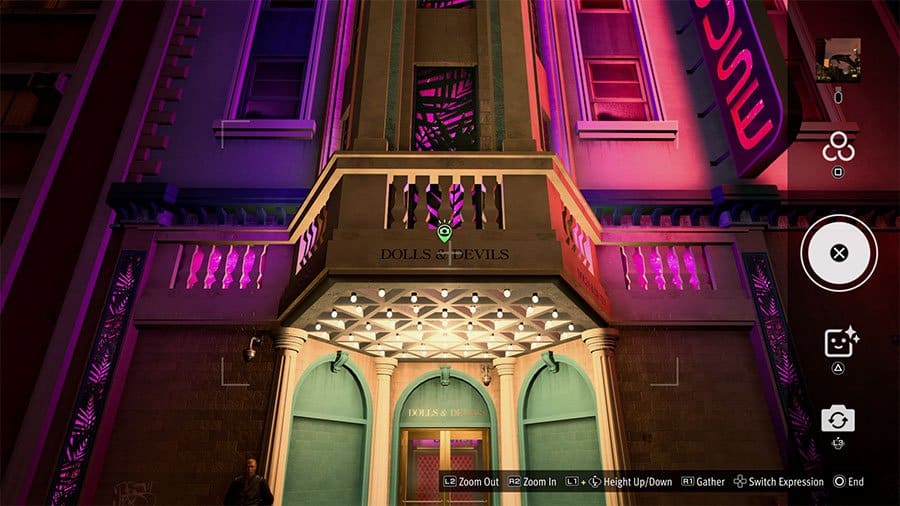
5: For Adults Seeking Playtime (Cultural District)
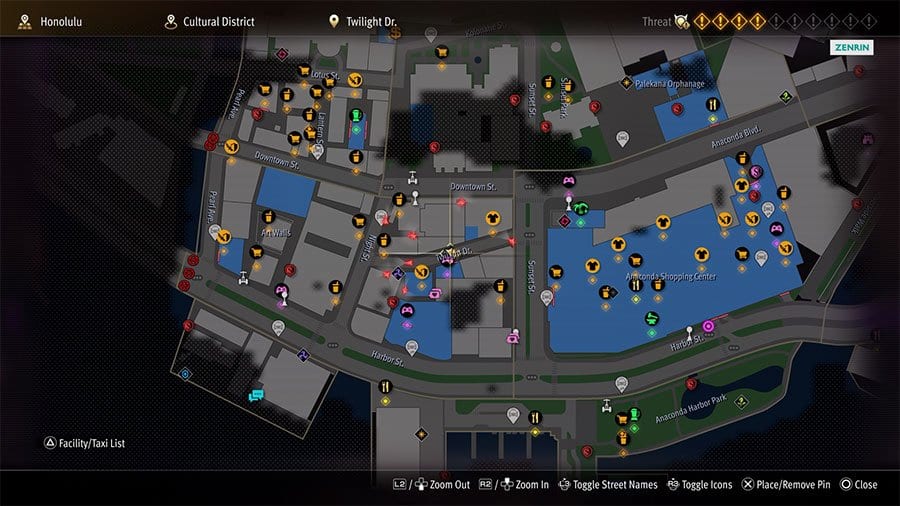
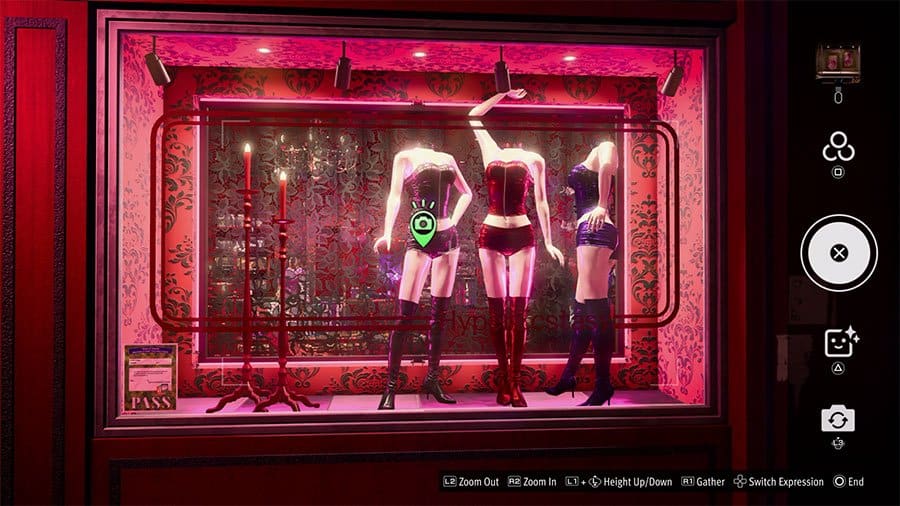
6: Raunchy Corset Display (Cultural District)
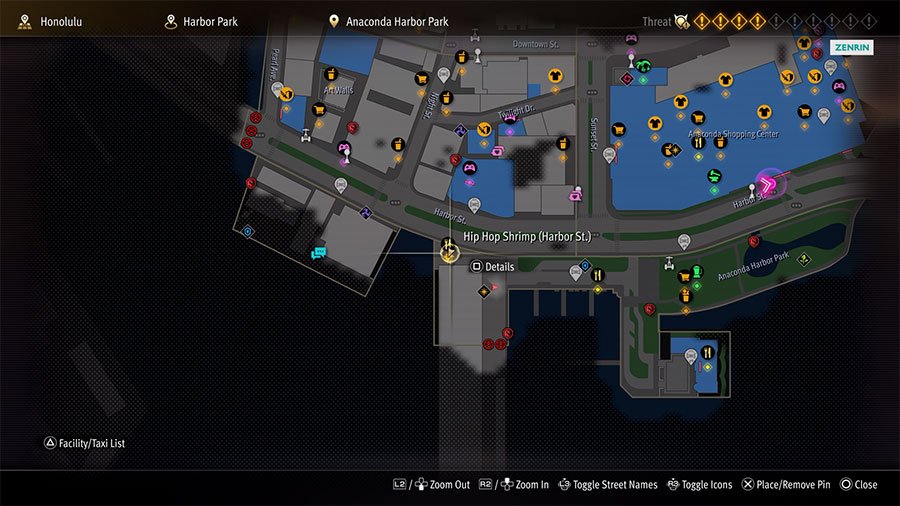
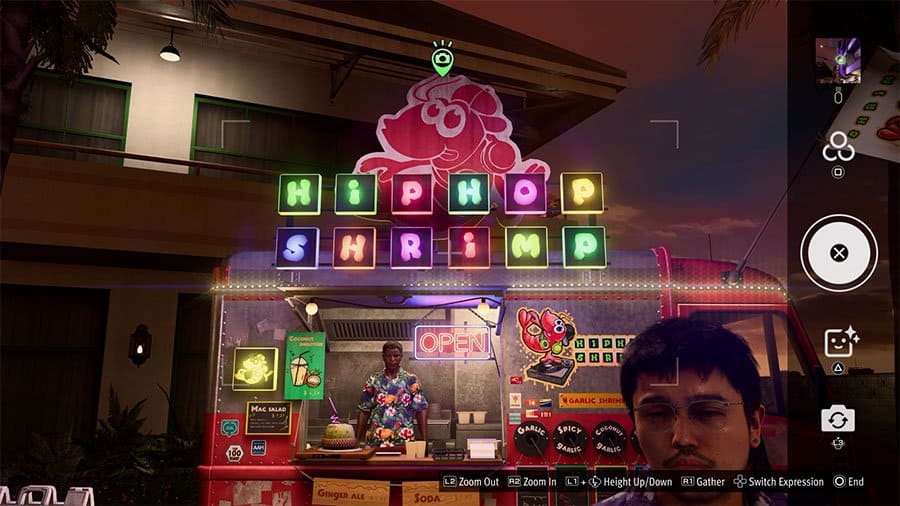
7: Food Truck Near Ship Landing (Harbor Park)
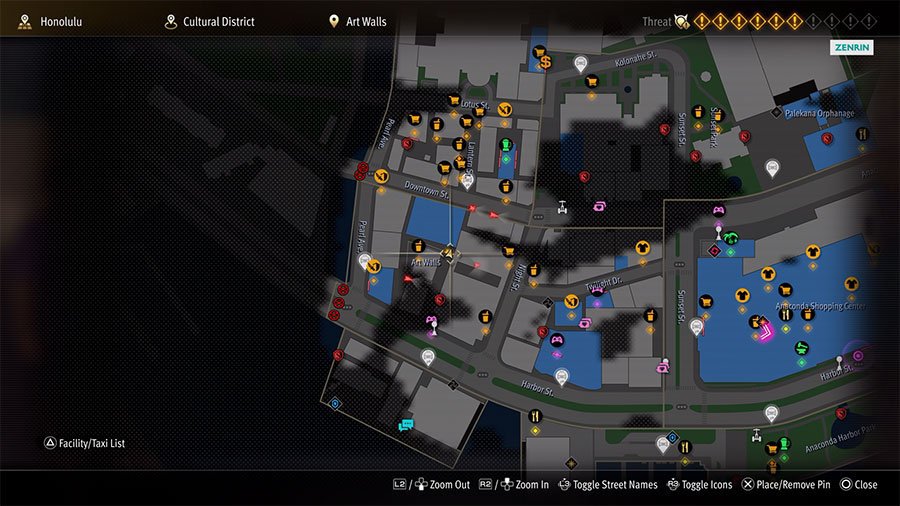
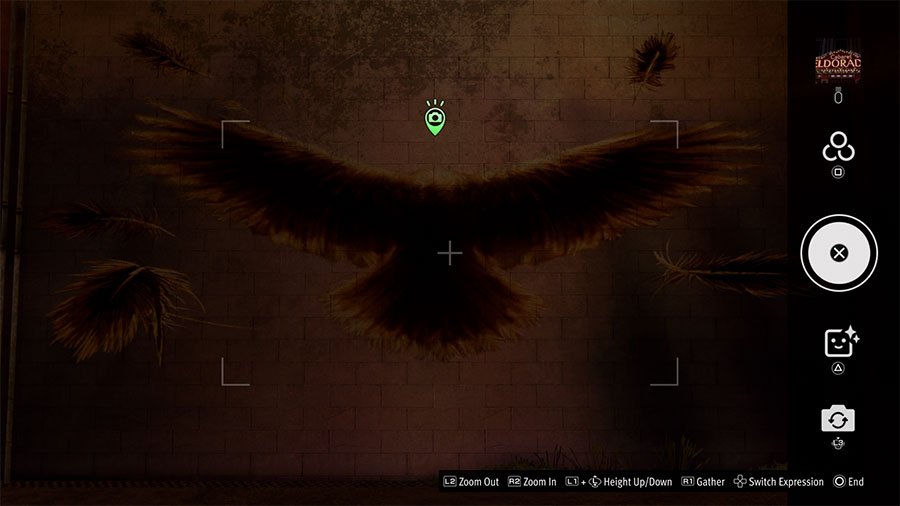
8: Art Walls Mural (Cultural District)
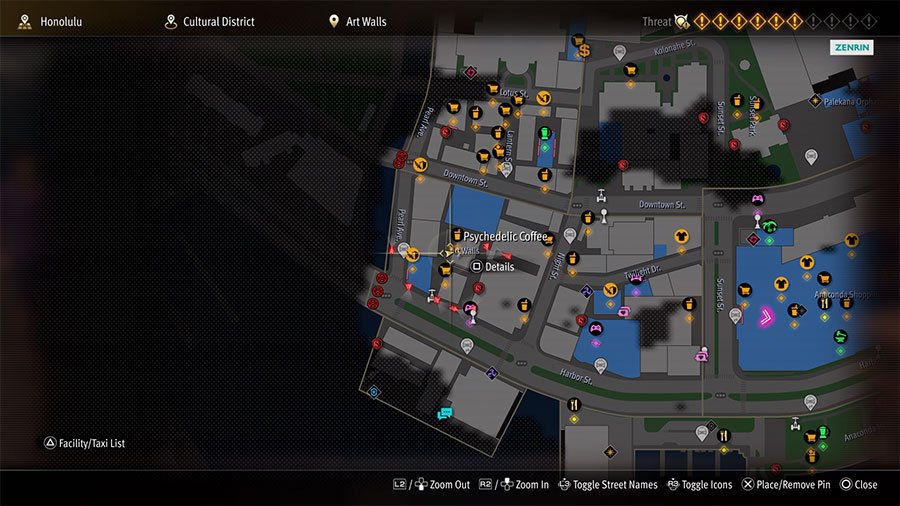
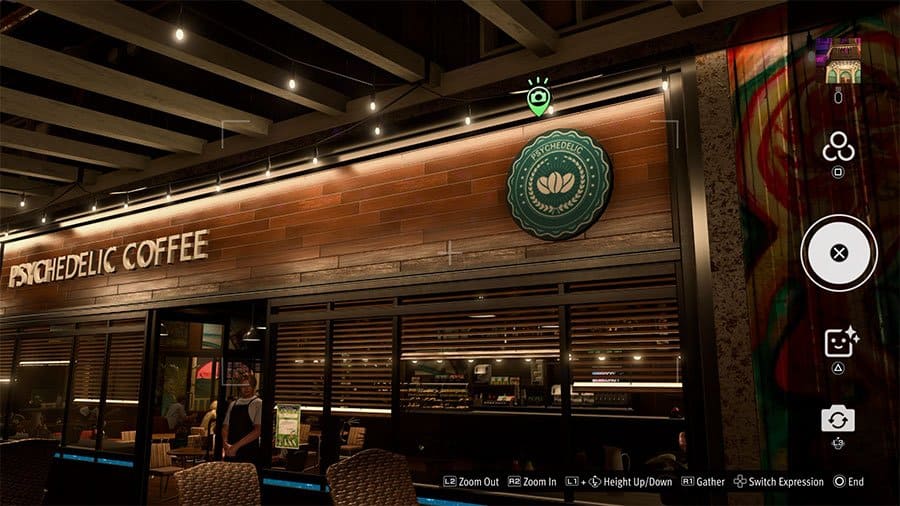
9: Groovy Cafe Sign (Cultural District)
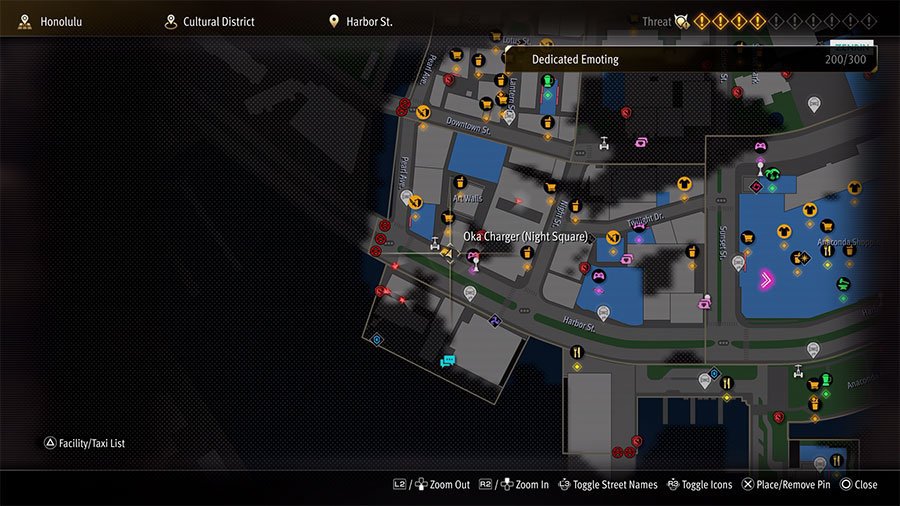
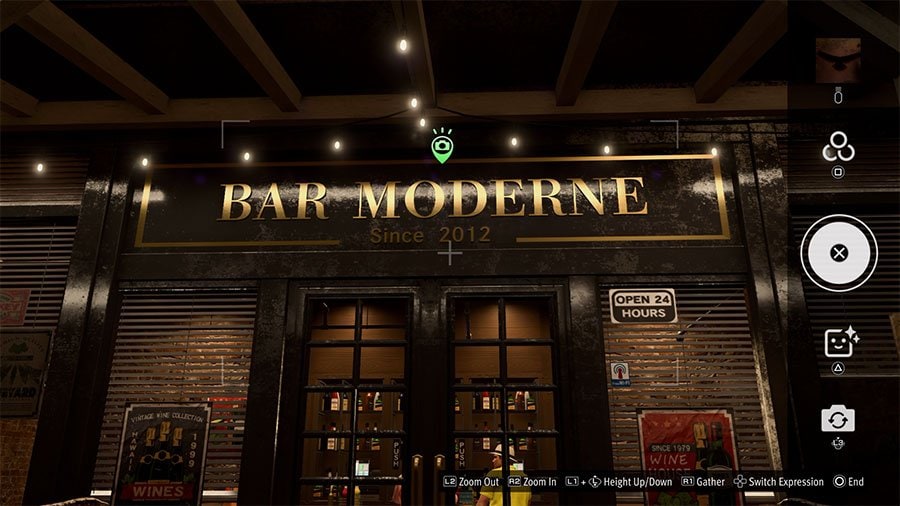
10: Streetside Art Walls Bar (Cultural District)
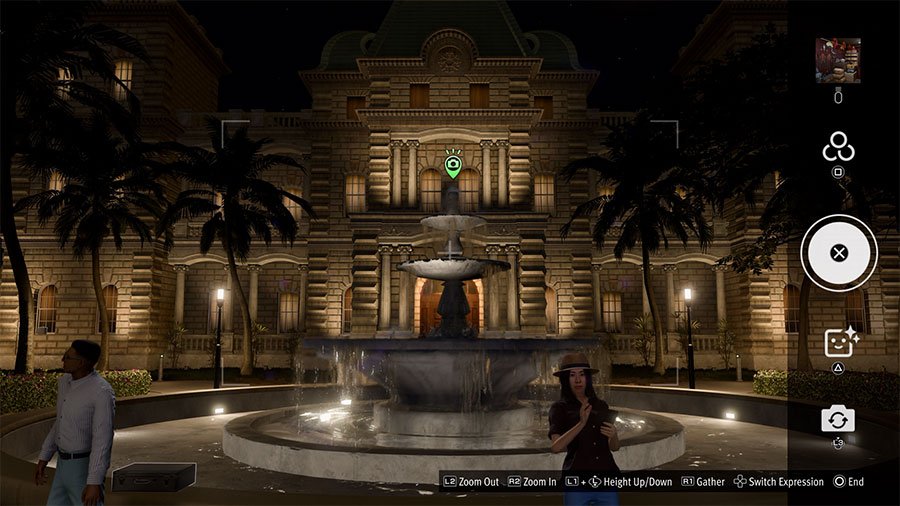
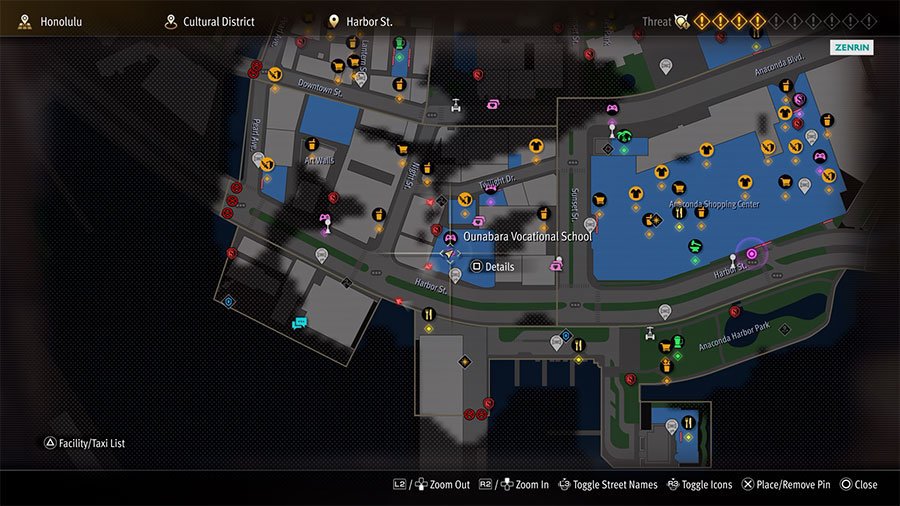
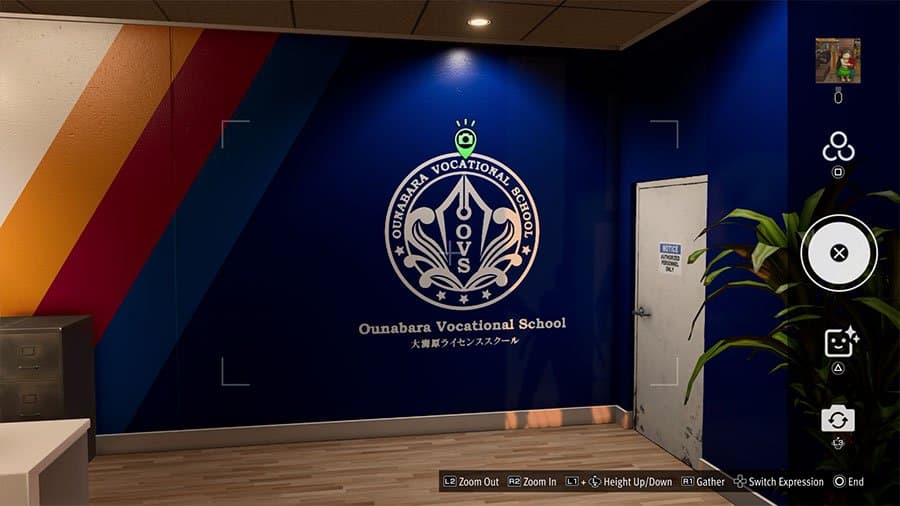
11: Lobby Of An Educational Facility (Cultural District)
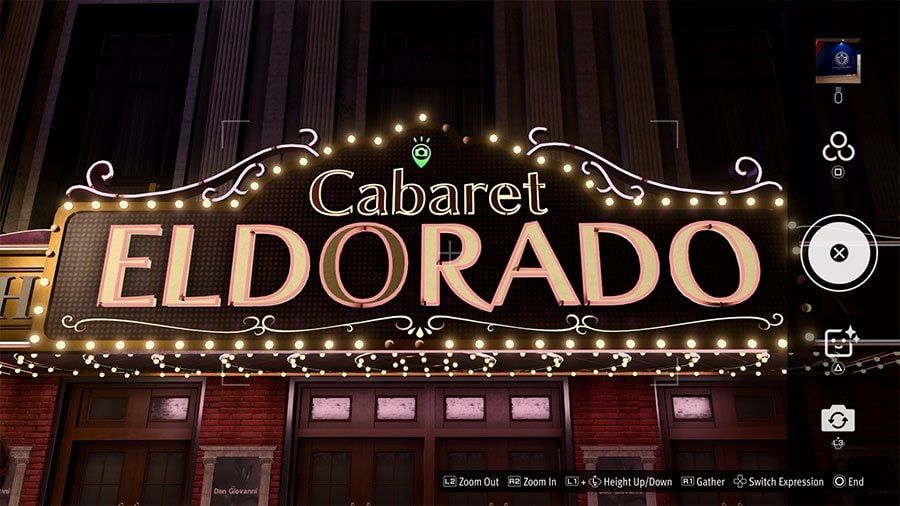
12: Currently Closed Theater (Cultural District)

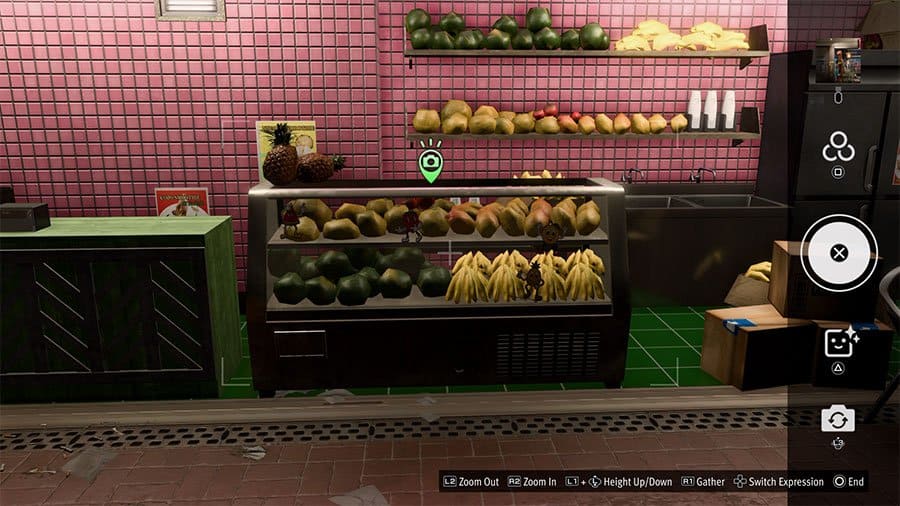
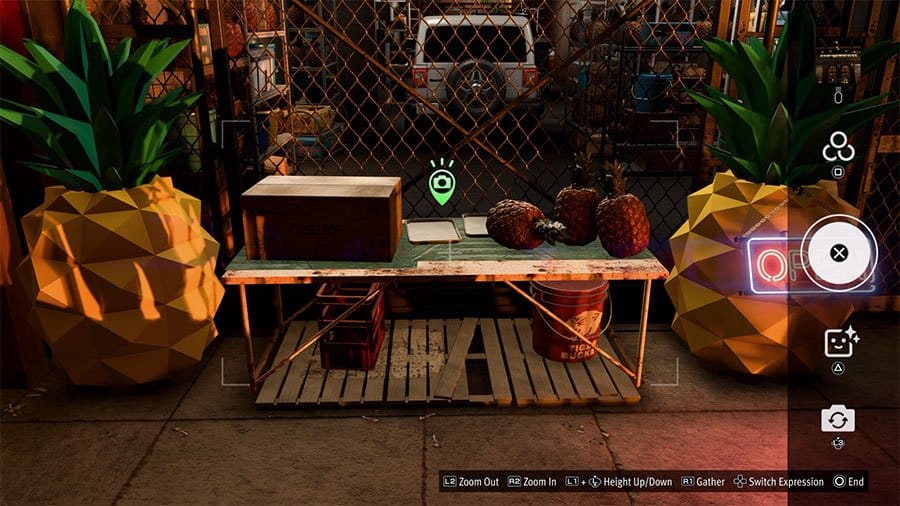
13: Pineapples For Sale (Cultural District)
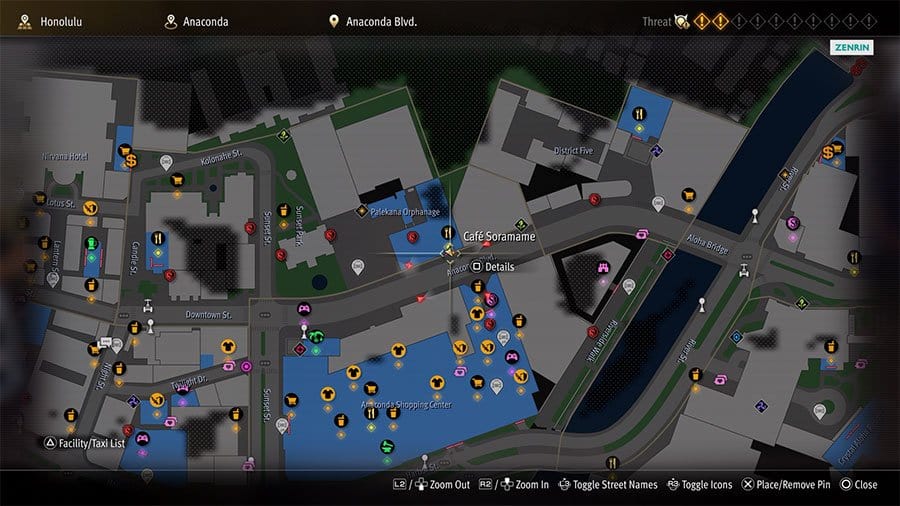
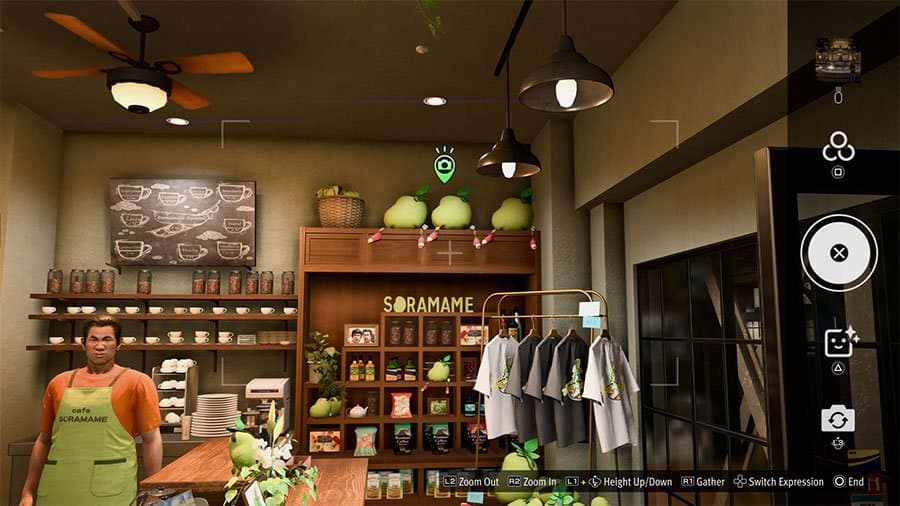
14: Streetside Cafe (Cultural District)

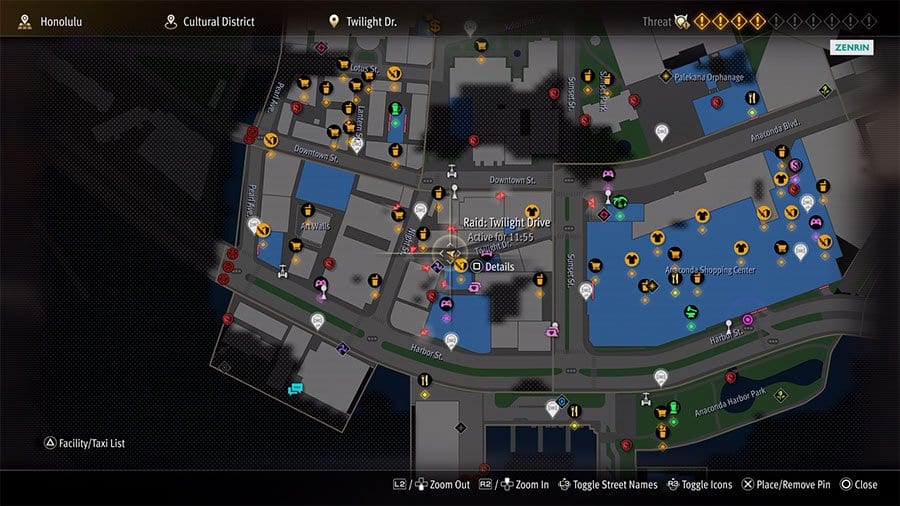
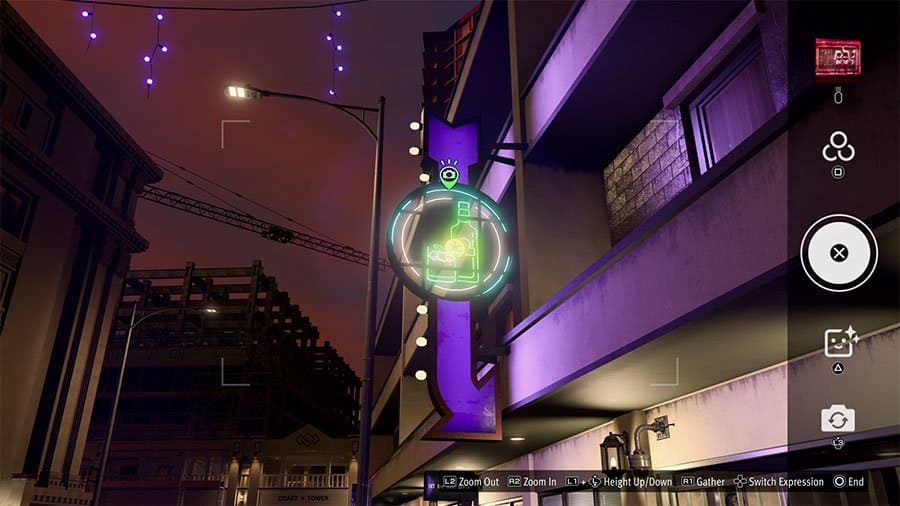
15: Lit-Up Sign For A Closed Bar (Cultural District)
Yokohama Tropical Photo Rally Locations
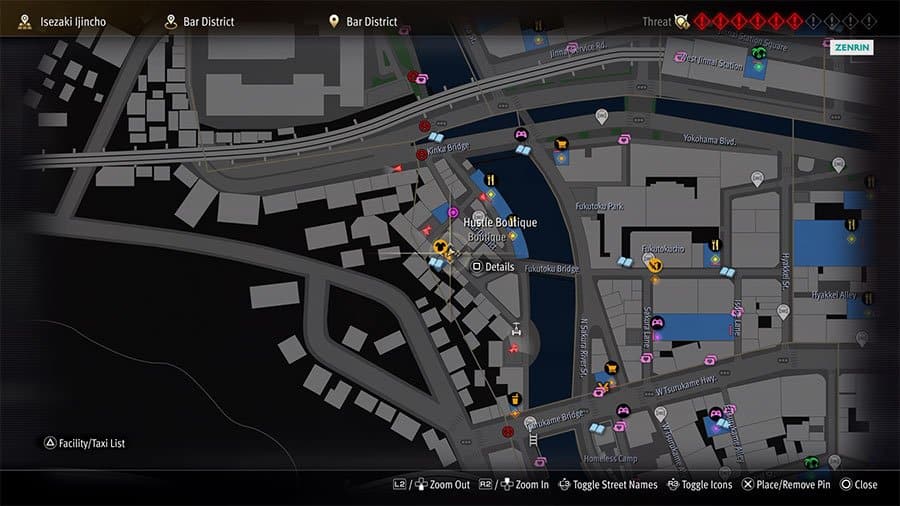
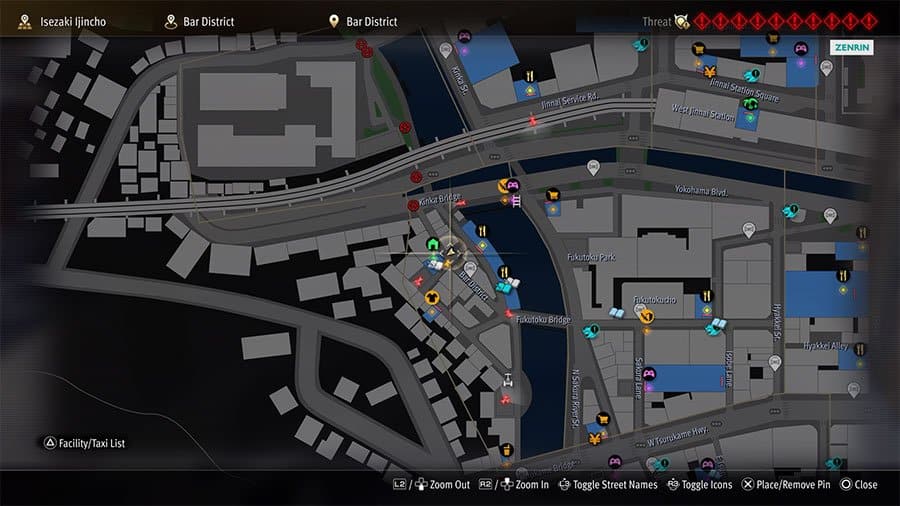
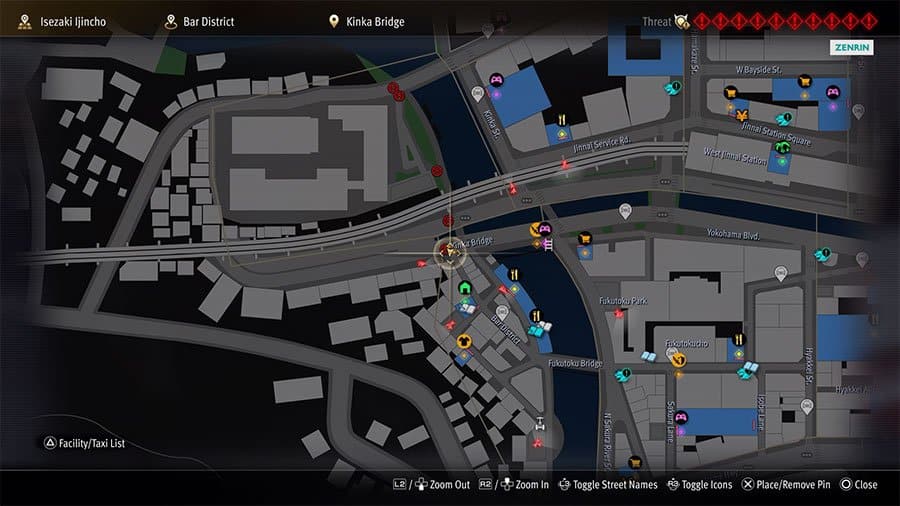
[line style=’solid’ top=’10’ bottom=’10’ width=’100%’ height=’1′ color=’blue’] The Bar District is the first section of the Yokohama Photo Rally challenges. This one is shorter, with only 10 objective locations instead of the typical 15. You can unlock the Bar District Photo Rally challenges by reaching Chapter 8 in the story and completing the first couple of story missions. You are rewarded with a Boom Bag weapon for completing these challenges. [accordion initial=’1′] [accordion_item title=’Bar District’]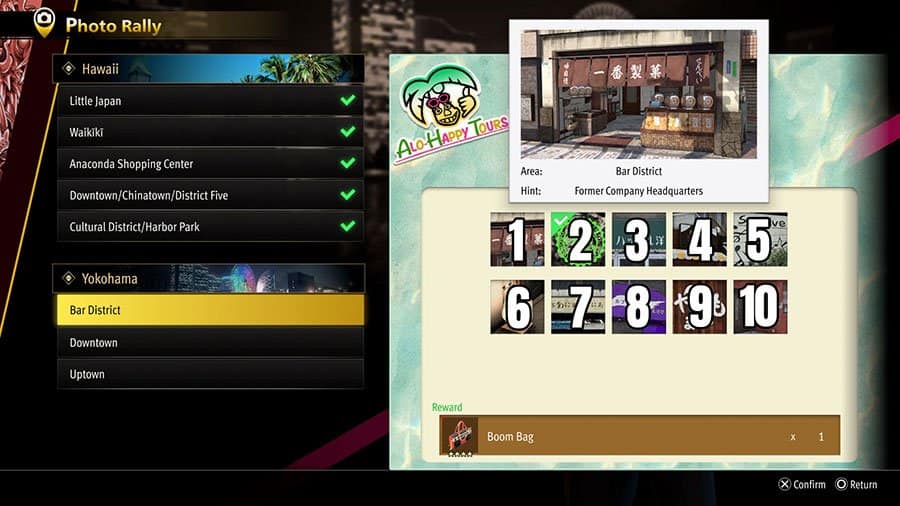
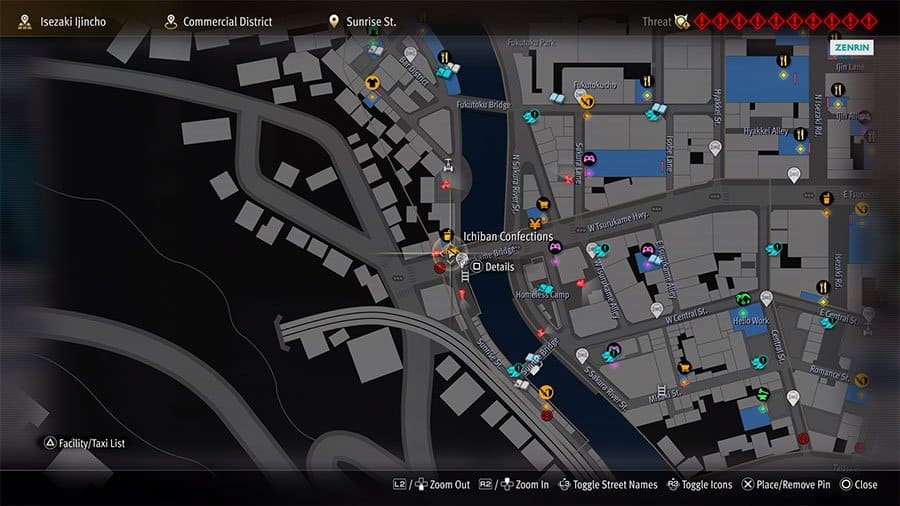
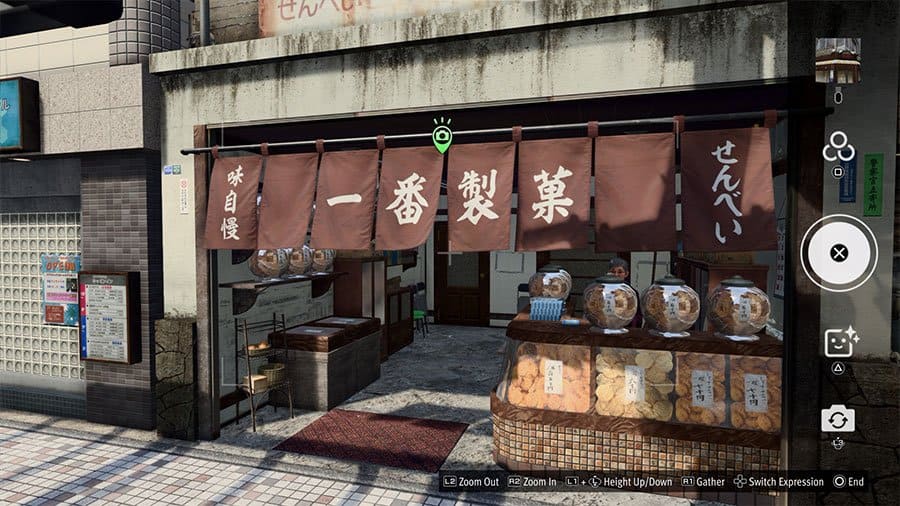
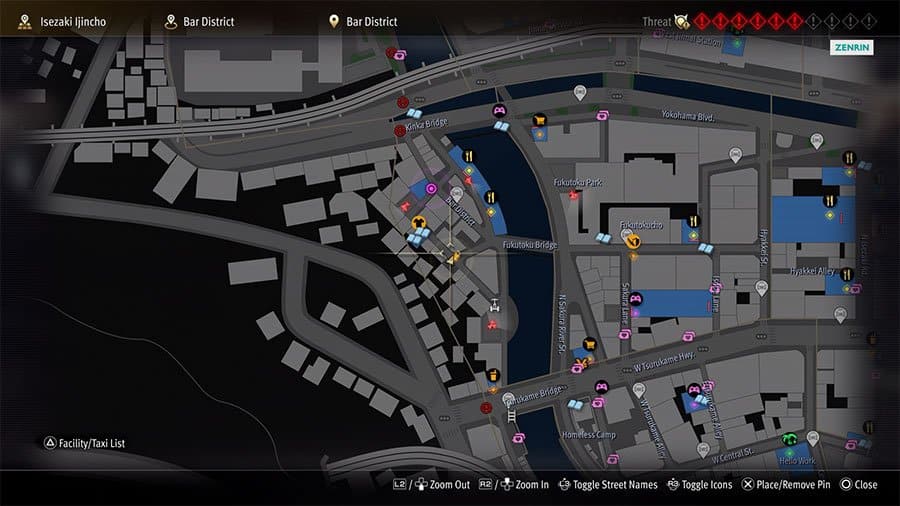
1: Former Company Headquarters (Bar District)
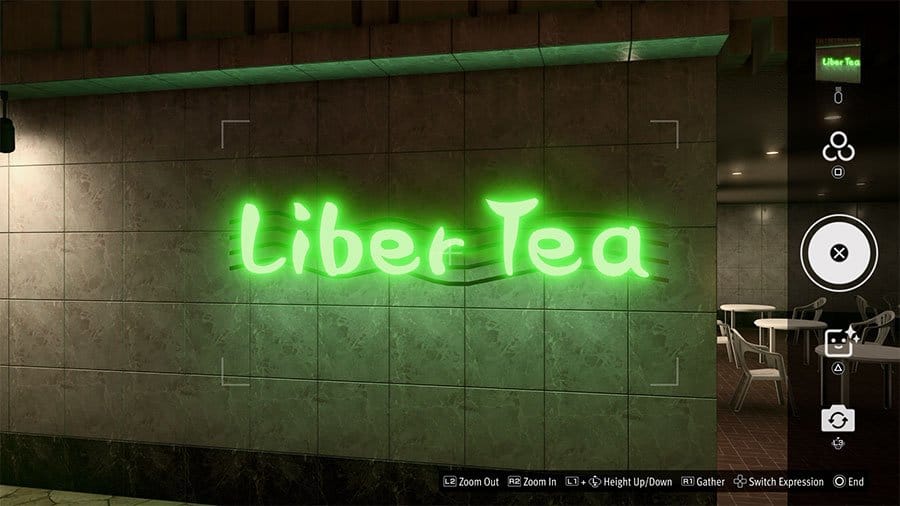
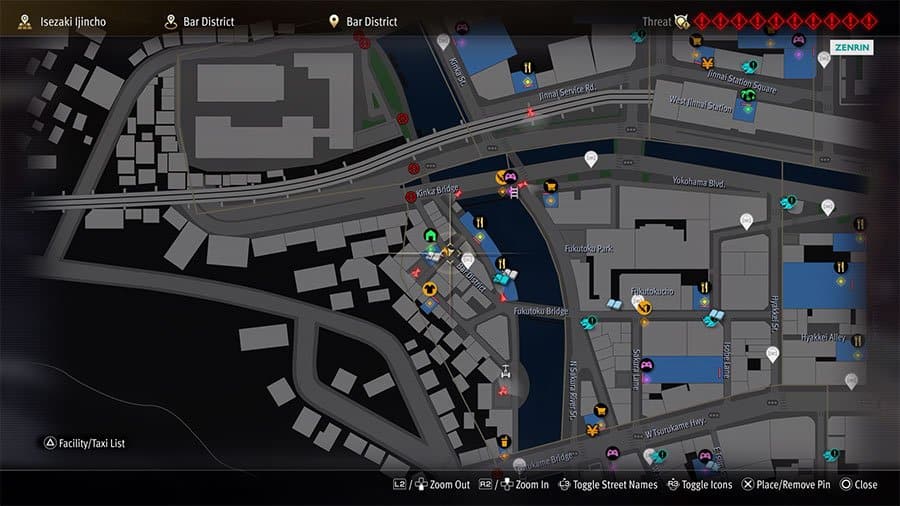
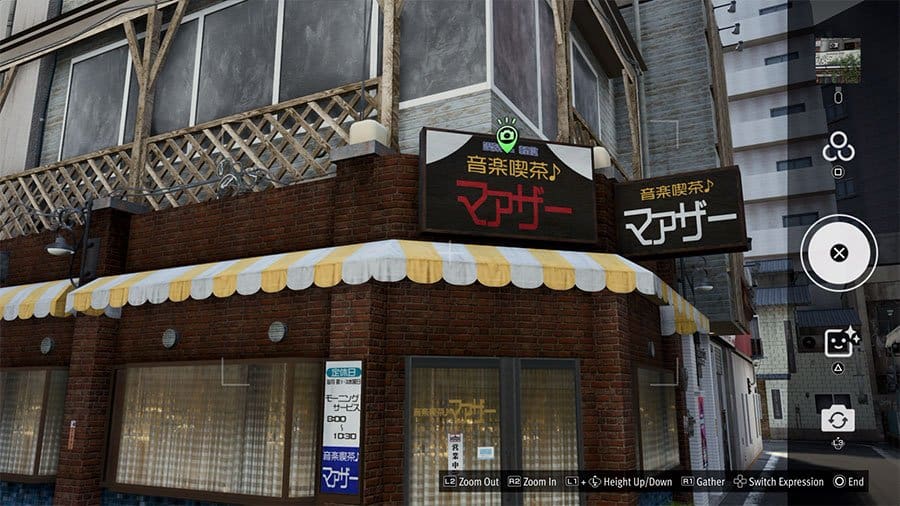
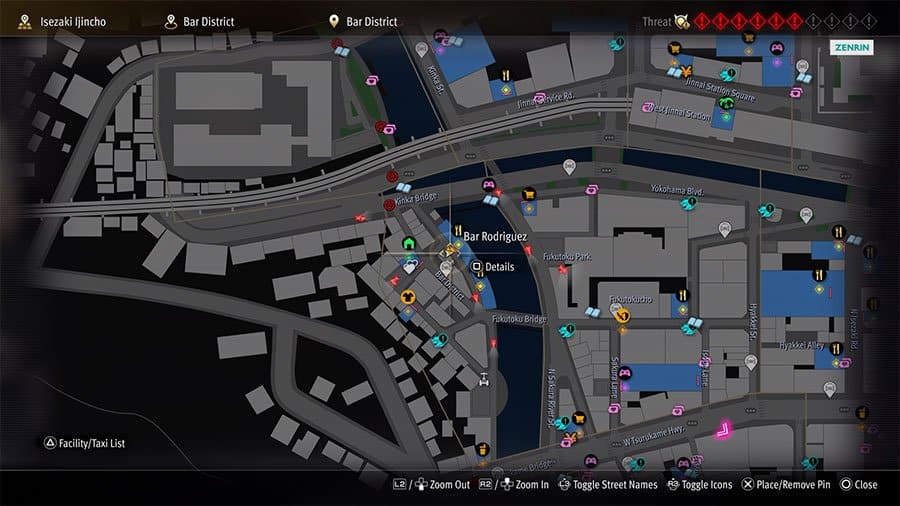
2: Leda (Bar District)
3: Trendy Clothing Shop (Bar District)

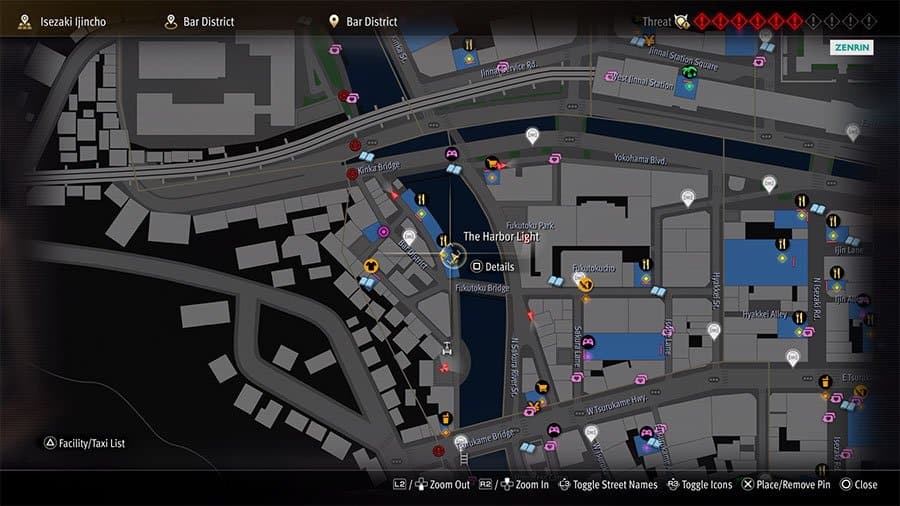
4: Cafe Near A Local Hangout (Bar District)
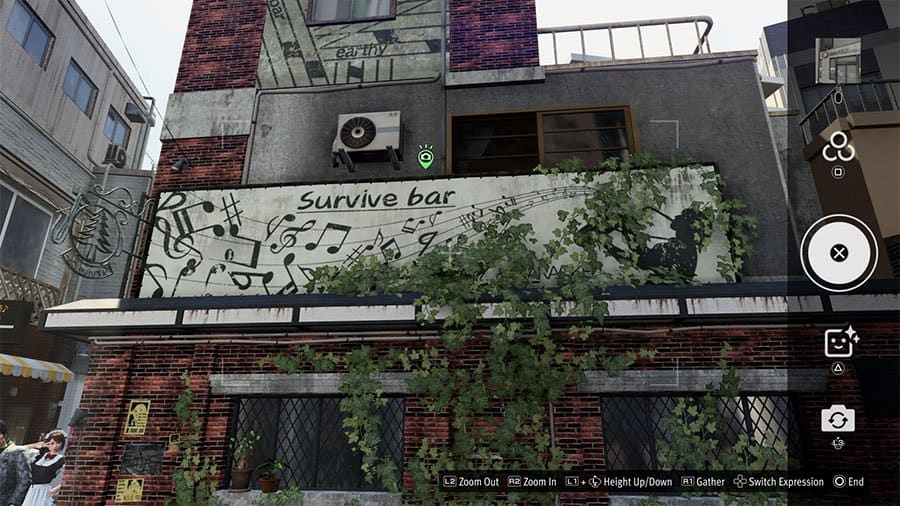
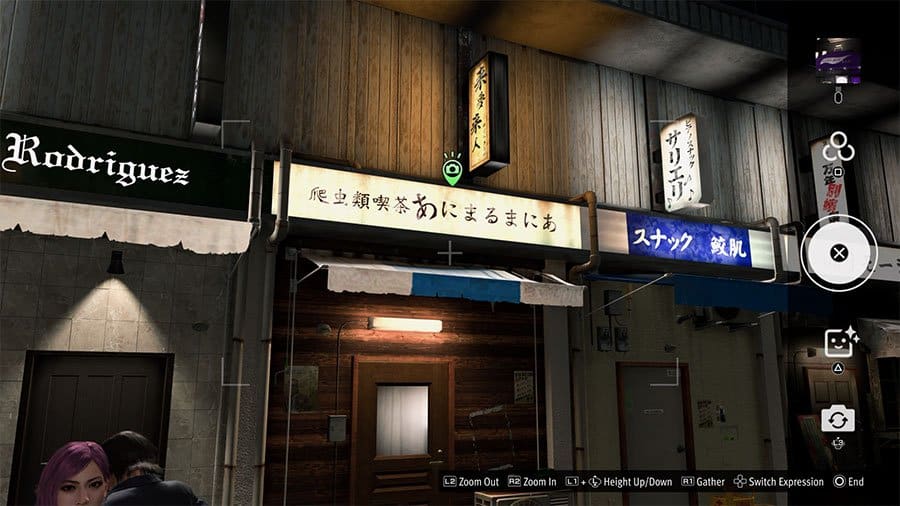
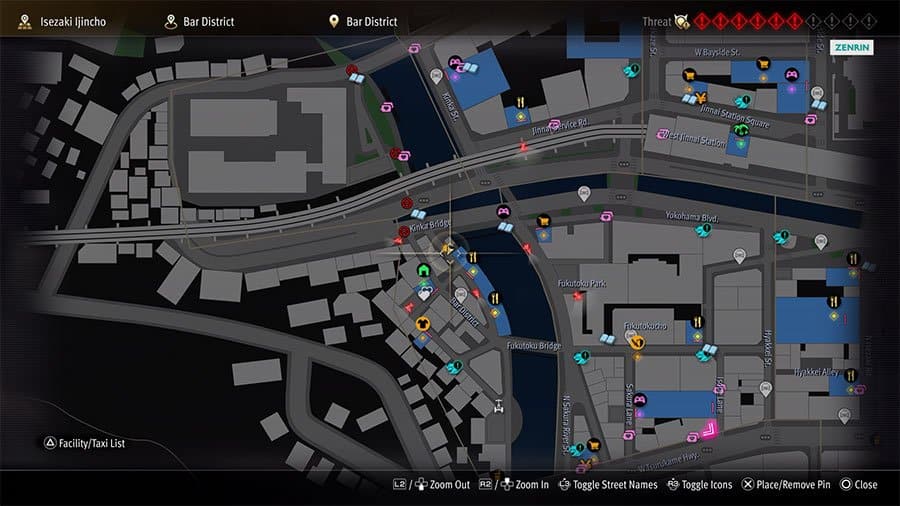
5: Popular Bar And Hangout Spot (Bar District)
6: Bar District 2F (Bar District)

7: Shop Amid The Street Downtown (Bar District)
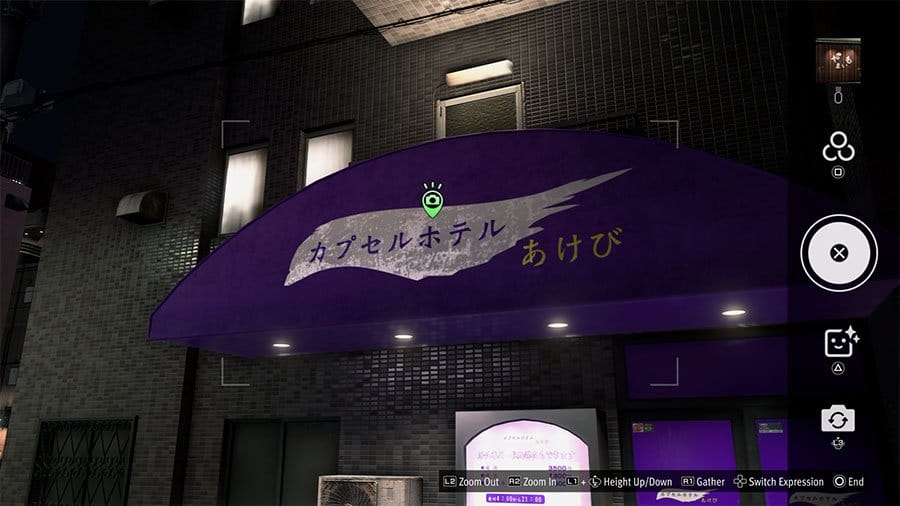
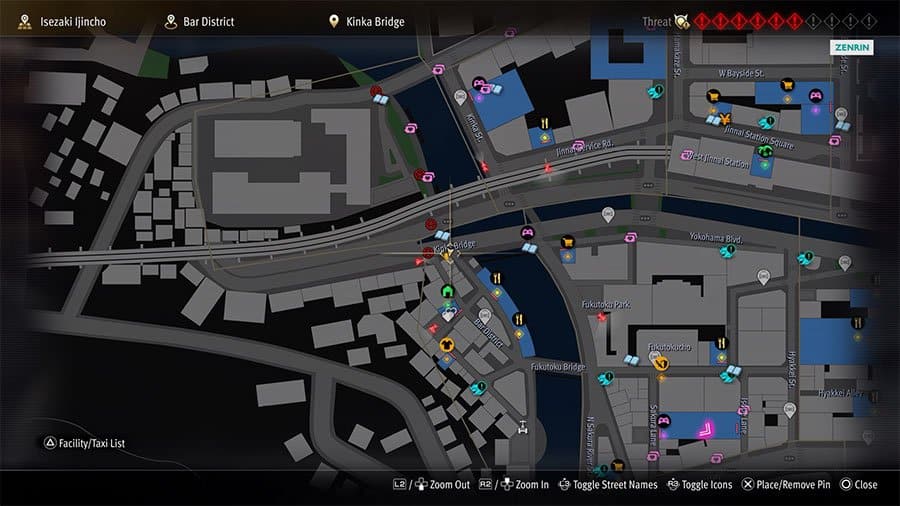
8: Convenient Streetside Hotel (Bar District)
9: Local Izakaya (Bar District)
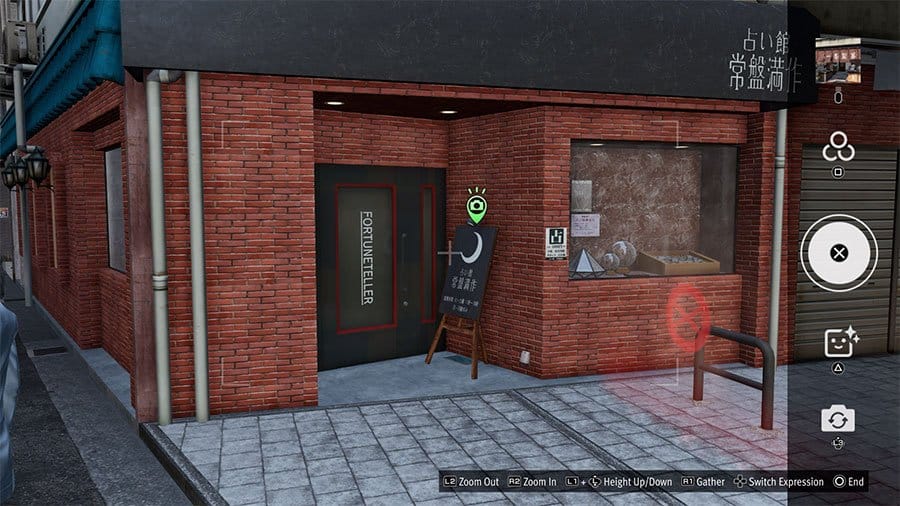
10: Street Corner Psychic (Bar District)
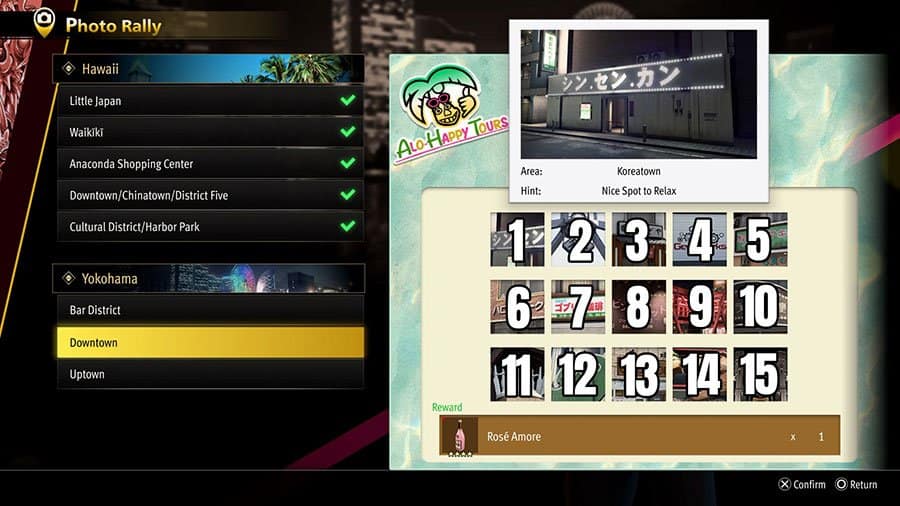
Downtown Photo Rally locations cannot be completed until Chapter 8. At the start of Chapter 8 you are returned to Yokohama with Kiryu and friends. After the first couple of story objectives there, you will unlock these Photo Rally locations. This rewards you with Rose Amore weapon.
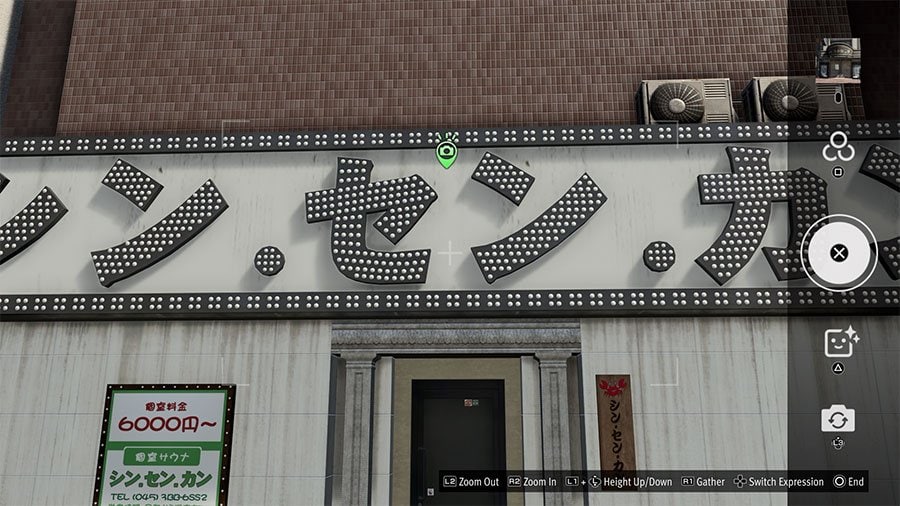
1: Nice Spot To Relax (Koreatown)
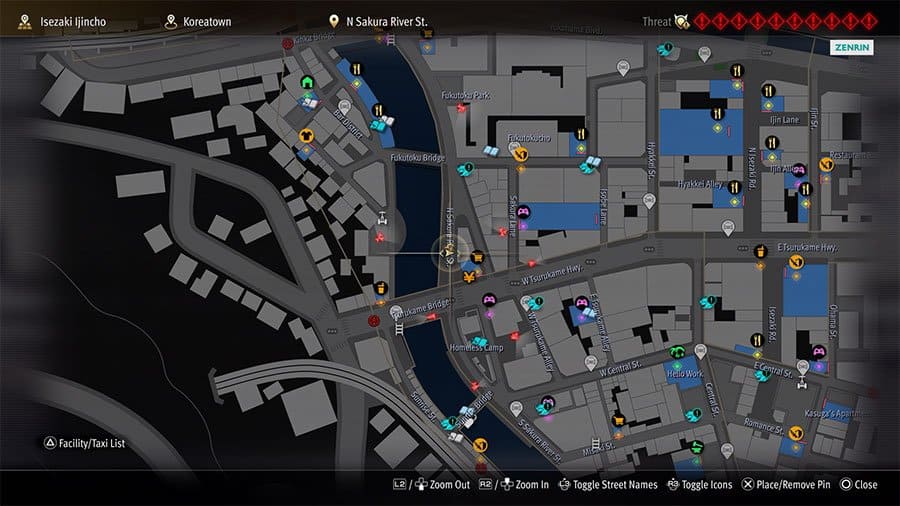
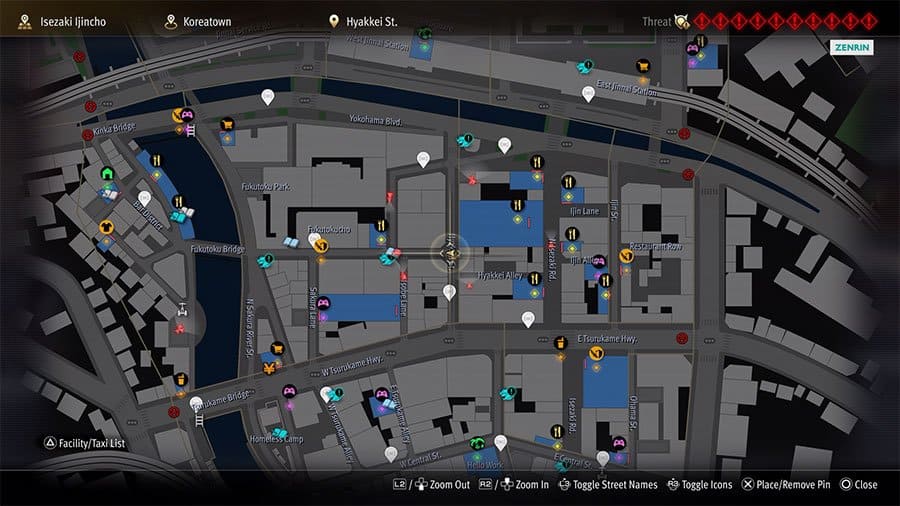
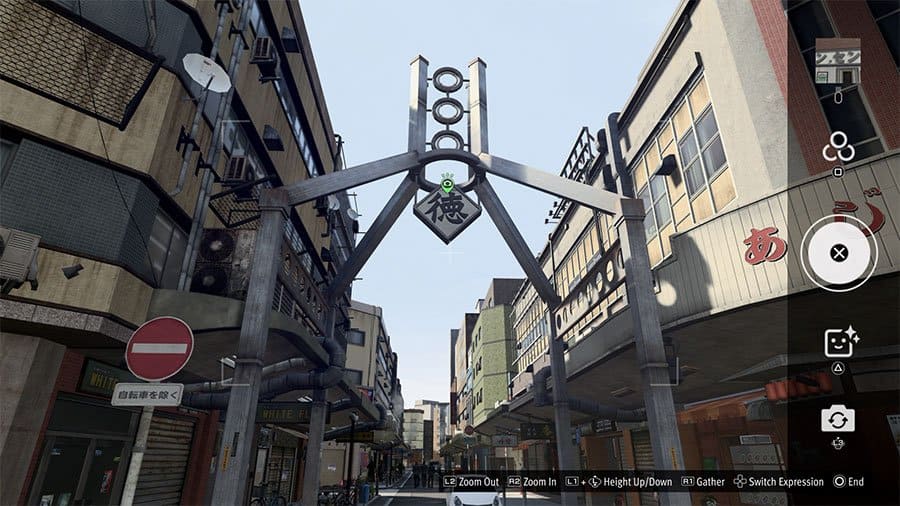
2: Street Archway Sculpture (Koreatown)
3: Local Izakaya (Koreatown)
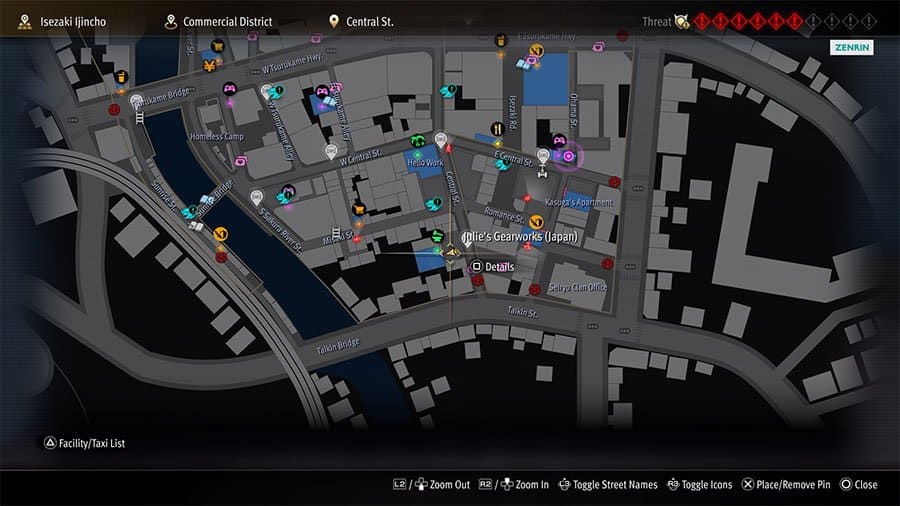
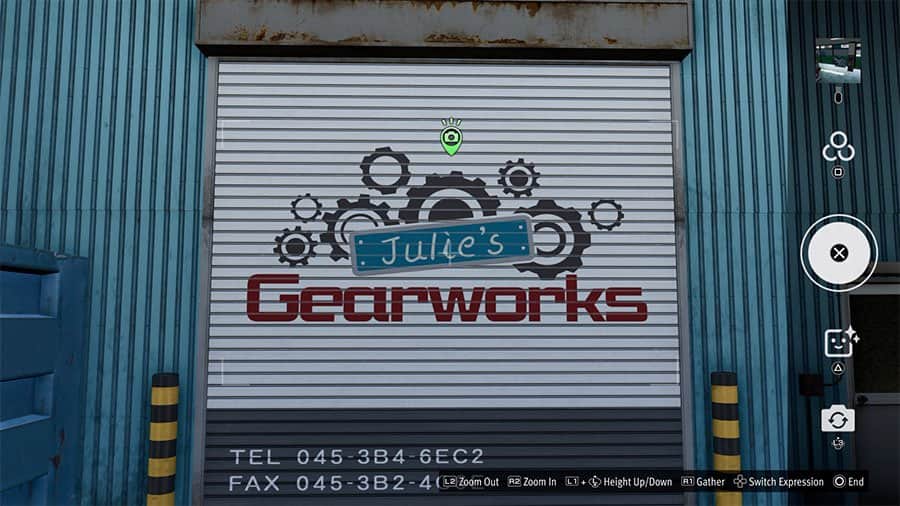
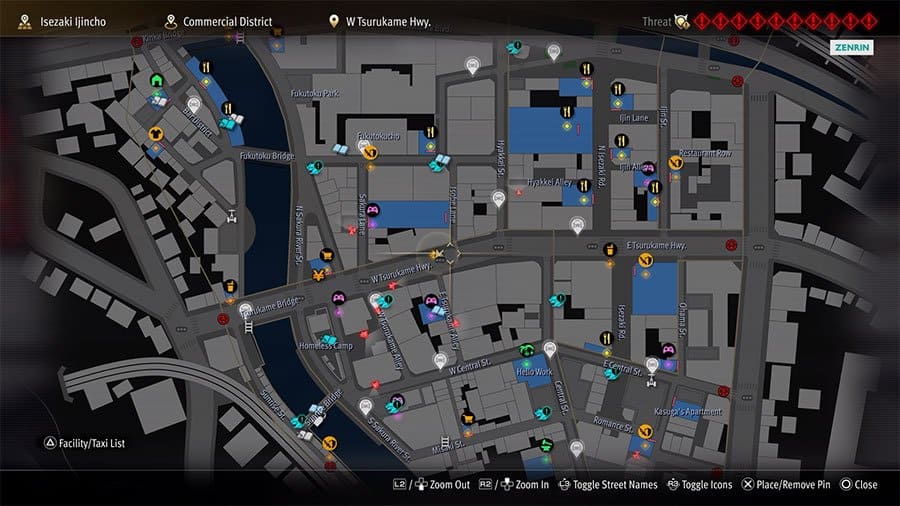
4: Recently Rebranded Workshop (Commercial District)
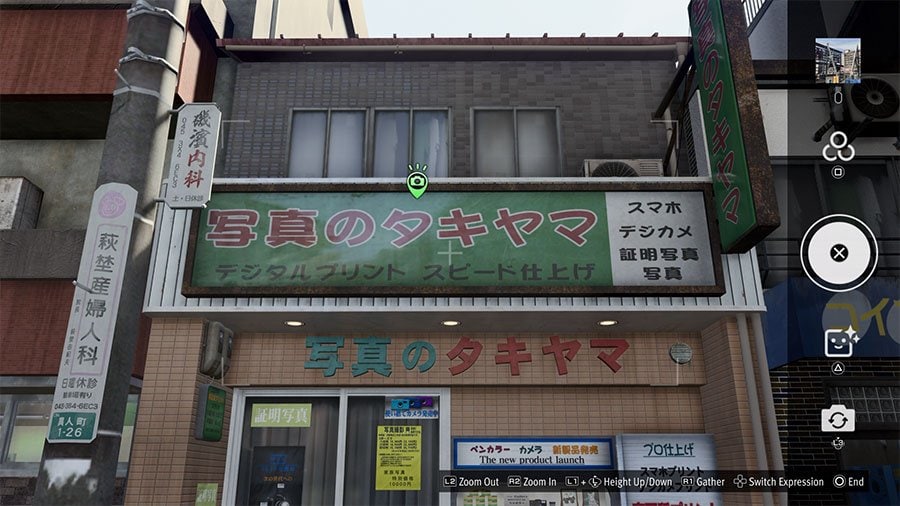
5: Photo Developer By Hello Work (Commercial District)
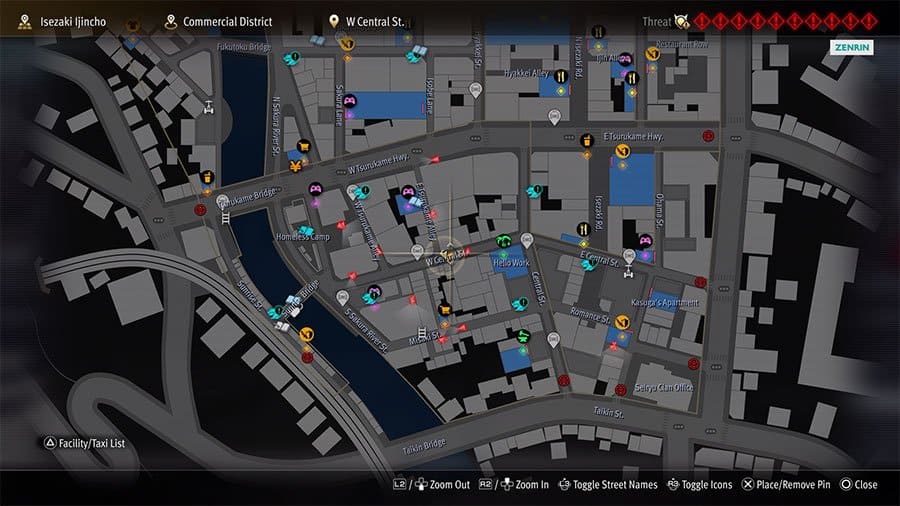
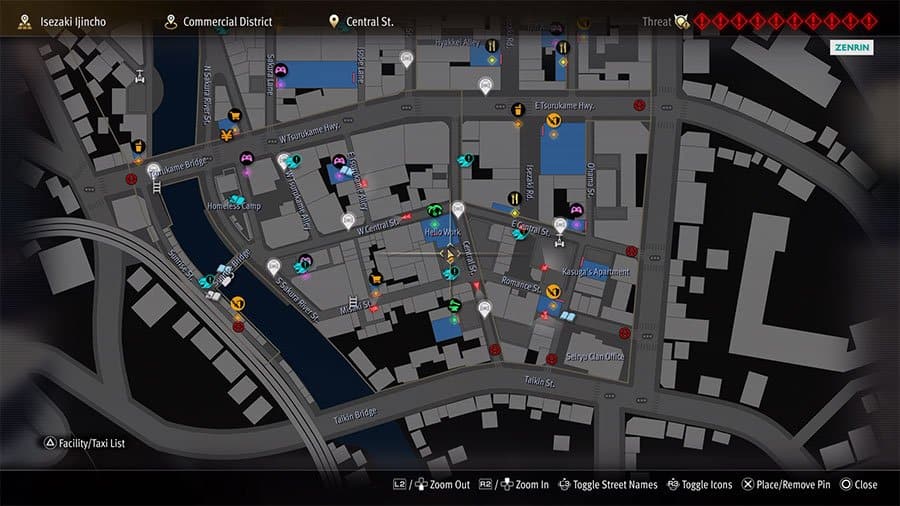
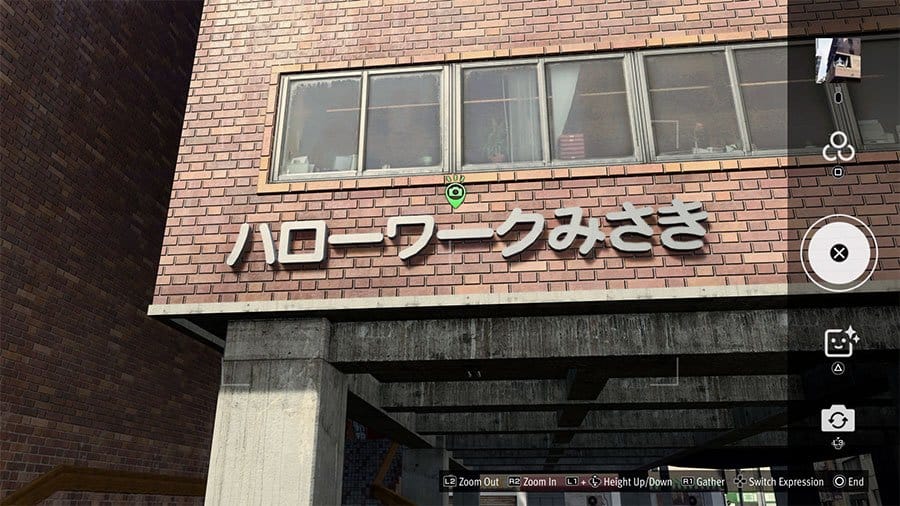
6: Employment Office of Yokohama (Commercial District)
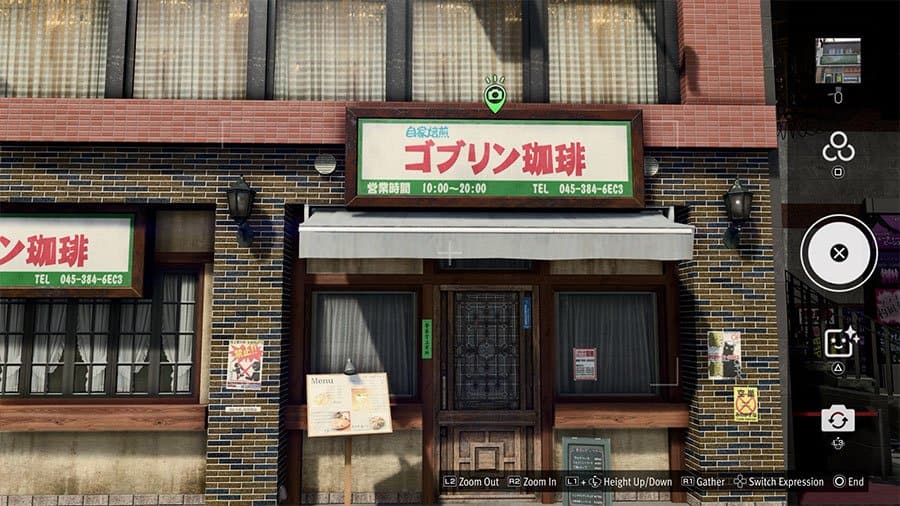
7: Cafe On Main Street (Commercial District)
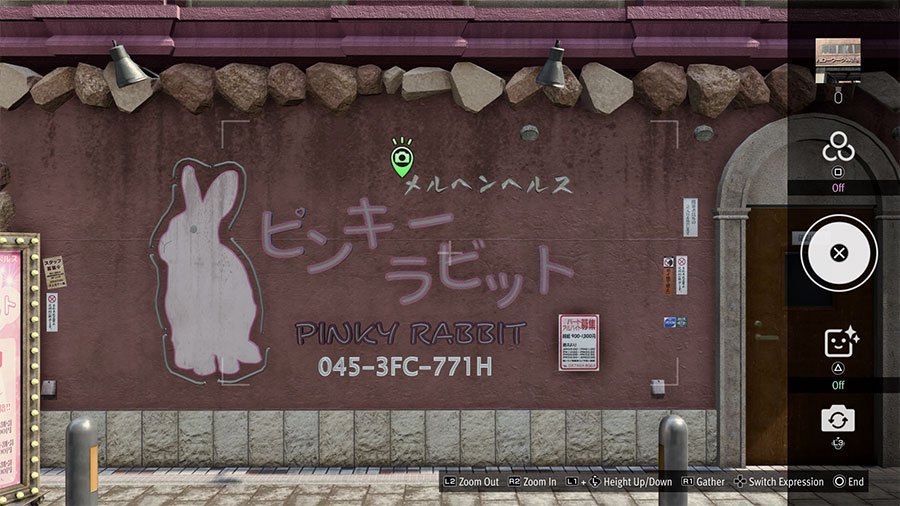
8: Rose-Colored Corner Store (Red Light District)
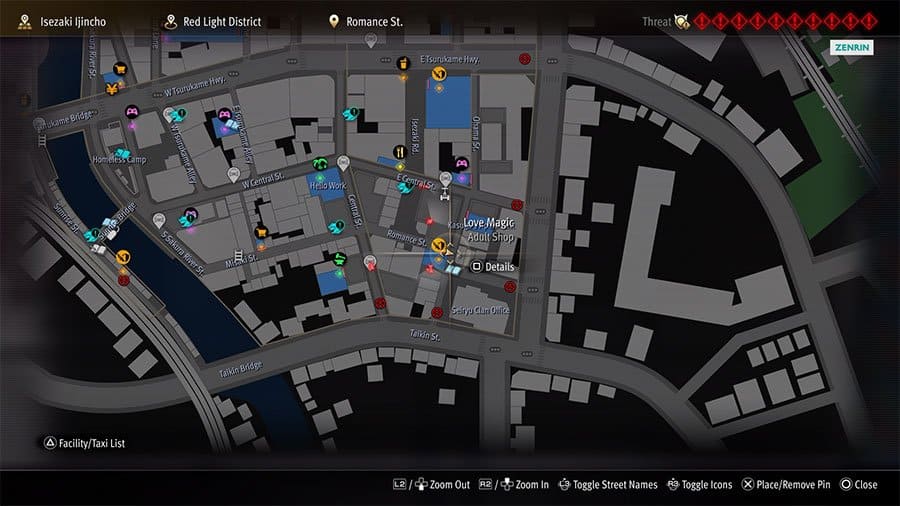
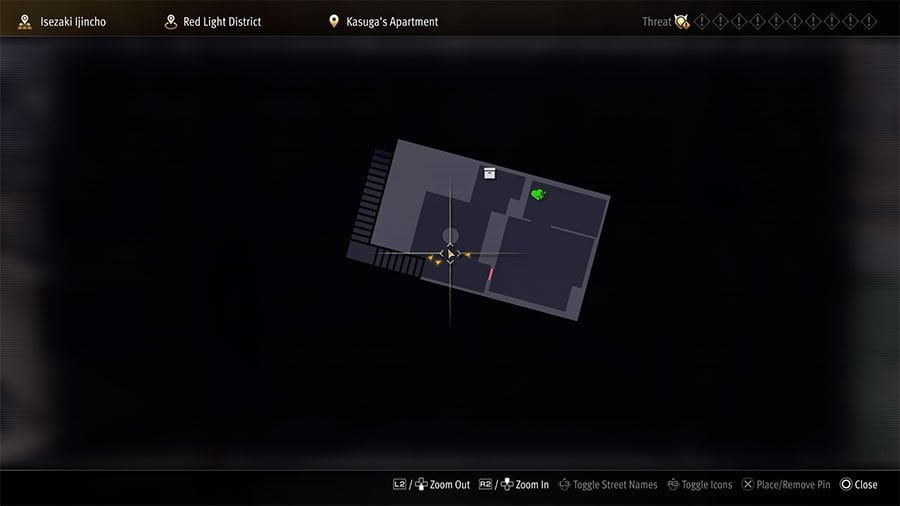
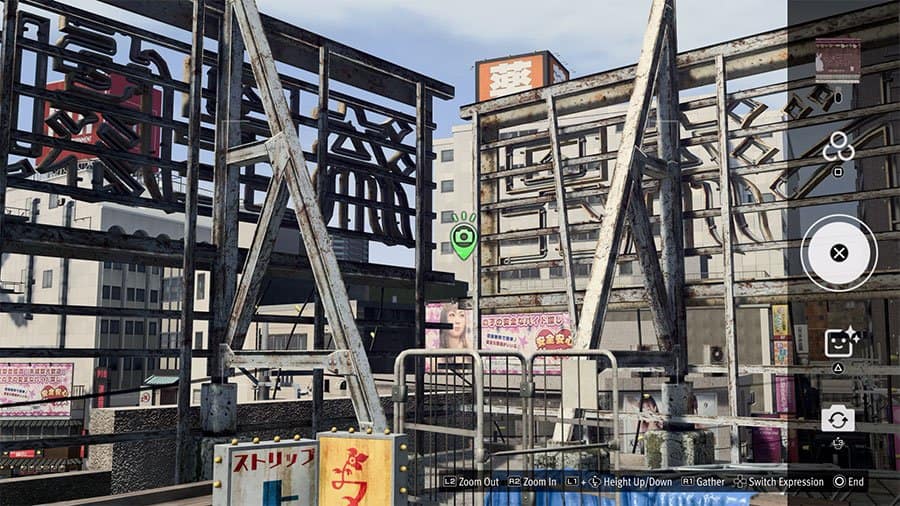
9: Local Theater’s Rooftop View (Red Light District)
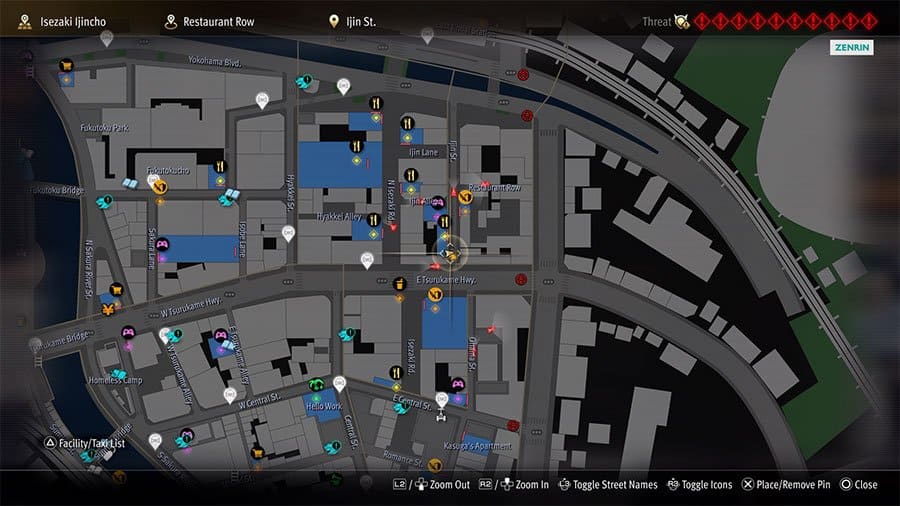
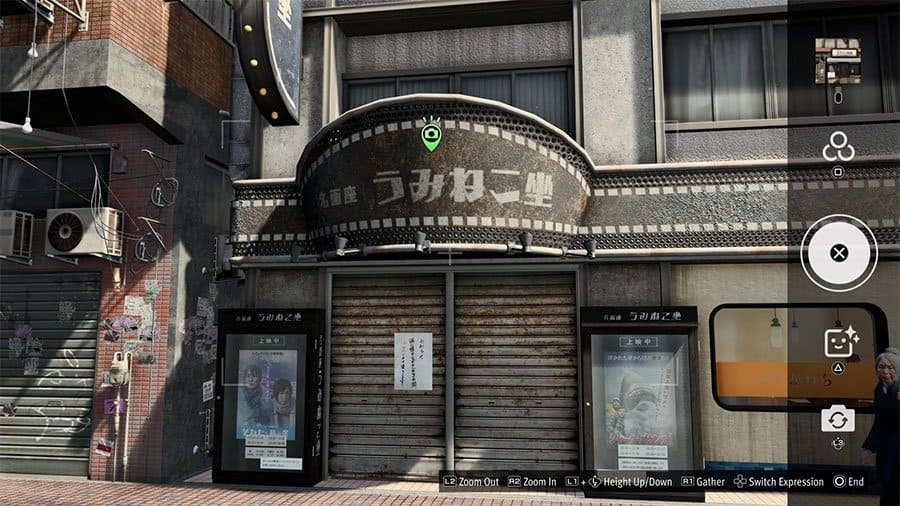
10: Currently Closed Movie Theater (Restaurant Row)
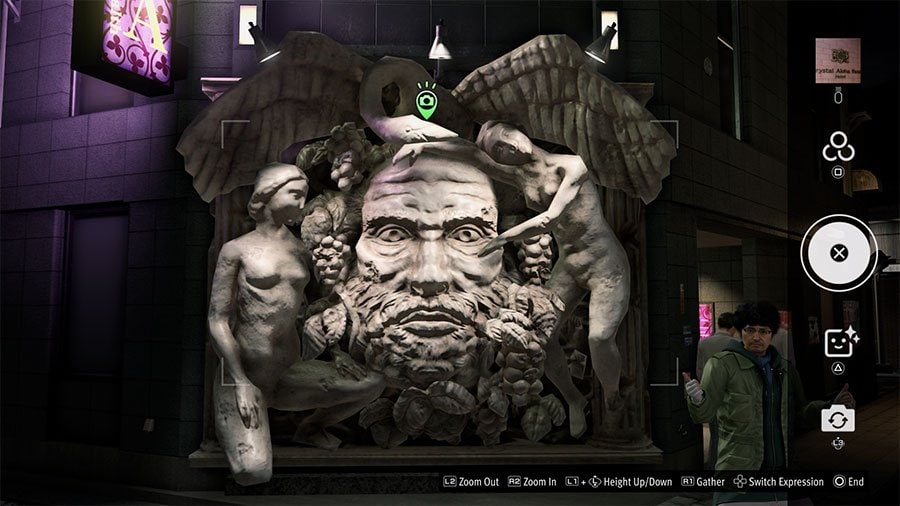
11: Street Corner Sculpture (Isezaki Road)
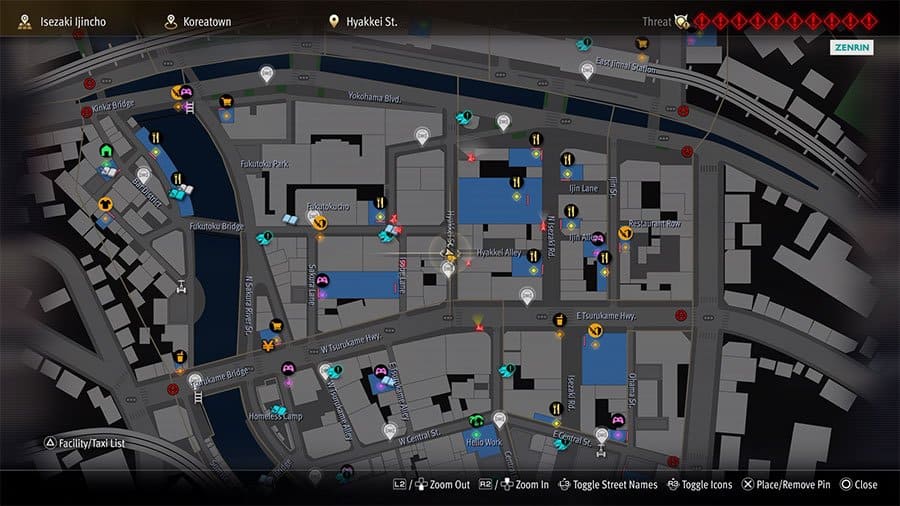

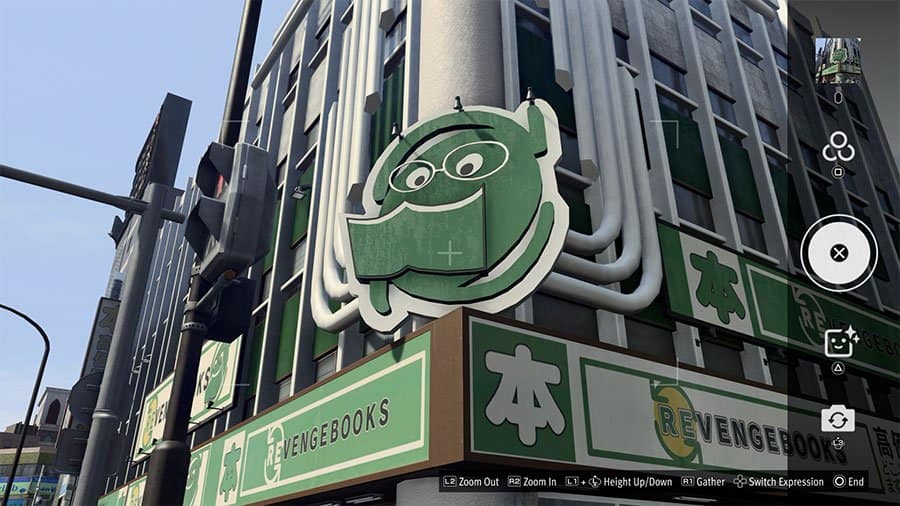
12: Mascot Of A Franchise Bookseller (Isezaki Road)
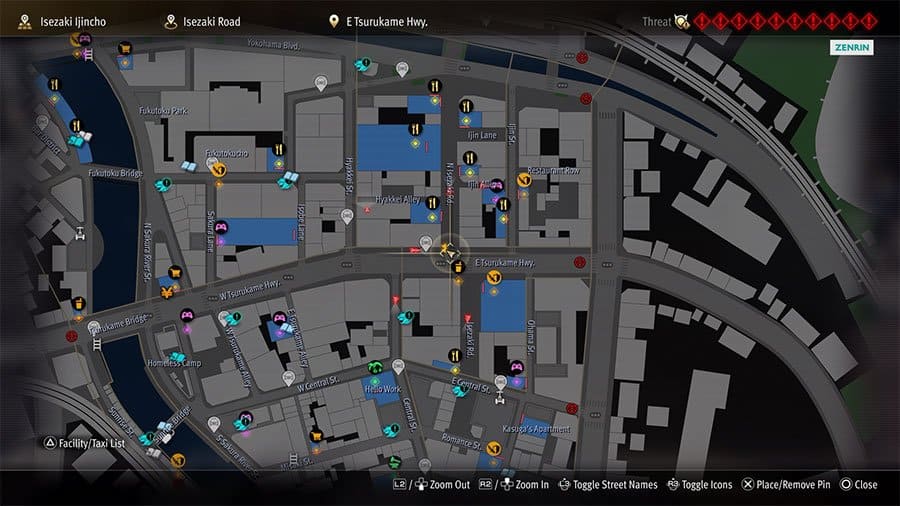
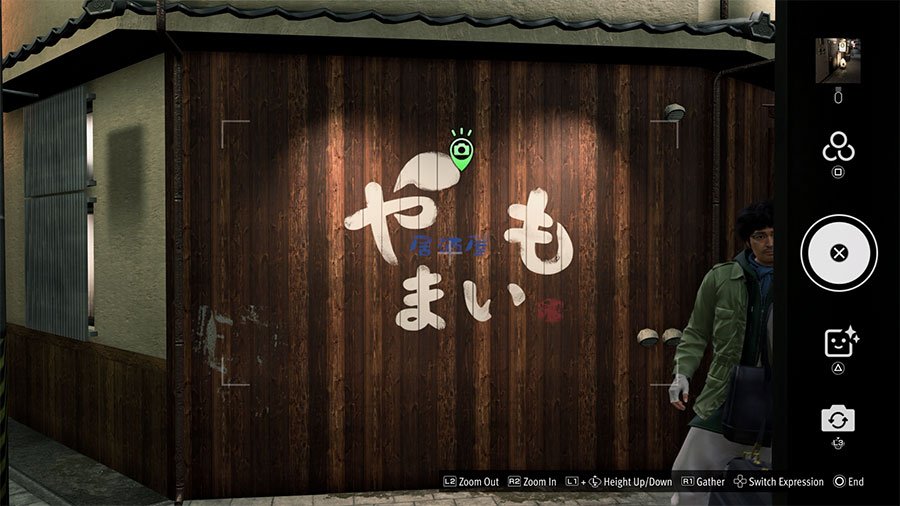
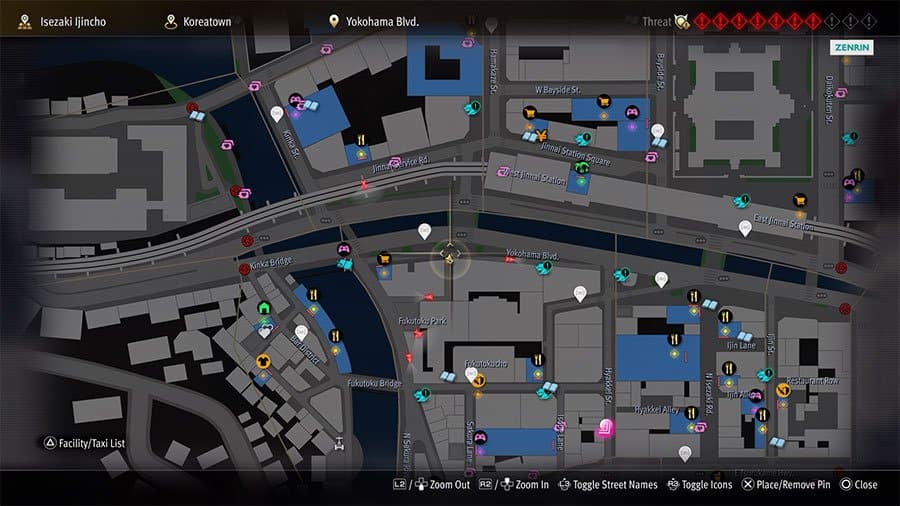
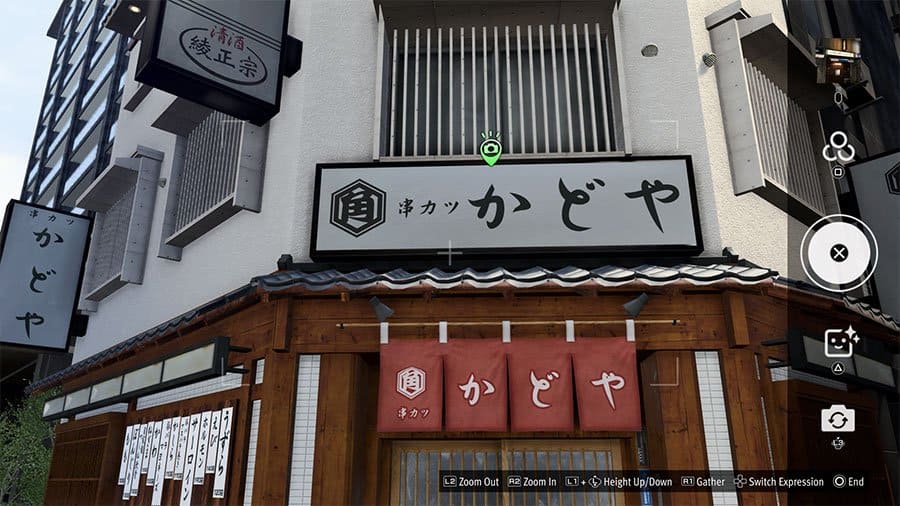
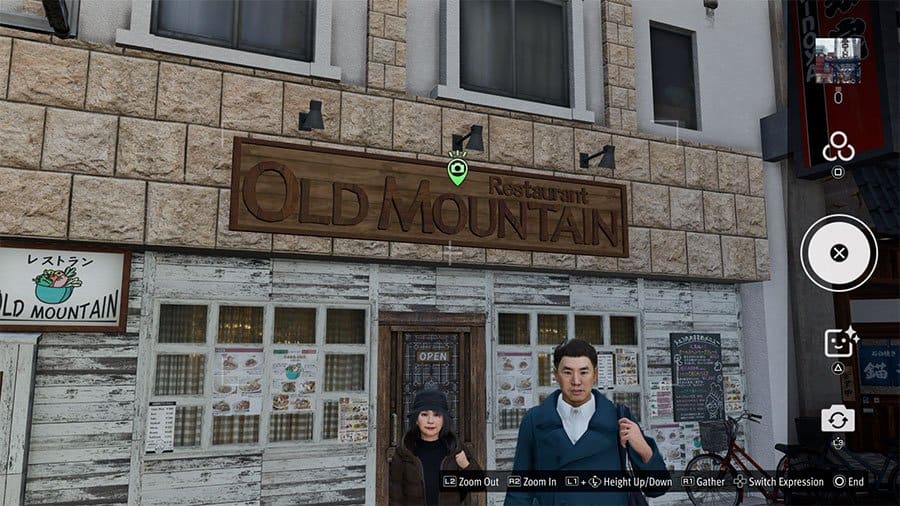
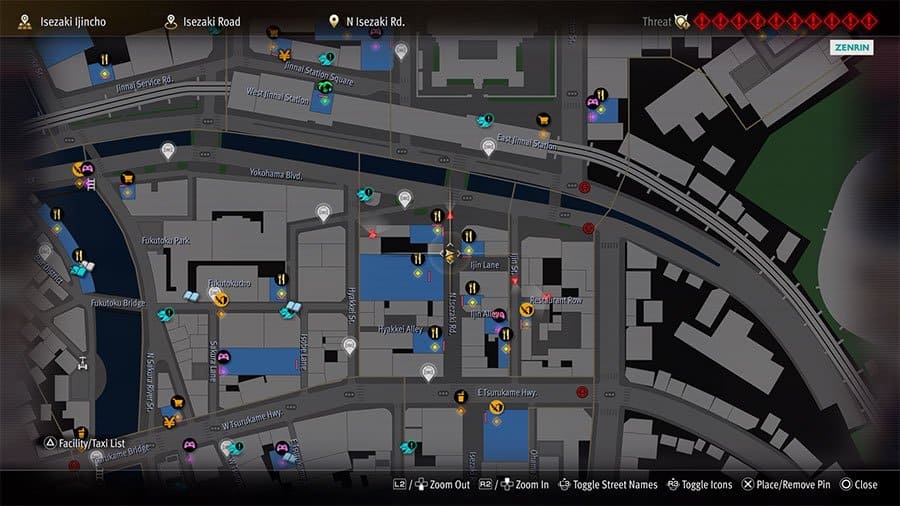
13: Rustic Streetside Restaurant (Isezaki Road)
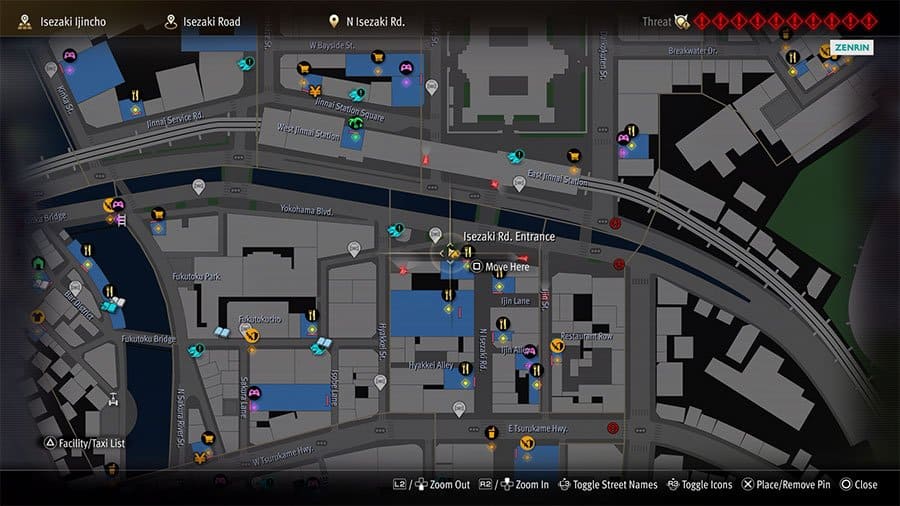
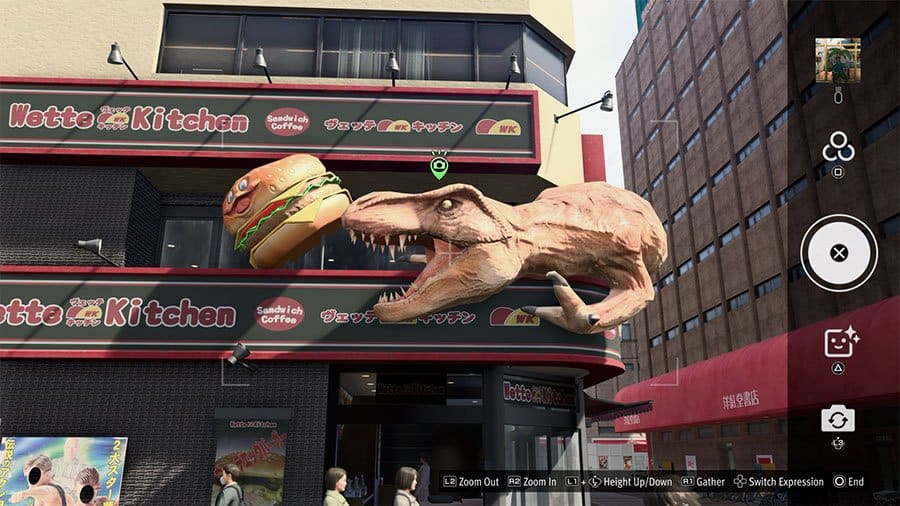
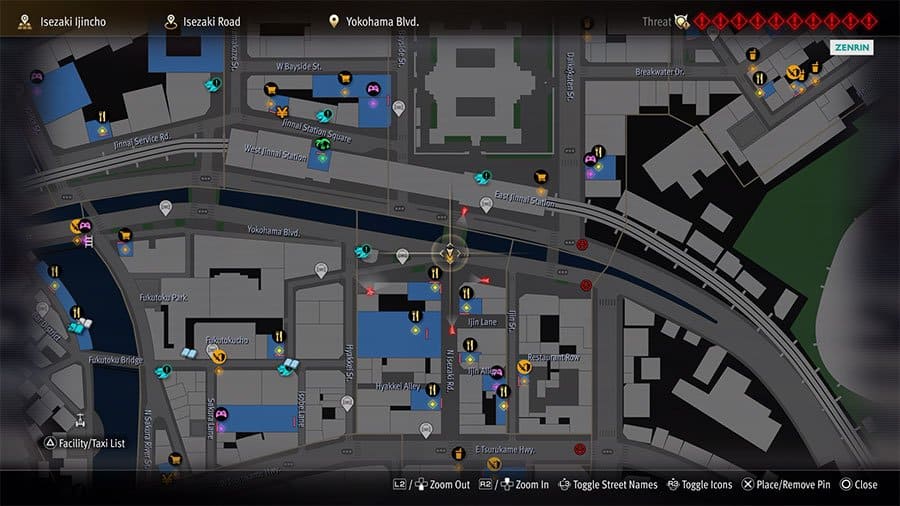
14: Mighty Fast Food Mascot (Isezaki Road)
15: Iconic Sign Of Isezaki Ijincho (Isezaki Road)


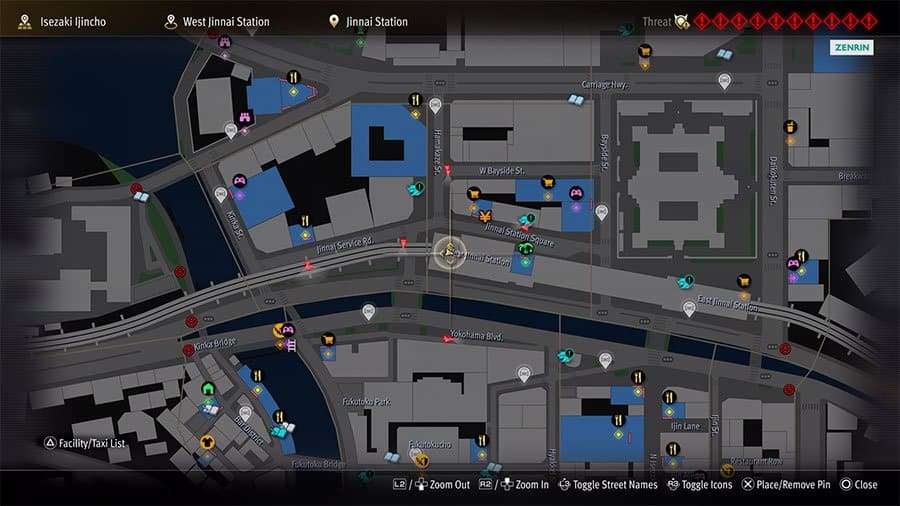
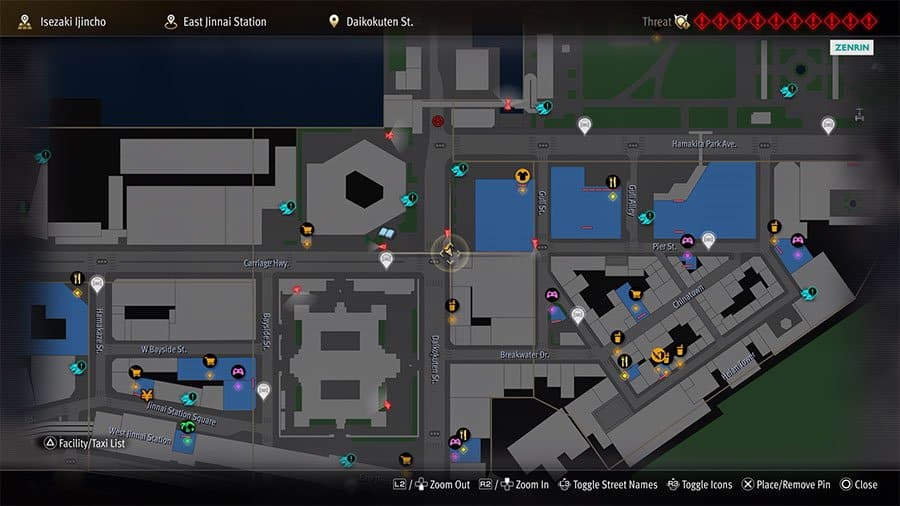
Uptown is one of the locations within Yokohama. You cannot complete these Photo Rally objectives until you reach Chapter 8 where the game sends you back to Yokohama to play as Kiryu and his party. Once you have followed the main story objectives in Chapter 8 for a short while, you will unlock a new series of Photo Rally objectives. You are rewarded with a Pancake Maker Weapon for completing this set of photographs.
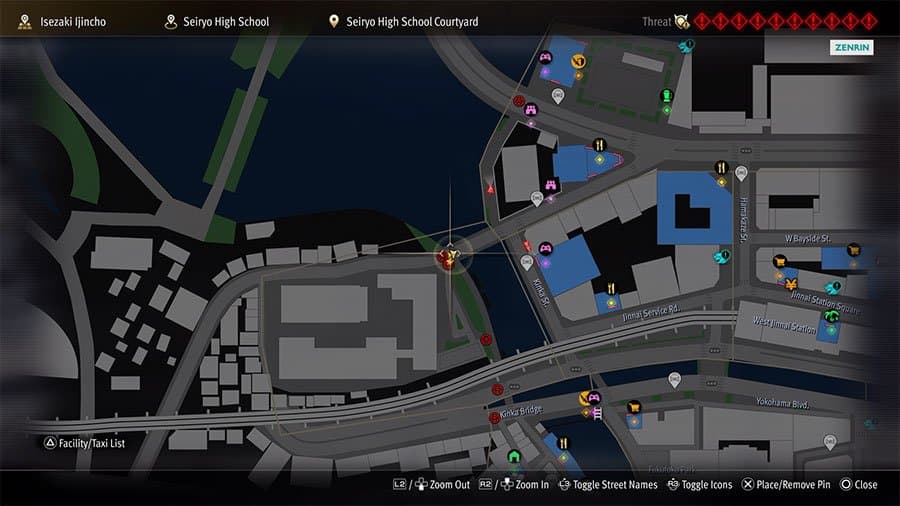
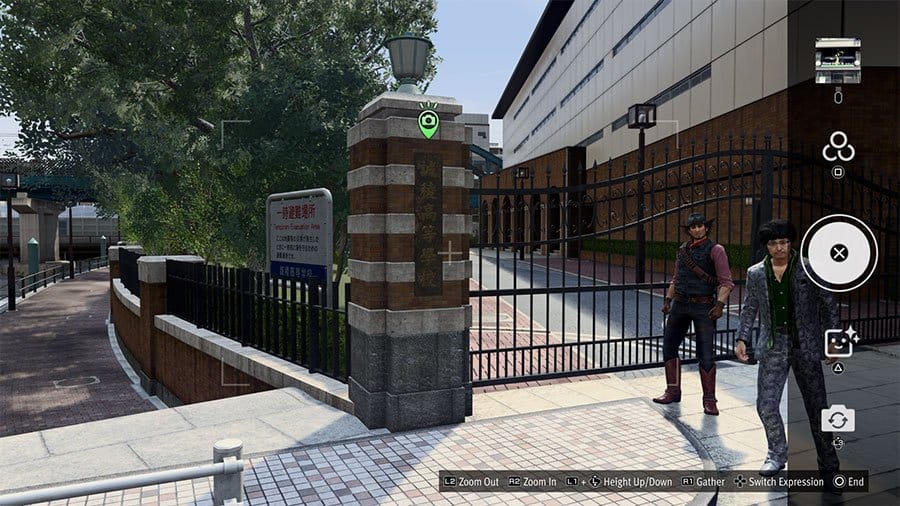
1: Entrance Of A Local High School (Seiryo High School)
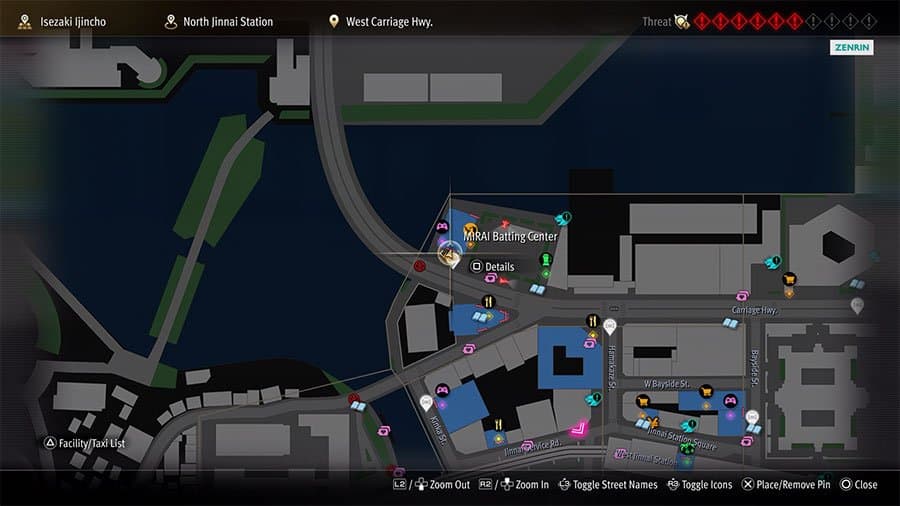
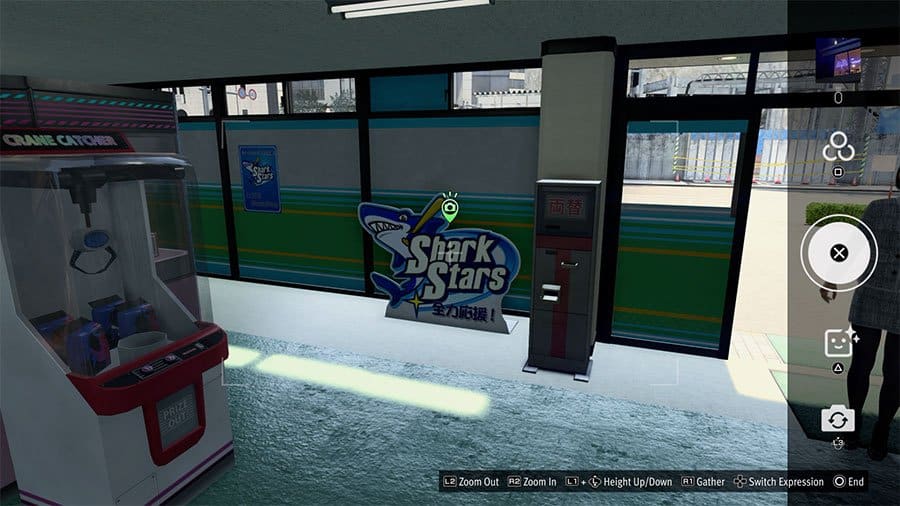
2: Logo Of A Golf Center (West Jinnai Station)
![]()
![]()
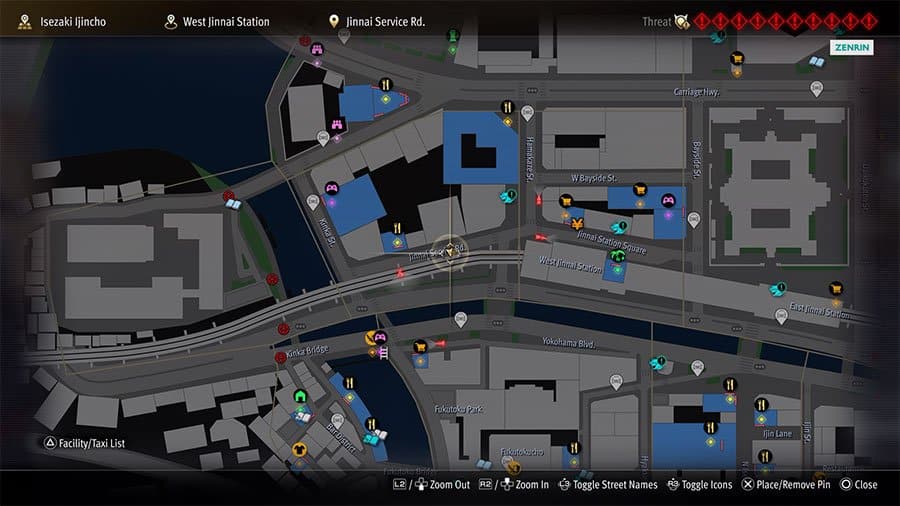
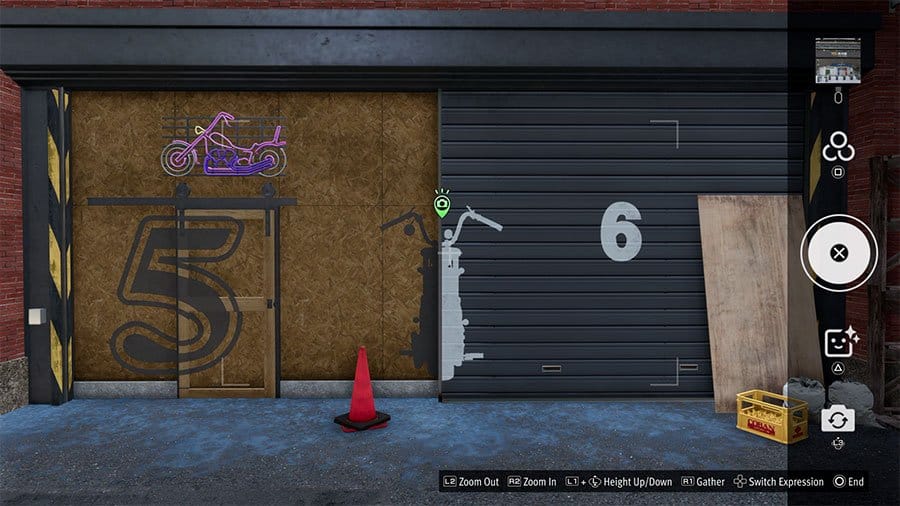
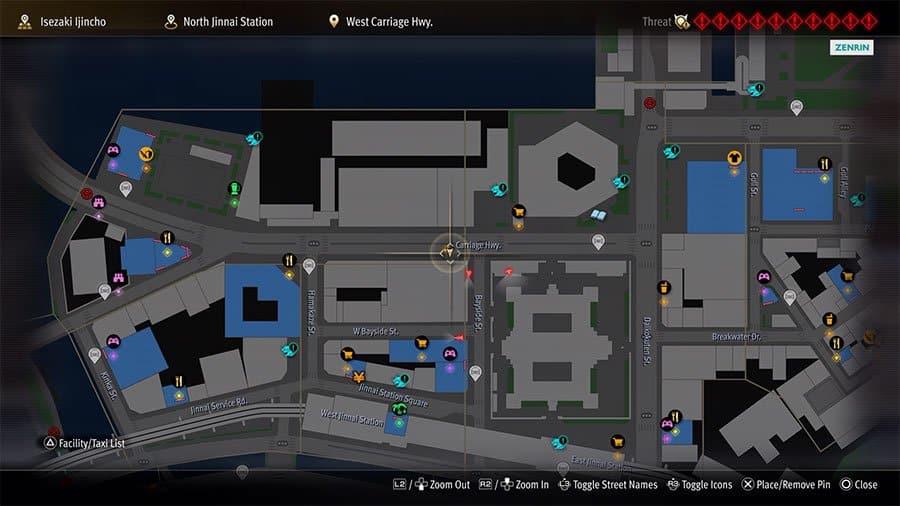
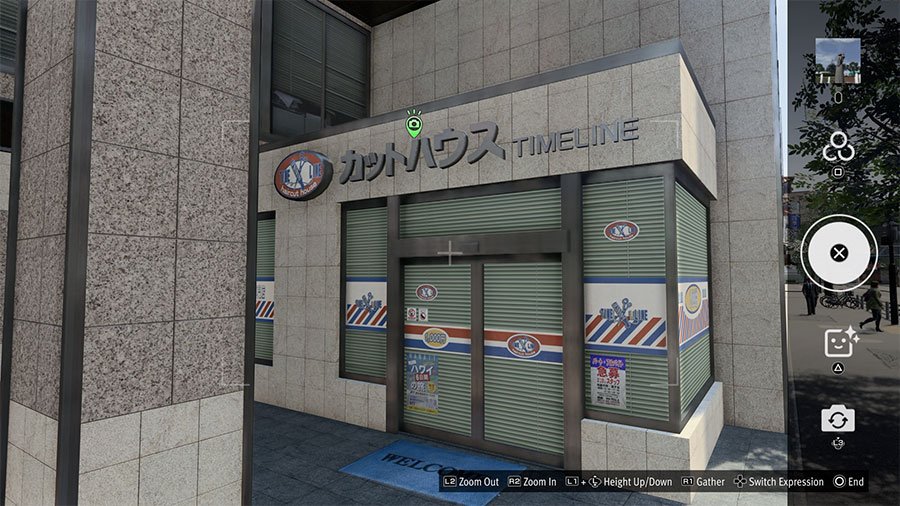
3: Shuttered Garage (West Jinnai Station)
4: Entrance Gate Sign (West Jinnai Station)
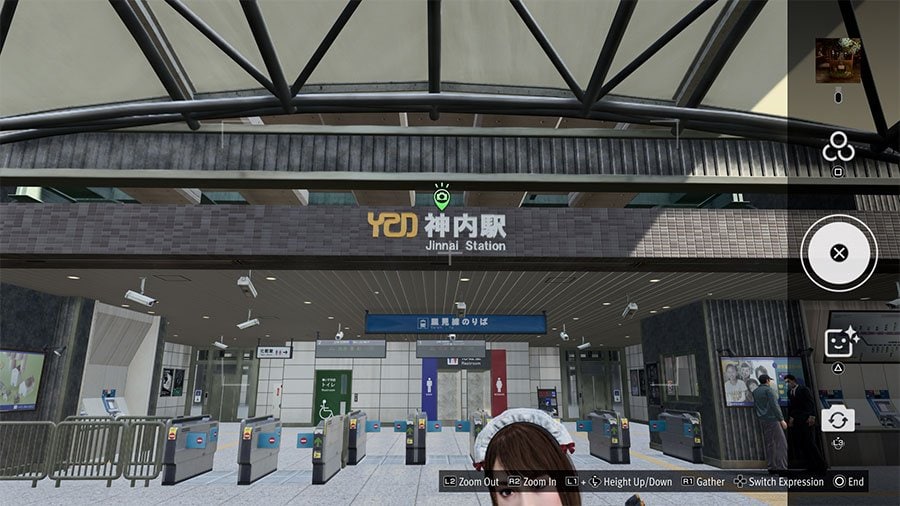
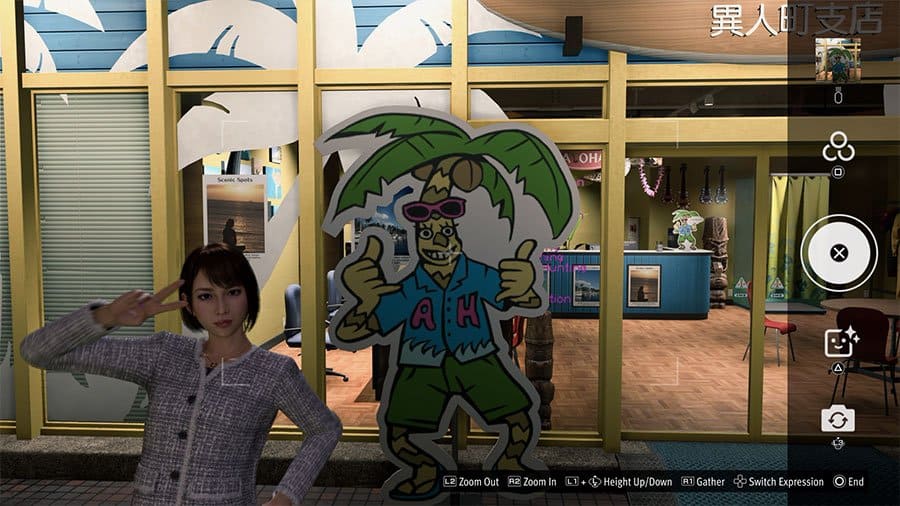
5: Alo-Happy Crosses Borders (Jinnai Station)
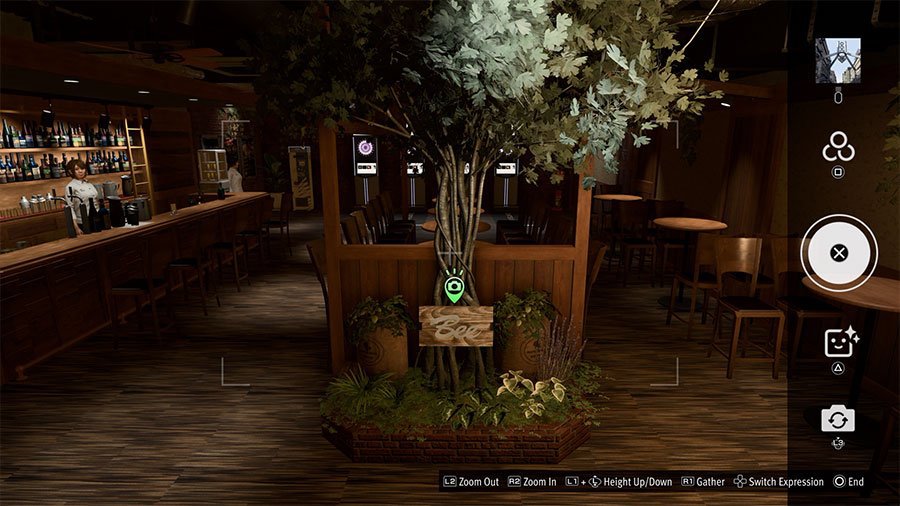
6: Inside The Bee (Jinnai Station)
7: Inside The Batting Center (North Jinnai Center)
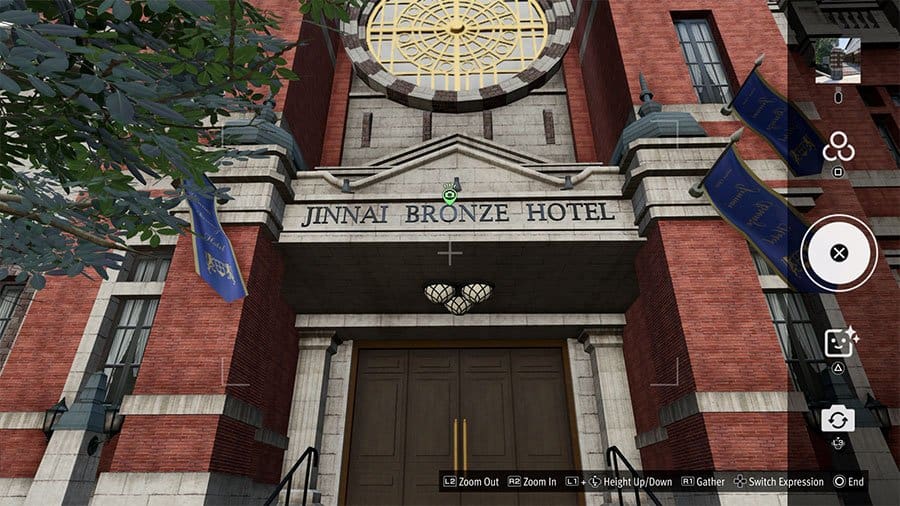
8: Face Of A Large Hotel (North Jinnai Center)
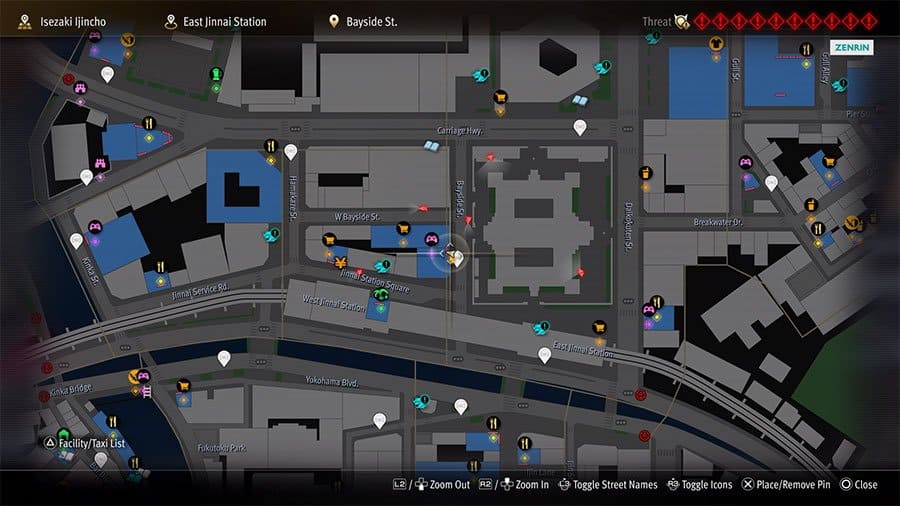
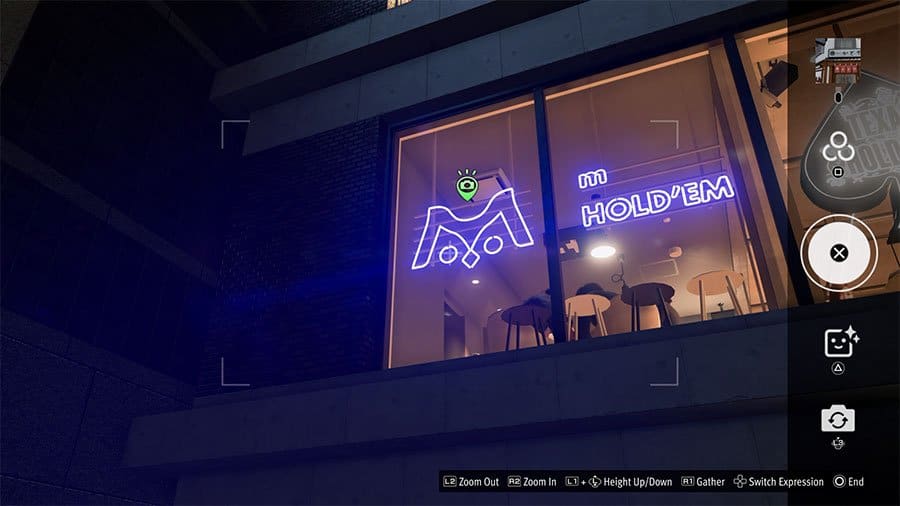
9: View Of A Poker Parlor (East Jinnai Station)

10: Large Cornerside Building (East Jinnai Station)
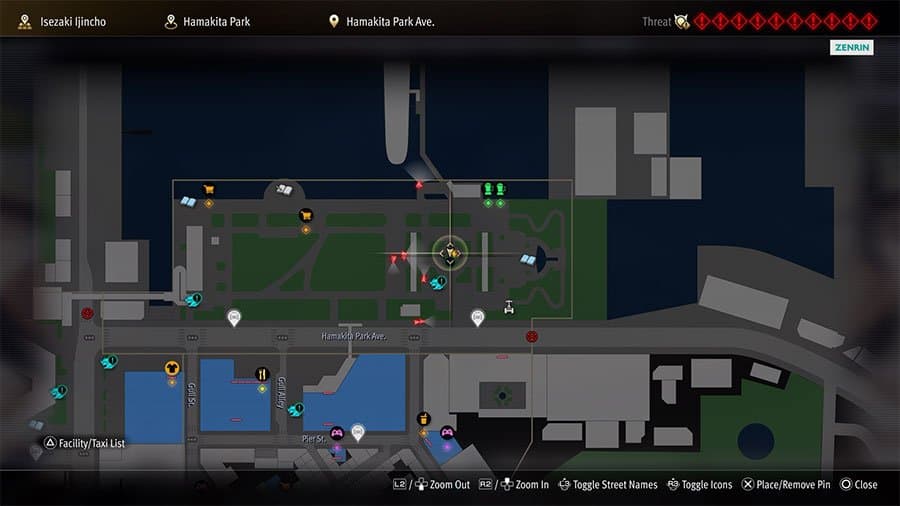
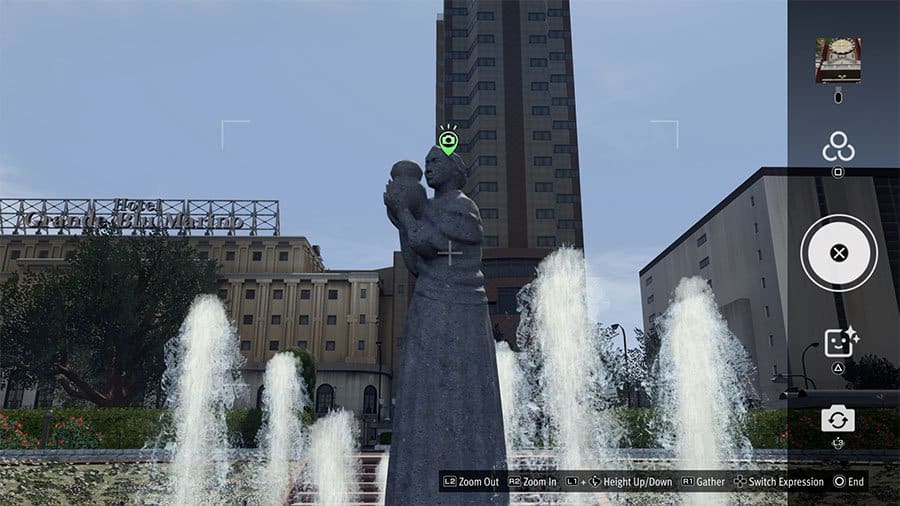
11: Statue In The Heart Of The Park (Hamakita Park)
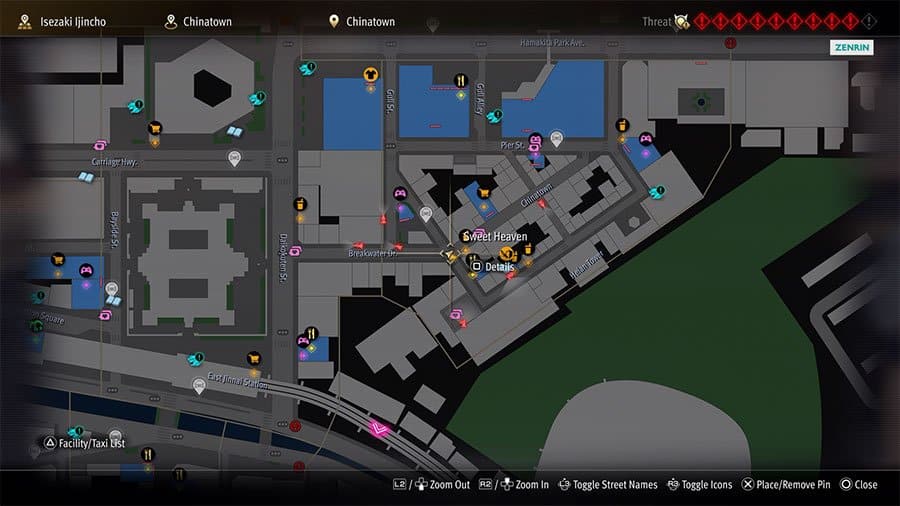
12: Chinatown Art Piece (Chinatown)
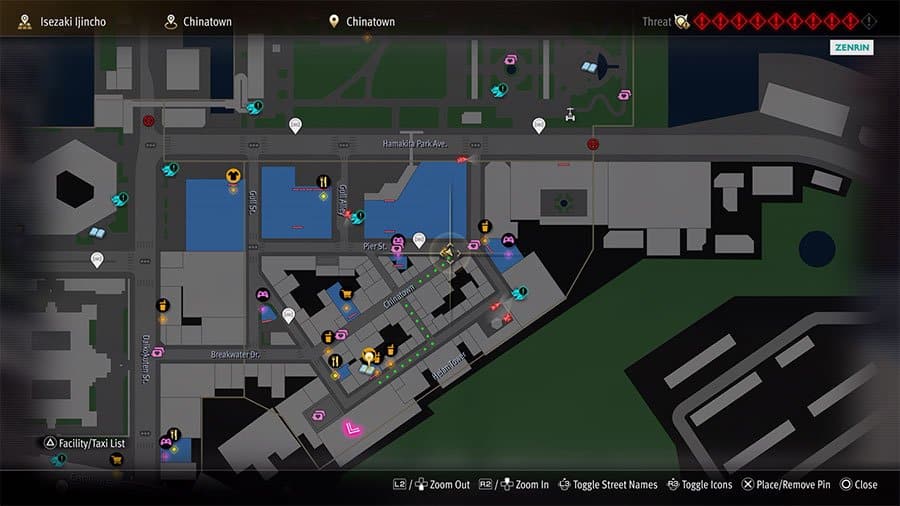
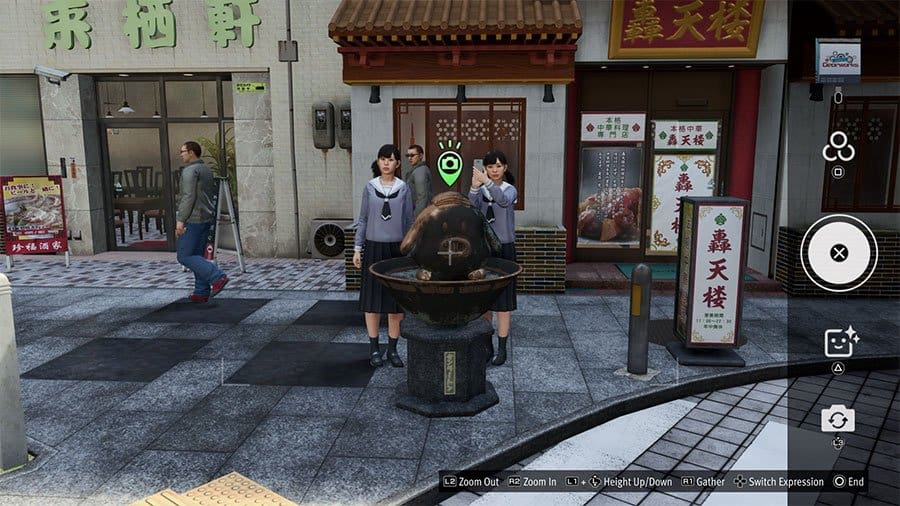
13: Fixture Of The Chinatown Park (Chinatown)
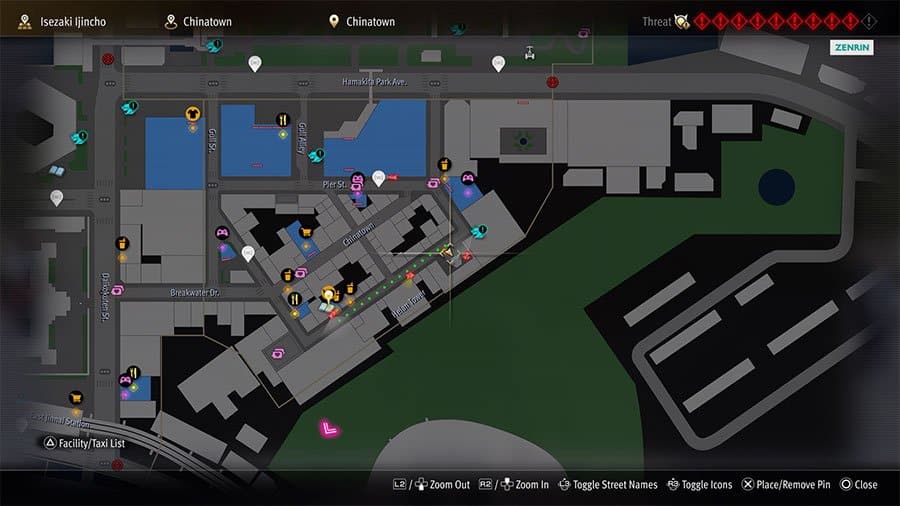
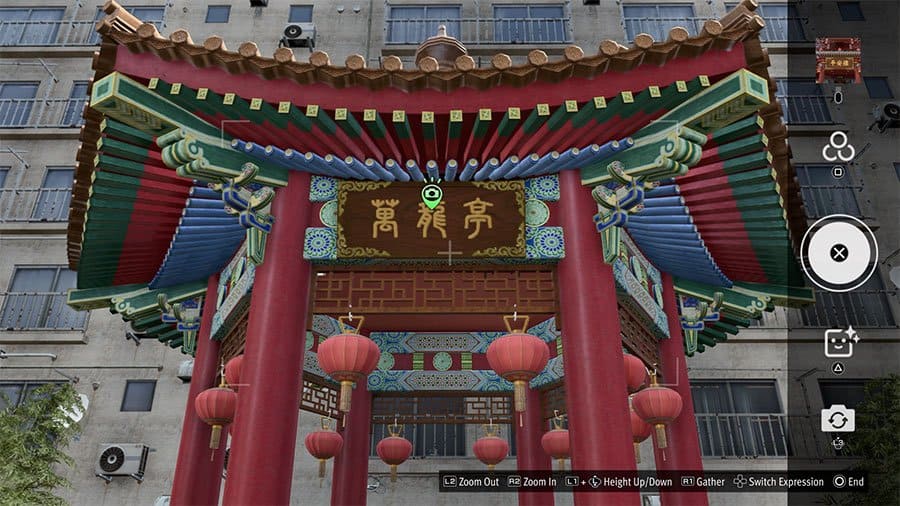
14: Authentic Chinese Restaurant (Chinatown)
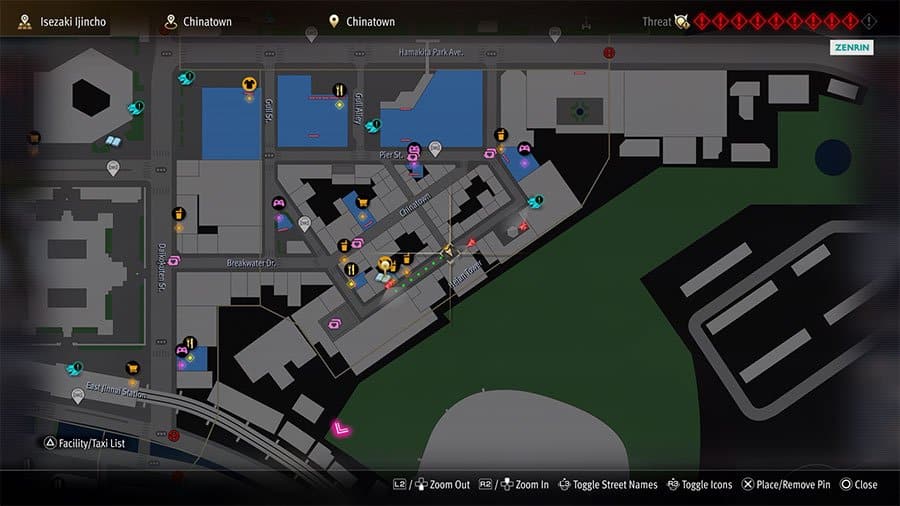
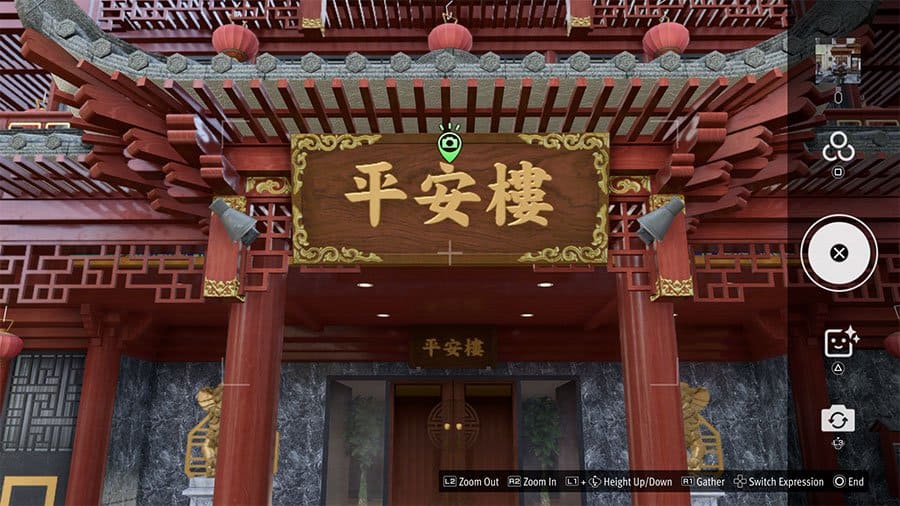
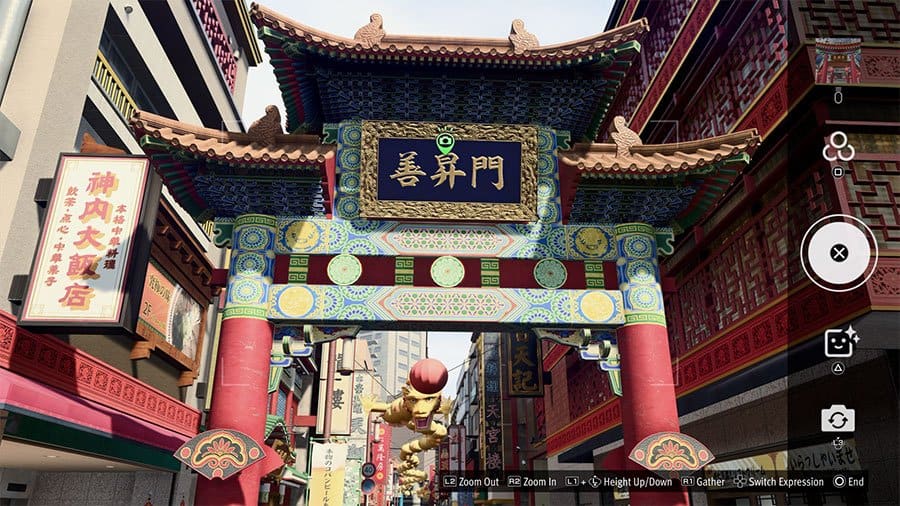
15: Archway Before The Dragon (Chinatown)
[/accordion_item]
[/accordion]
Completing all of the Tropical Photo Rally challenges is a great way to unlock powerful weapons early in the story. With all of these marked off and complete, you should have everything you need.
[blogger ids=” cat=’like-a-dragon-infinite-wealth-guides’ orderby=’rand’ order=’desc’ count=’6′ descr=’200′ readmore=’1′ rating=’0′ style=’image_large’ border=’0′ dir=’vertical’]